SECTION 8—BATTERIES
Installing
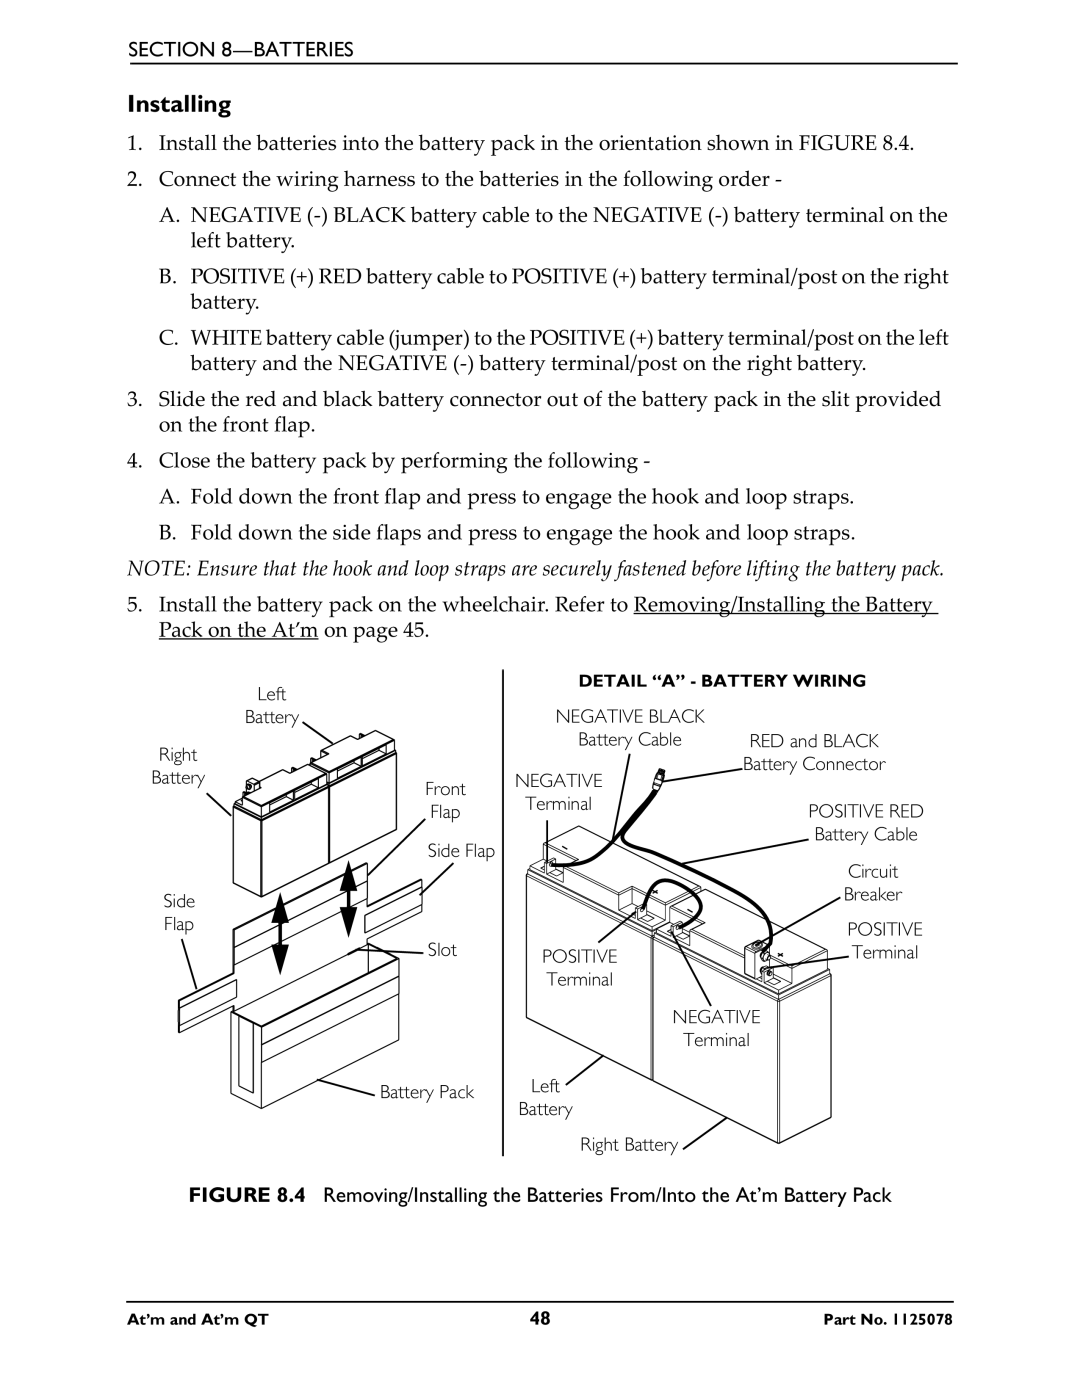
1.Install the batteries into the battery pack in the orientation shown in FIGURE 8.4.
2.Connect the wiring harness to the batteries in the following order -
A.NEGATIVE
B.POSITIVE (+) RED battery cable to POSITIVE (+) battery terminal/post on the right battery.
C.WHITE battery cable (jumper) to the POSITIVE (+) battery terminal/post on the left battery and the NEGATIVE
3.Slide the red and black battery connector out of the battery pack in the slit provided on the front flap.
4.Close the battery pack by performing the following -
A.Fold down the front flap and press to engage the hook and loop straps.
B.Fold down the side flaps and press to engage the hook and loop straps.
NOTE: Ensure that the hook and loop straps are securely fastened before lifting the battery pack.
5.Install the battery pack on the wheelchair. Refer to Removing/Installing the Battery Pack on the At’m on page 45.
Left
Battery
DETAIL “A” - BATTERY WIRING
NEGATIVE BLACK
Right
Battery
Front
Battery Cable RED and BLACK
Battery Connector
NEGATIVE
Side Flap
Flap
Side Flap
Terminal
POSITIVE RED
Battery Cable
Circuit
Breaker
POSITIVE
![]()
![]() Slot
Slot
![]() Battery Pack
Battery Pack
POSITIVETerminal Terminal
NEGATIVE
Terminal
Left
Battery
Right Battery ![]()
At’m and At’m QT | 48 | Part No. 1125078 |
