SECTION
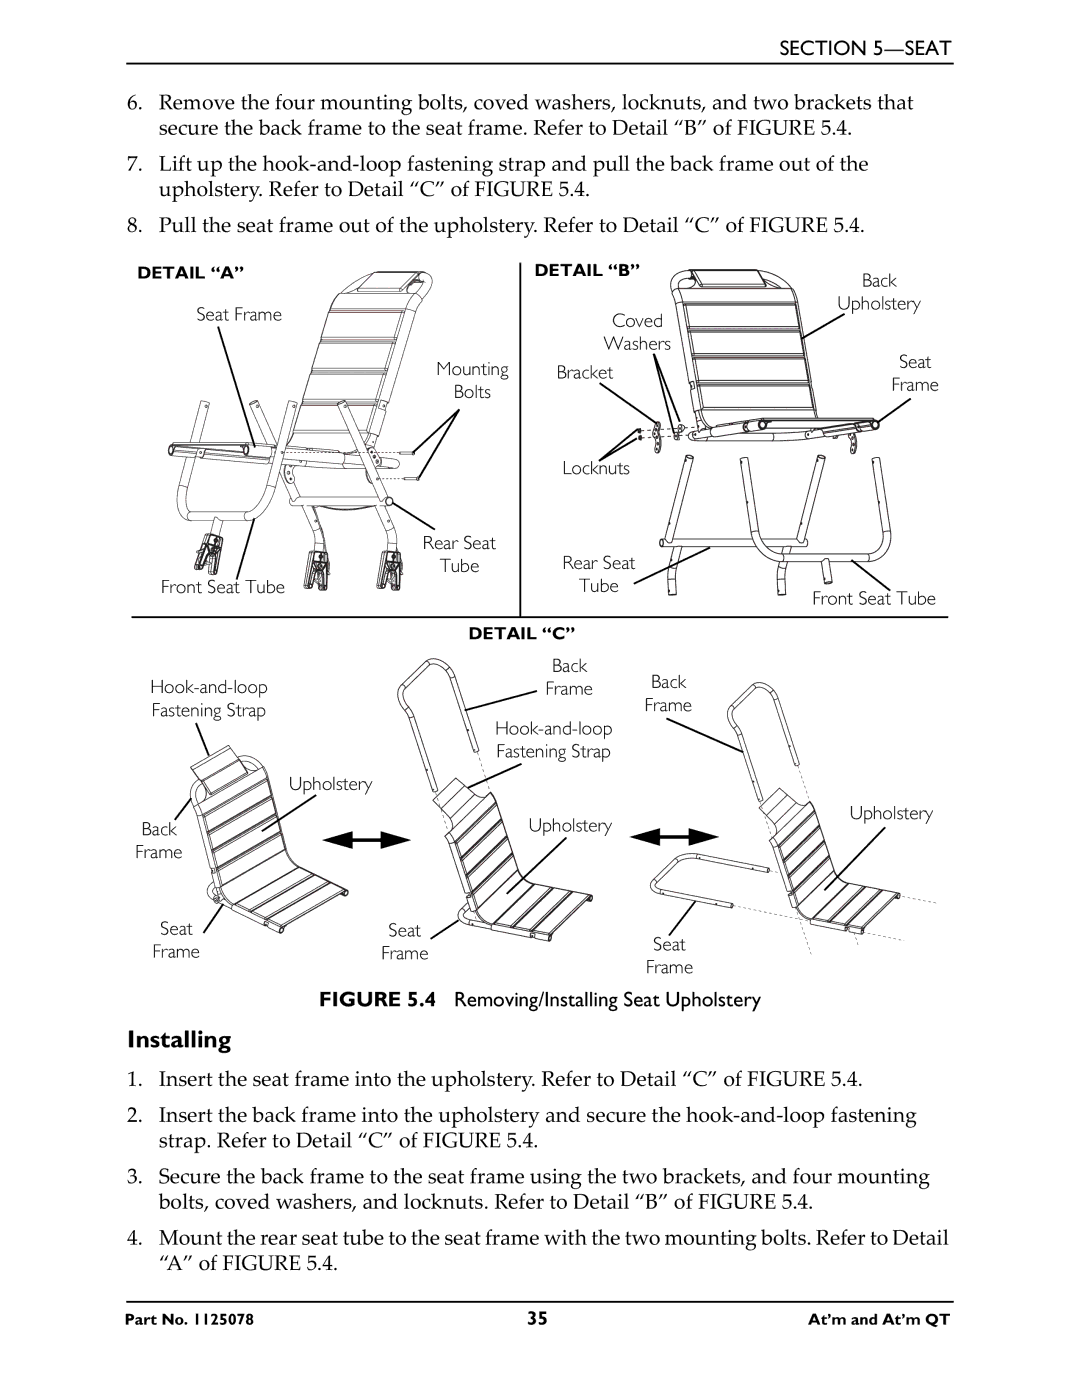
6.Remove the four mounting bolts, coved washers, locknuts, and two brackets that secure the back frame to the seat frame. Refer to Detail “B” of FIGURE 5.4.
7.Lift up the
8.Pull the seat frame out of the upholstery. Refer to Detail “C” of FIGURE 5.4.
DETAIL “A” | DETAIL “B” | Back | |
|
| ||
Seat Frame | Coved | Upholstery | |
| |||
|
| ||
| Washers |
| |
Mounting | Bracket | Seat | |
Frame | |||
Bolts |
| ||
|
| ||
| Locknuts |
| |
Rear Seat |
|
| |
Tube | Rear Seat |
| |
Front Seat Tube | Tube | Front Seat Tube | |
|
|
DETAIL “C”
|
| Back | Back |
| Frame | ||
| Frame | ||
Fastening Strap |
|
| |
|
|
| |
|
|
| |
|
| Fastening Strap |
|
| Upholstery |
|
|
Back |
| Upholstery | Upholstery |
|
| ||
Frame |
|
|
|
Seat | Seat |
| Seat |
Frame | Frame |
| |
| Frame | ||
|
|
|
FIGURE 5.4 Removing/Installing Seat Upholstery
Installing
1.Insert the seat frame into the upholstery. Refer to Detail “C” of FIGURE 5.4.
2.Insert the back frame into the upholstery and secure the
3.Secure the back frame to the seat frame using the two brackets, and four mounting bolts, coved washers, and locknuts. Refer to Detail “B” of FIGURE 5.4.
4.Mount the rear seat tube to the seat frame with the two mounting bolts. Refer to Detail “A” of FIGURE 5.4.
Part No. 1125078 | 35 | At’m and At’m QT |
