SECTION 10—ELEVATE BATTERIES
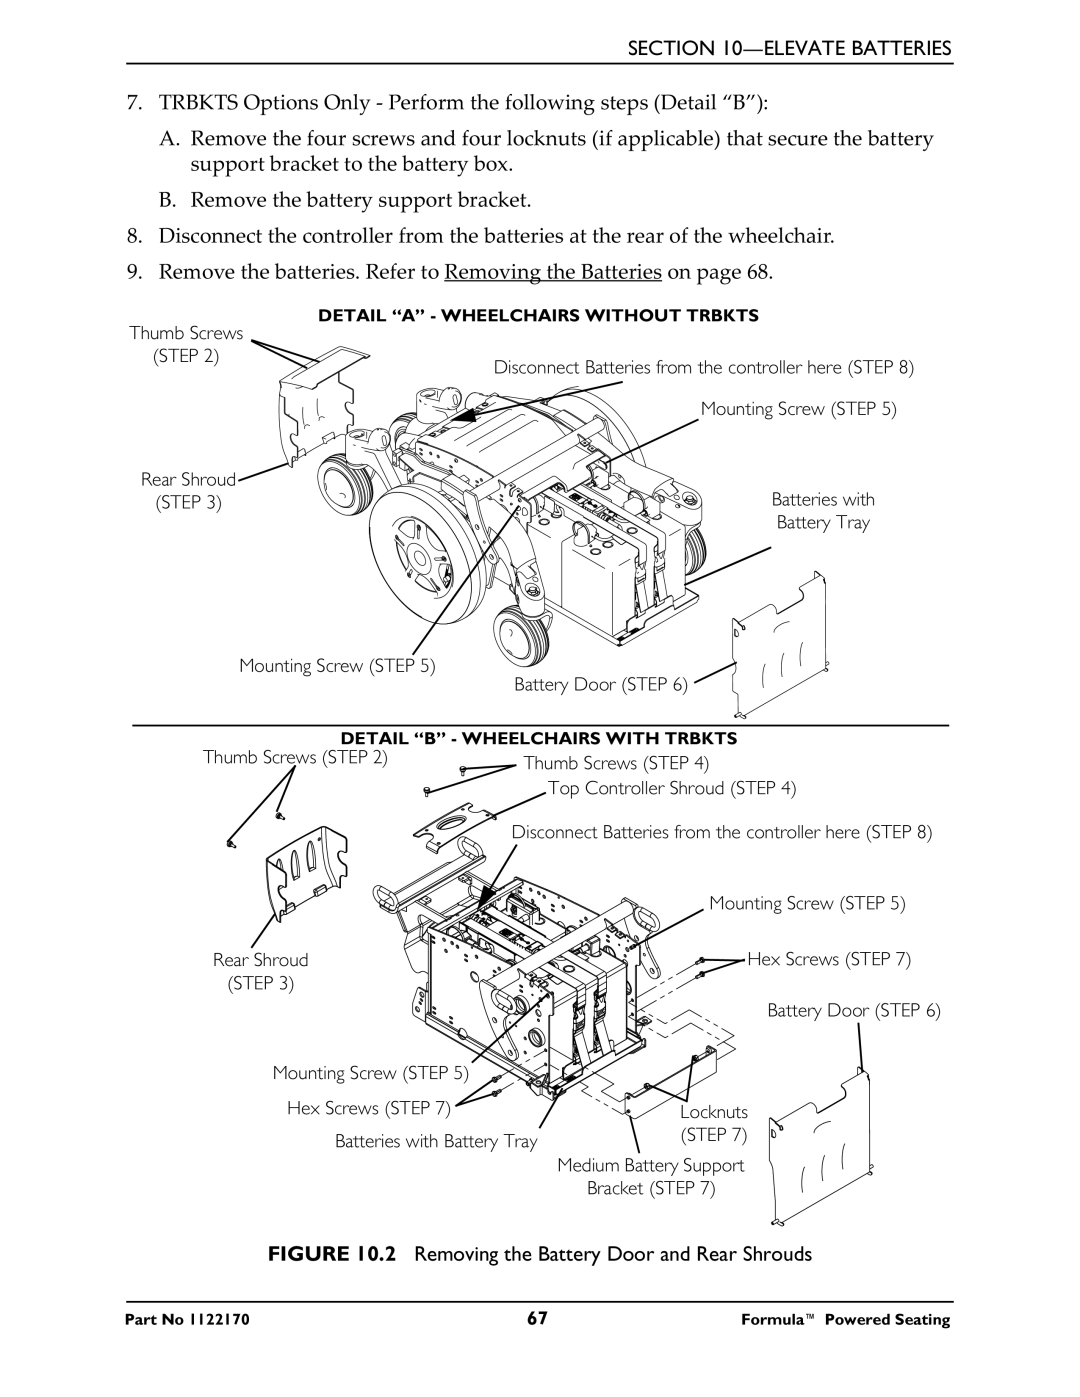
7.TRBKTS Options Only - Perform the following steps (Detail “B”):
A.Remove the four screws and four locknuts (if applicable) that secure the battery support bracket to the battery box.
B.Remove the battery support bracket.
8.Disconnect the controller from the batteries at the rear of the wheelchair.
9.Remove the batteries. Refer to Removing the Batteries on page 68.
DETAIL “A” - WHEELCHAIRS WITHOUT TRBKTS
Thumb Screws |
|
(STEP 2) | Disconnect Batteries from the controller here (STEP 8) |
| |
| Mounting Screw (STEP 5) |
Rear Shroud |
|
(STEP 3) | Batteries with |
| Battery Tray |
Mounting Screw (STEP 5)
Battery Door (STEP 6) ![]()
DETAIL “B” - WHEELCHAIRS WITH TRBKTS
Thumb Screws (STEP 2) | Thumb Screws (STEP 4) | |
| ||
|
| Top Controller Shroud (STEP 4) |
| Disconnect Batteries from the controller here (STEP 8) | |
|
| Mounting Screw (STEP 5) |
Rear Shroud |
| Hex Screws (STEP 7) |
(STEP 3) |
|
|
|
| Battery Door (STEP 6) |
Mounting Screw (STEP 5) |
|
|
Hex Screws (STEP 7) |
| Locknuts |
Batteries with Battery Tray | (STEP 7) | |
| ||
Medium Battery Support
Bracket (STEP 7)
FIGURE 10.2 Removing the Battery Door and Rear Shrouds
Part No 1122170 | 67 | Formula™ Powered Seating |
