Voltage Checks
CA U TION
When making voltage checks, remember that the machine is connected to a live power source Use
extreme caution to not physically touch any bare contacts or wiring terminals when making voltage checks..
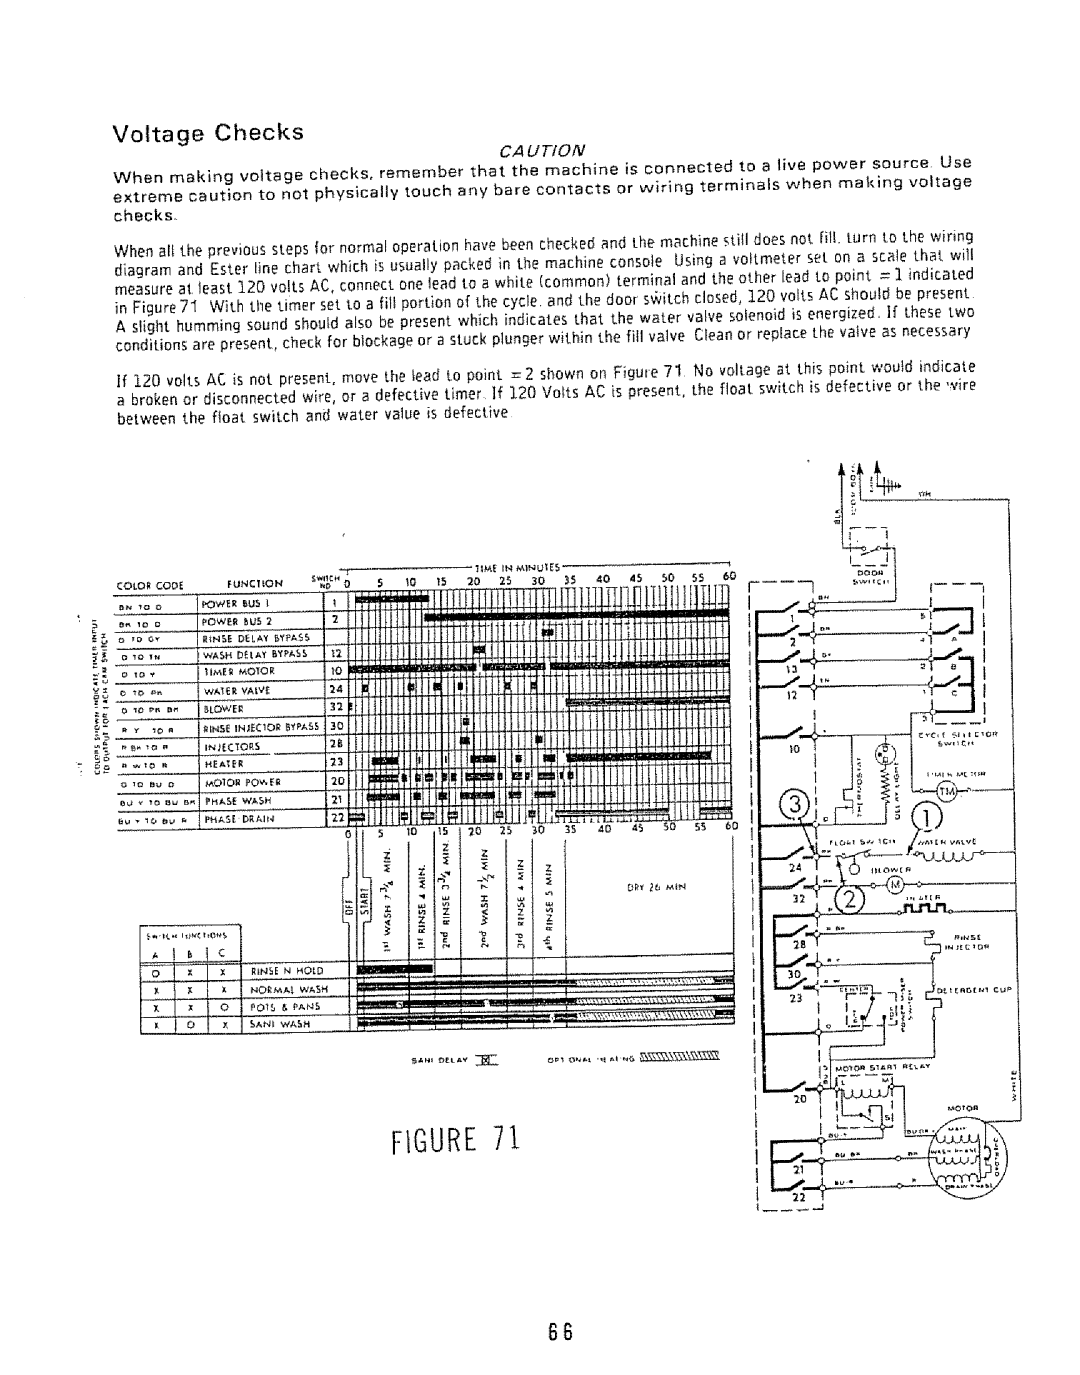
When all the previous steps for normal operation have been checked and the machine stitl does not tilt. turn to the wiring diagram and Ester line chart which is usually packed {n the machine console Using a vottmeter set on a scab that will measure at least 120 volts AC, connect one lead to a white (common) terminal and the other lead to point = 1 indicated in Figure 71 With the timer set to a fill portion of the cycle, and the door s_itch closed, 120 volts AC should be present A slight humming sound should also be present which indicates that the water valve solenoid is energized if these two conditions are present, check for blockage or a stuck plunger with]n the fill valve Clean or replace the valve as necessary
if 120 volts AC is not present, move the tead to point =2 shown on Figure 71 No voltage at this point would indicate a broken or disconnected wire, or a defective timer ]f 120 Votts AC is present, the float switch is defective or the wire between the float switch and water value is defective
0
v
_u
=*
o-
2?
I _o '
FIGURE7i
66
