5.Remove hose saddle
6.Remove hoses.
7, Detach inlet hose and reattach it to a new coupler and drain hose assembly
Reinstall coupbr and hose assembly in reverse orden Be Certain routing is proper with no twists or kinks in hoses Check connections for leaks and test movement of hoses in and out of cabinet
Adjustment of Hose Length:
The length of the hose when fuJly extended is approximately 4%" to 5'. Should this appear short or an additional
inch or two be needed, you could take up any slack that may be available in the routing (Figure42), Be certain however, that you do not kink or otherwise restrict the hoses.
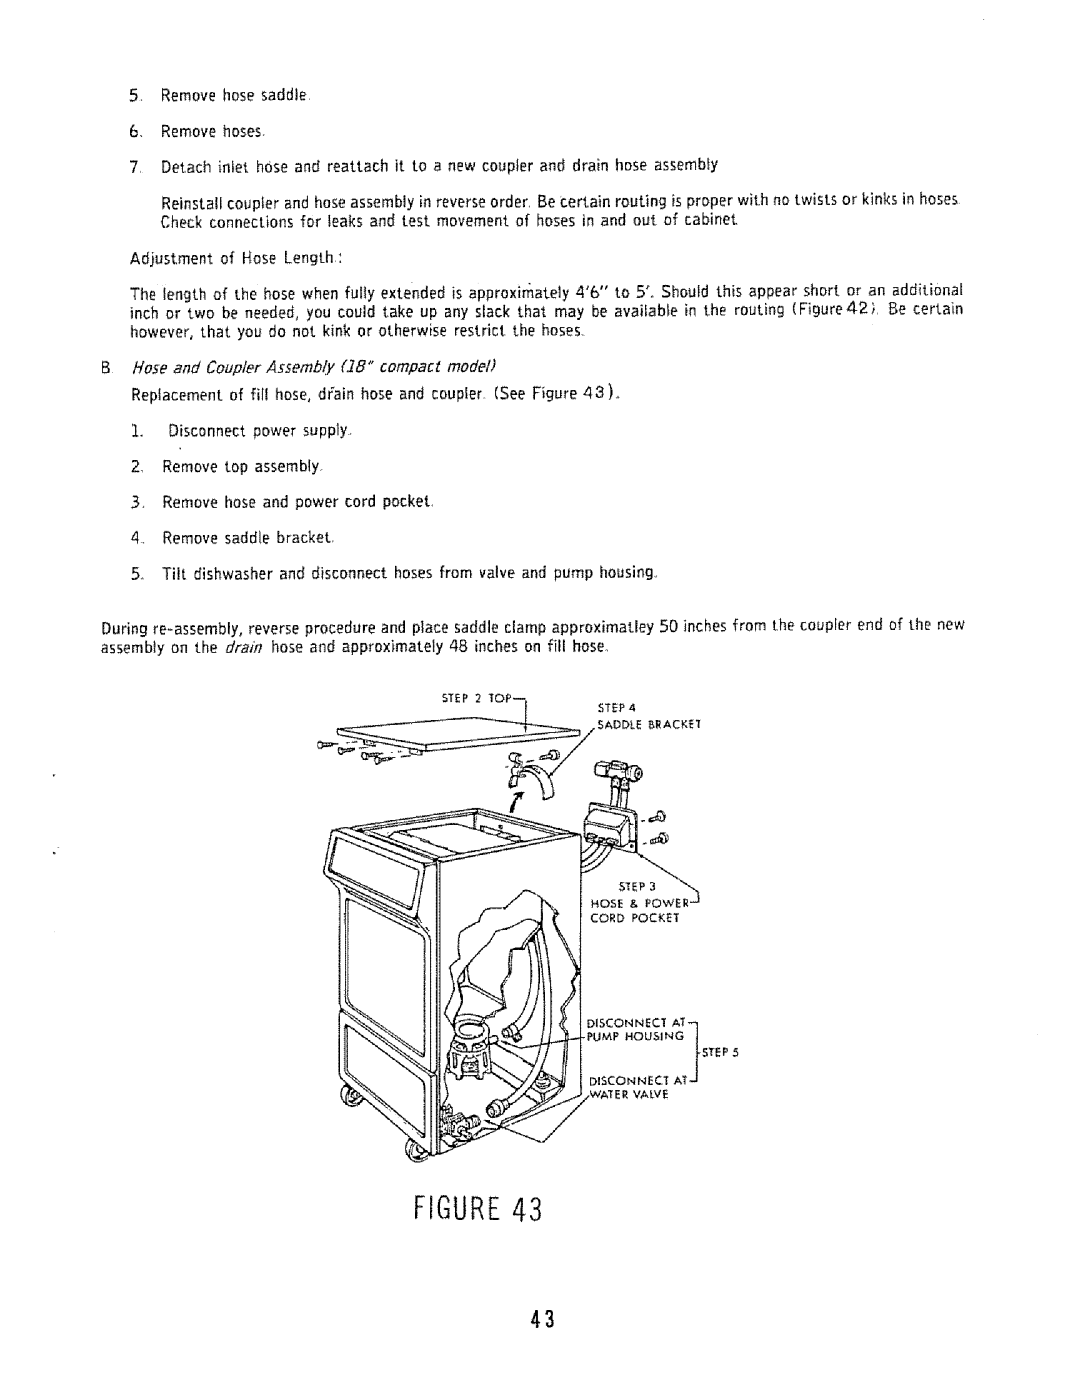
BHose and Coupler Assembly (]8" compact model)
Replacement of fill hose, drain hose and coupler (See Figure 48),_
1. Disconnect power supply
2, Remove top assembly.
3, Remove hose and power cord pocket,
4.Remove saddle bracket,
5o Tilt dishwasher and disconnect hoses from valve and pump housing,,
During
CORD POCKET
DISCONNECT
• PUMP HOUSING _STEP
)ISCON NECT ATJ VALVE
FIGURE43
43
