Chapter One : Connecting Your Devices
Do not plug in the receiver to AC power until all connec- tions have been made.
To Connect Front Speakers Only:
If you only intend to listen to stereo sound (as opposed to surround sound), you may simply connect a single pair of speakers. To do so:
Using Banana Plugs (except for U.K.):
1.Tighten the speaker wire binding posts. If you do not tighten the posts, they will not conduct sound properly to the speakers.
2.Insert the plug from the positive jack on the RIGHT FRONT speaker into the pin jack on the positive RIGHT FRONT post. Repeat for the negative plug.
3.Repeat step 2 for the positive and negative wires on the LEFT FRONT speaker.
Using Bare Wires:
1.Loosen the speaker wire binding posts.
2.Insert the wire from the positive jack on the RIGHT FRONT speaker into the
3.Repeat step 2 for the positive and negative wires on the LEFT FRONT speaker.
Connecting Your Speakers, continued
To Connect Front and Surround Sound Speakers:
To listen to the full surround sound that this receiver can put out, connect front speakers, center, left surround, and right surround speakers. To do so:
To reproduce more enriched bass, connect a subwoofer incorporating a power amplifier.
For the connections of the subwoofer and surround back speakers, see page 6 to 7.
Using Banana Plugs (except for U.K.):
1.Tighten the speaker wire binding posts. If you do not tighten the posts, they will not conduct sound properly to the speakers.
2.Follow the steps under “To Connect Front Speakers Only” on this page to connect the RIGHT and LEFT FRONT speakers.
3.Insert the plug from the positive jack on the CENTER speaker into the pin jack on the positive CENTER post. Repeat for the negative plug.
4.Insert the plug from the positive jack on the RIGHT SURROUND speaker into the pin jack on the positive RIGHT SURROUND post. Repeat for the negative plug.
5.Repeat step 4 for the positive and negative wires on the LEFT SURROUND speaker.
Using Bare Wires:
1.Loosen the speaker wire binding posts.
2.Follow the steps under “To Connect Front Speakers Only” on this page to connect the RIGHT and LEFT FRONT speakers.
3.Insert the wire from the positive jack on the CENTER speaker into the
Tighten the post. Repeat for the negative wire.
4.Insert the wire from the positive jack on the RIGHT SUR- ROUND speaker into the
5.Repeat step 4 for the positive and negative wires on the LEFT SURROUND speaker.
Never short circuit the + and - speaker wires.
Do not switch the left and right speaker wires or swap the + and - wires on the binding posts.
The speakers must have a nominal impedance of between 6Ω and 16Ω.
5
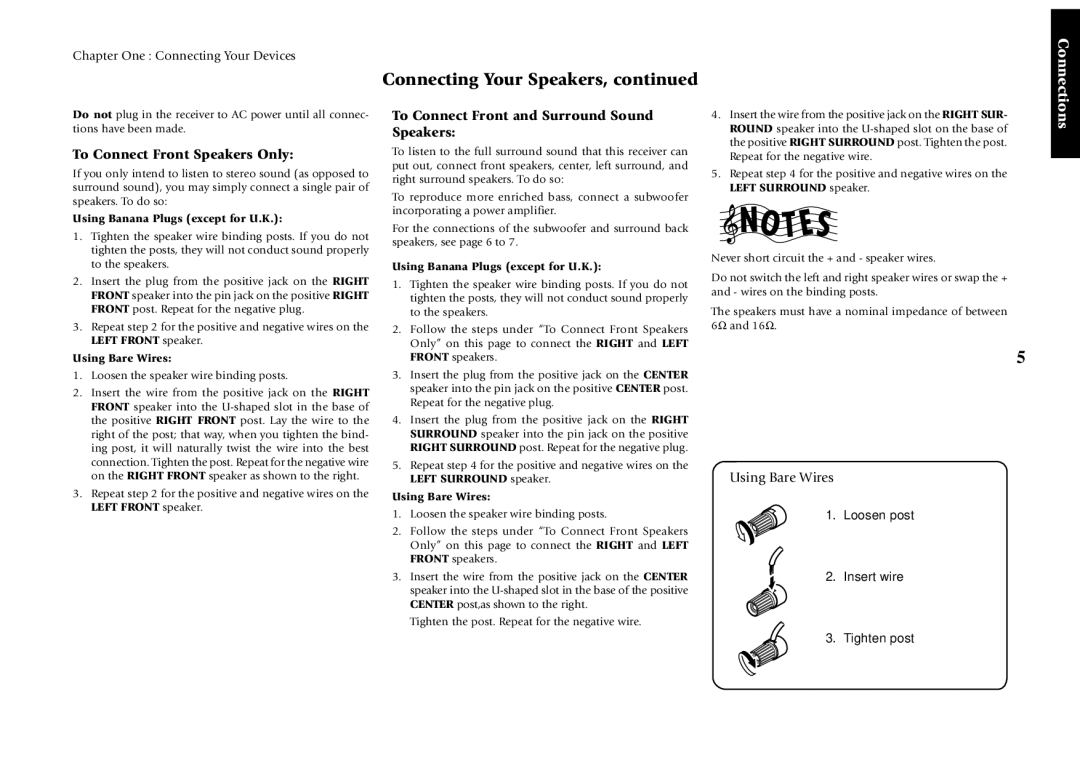
Using Bare Wires
1. Loosen post
2. Insert wire
3. Tighten post
Connections