Chapter Two : Setting Up PowerTouch
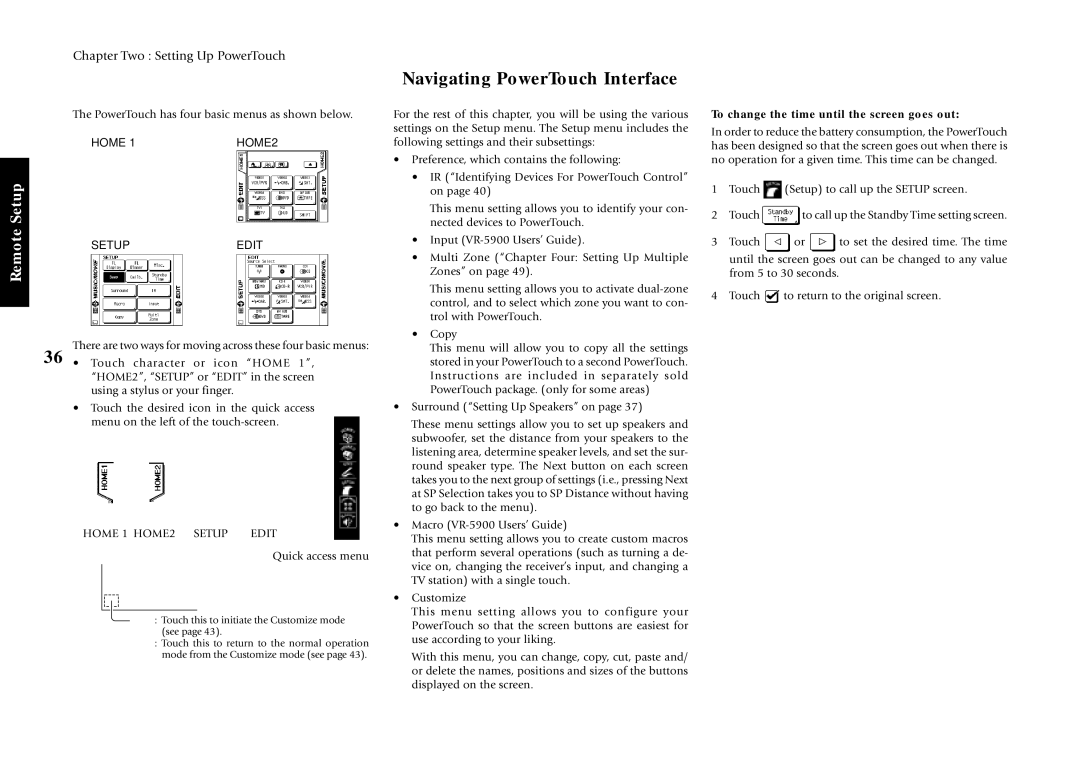
The PowerTouch has four basic menus as shown below.
HOME 1HOME2
Setup |
|
|
Remote | SETUP | EDIT |
| ||
|
|
|
There are two ways for moving across these four basic menus:
36 • Touch character or icon “HOME 1”, “HOME2”, “SETUP” or “EDIT” in the screen using a stylus or your finger.
•Touch the desired icon in the quick access menu on the left of the
HOME 1 HOME2 SETUP EDIT
Quick access menu
:Touch this to initiate the Customize mode (see page 43).
:Touch this to return to the normal operation mode from the Customize mode (see page 43).
Navigating PowerTouch Interface
For the rest of this chapter, you will be using the various settings on the Setup menu. The Setup menu includes the following settings and their subsettings:
•Preference, which contains the following:
•IR (“Identifying Devices For PowerTouch Control” on page 40)
This menu setting allows you to identify your con- nected devices to PowerTouch.
•Input
•Multi Zone (“Chapter Four: Setting Up Multiple Zones” on page 49).
This menu setting allows you to activate
•Copy
This menu will allow you to copy all the settings stored in your PowerTouch to a second PowerTouch. Instructions are included in separately sold PowerTouch package. (only for some areas)
•Surround (“Setting Up Speakers” on page 37)
These menu settings allow you to set up speakers and subwoofer, set the distance from your speakers to the listening area, determine speaker levels, and set the sur- round speaker type. The Next button on each screen takes you to the next group of settings (i.e., pressing Next at SP Selection takes you to SP Distance without having to go back to the menu).
•Macro
This menu setting allows you to create custom macros that perform several operations (such as turning a de- vice on, changing the receiver’s input, and changing a TV station) with a single touch.
•Customize
This menu setting allows you to configure your PowerTouch so that the screen buttons are easiest for use according to your liking.
With this menu, you can change, copy, cut, paste and/ or delete the names, positions and sizes of the buttons displayed on the screen.
To change the time until the screen goes out:
In order to reduce the battery consumption, the PowerTouch has been designed so that the screen goes out when there is no operation for a given time. This time can be changed.
1Touch ![]() (Setup) to call up the SETUP screen.
(Setup) to call up the SETUP screen.
2Touch ![]() to call up the Standby Time setting screen.
to call up the Standby Time setting screen.
3Touch ![]() or
or ![]() to set the desired time. The time until the screen goes out can be changed to any value from 5 to 30 seconds.
to set the desired time. The time until the screen goes out can be changed to any value from 5 to 30 seconds.
4Touch ![]() to return to the original screen.
to return to the original screen.