Fixed IP Address | This option is recommended. If this option is used, the IP address or |
| the NAS will never change. You need to enter the following data. |
•IP address - The utility will suggest a unused IP address within the address range used on your LAN. If you wish, you can change this, but you must ensure the address is unused.
•Network Mask - This must match the value used by PCs on your LAN.
•Gateway - This must match the value used by PCs on your LAN.
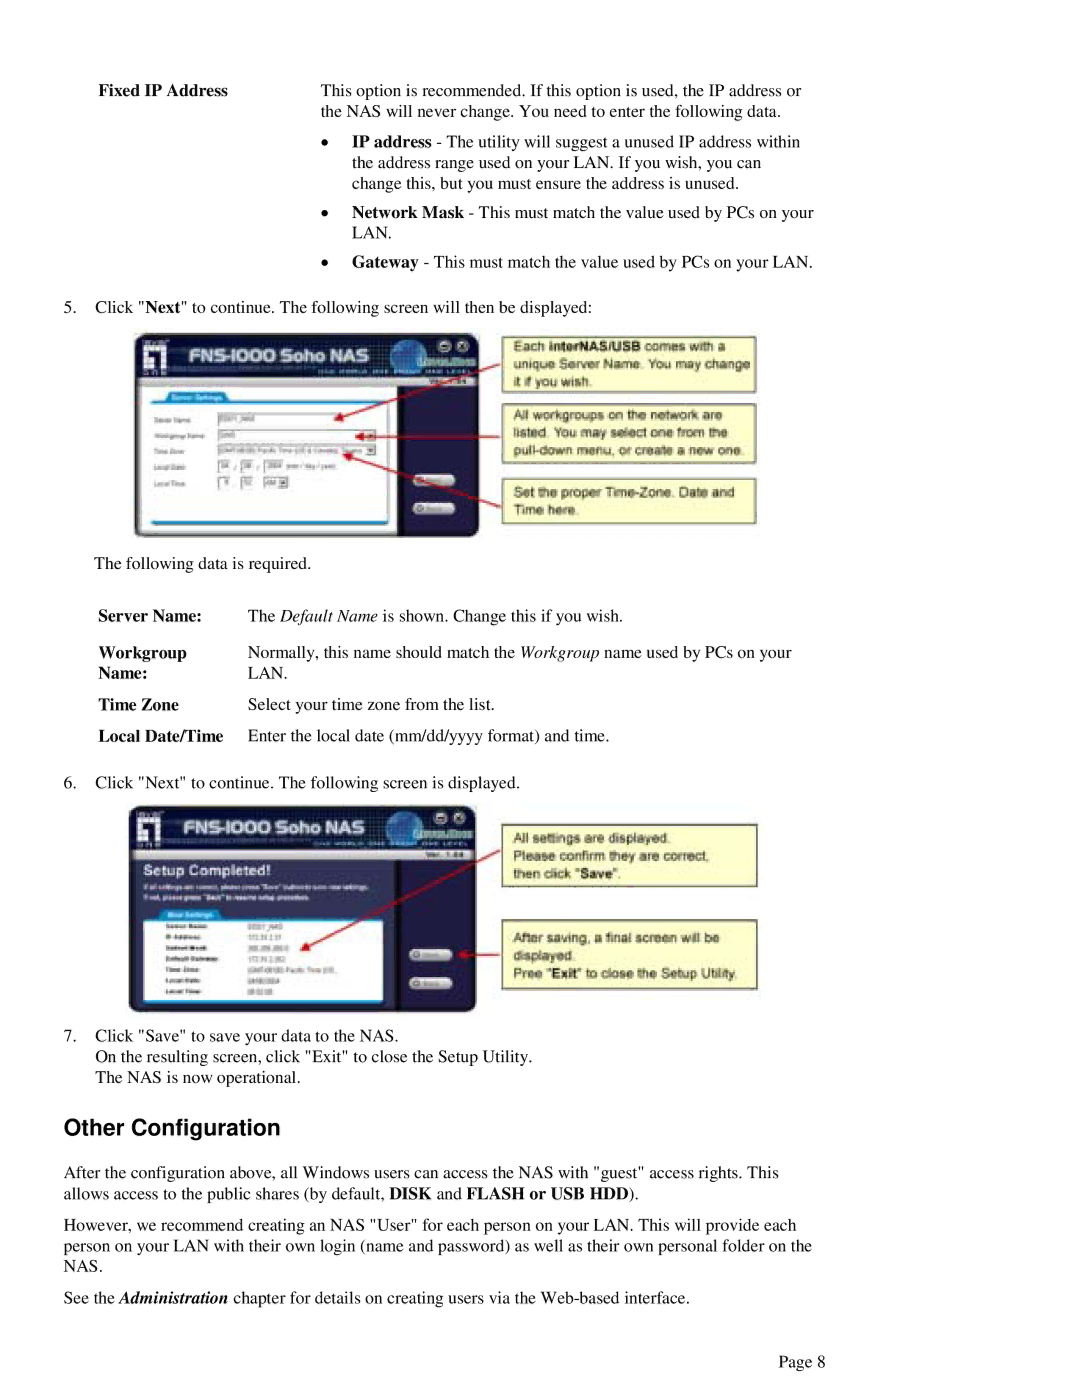
5.Click "Next" to continue. The following screen will then be displayed:
The following data is required.
Server Name: | The Default Name is shown. Change this if you wish. |
Workgroup | Normally, this name should match the Workgroup name used by PCs on your |
Name: | LAN. |
Time Zone | Select your time zone from the list. |
Local Date/Time | Enter the local date (mm/dd/yyyy format) and time. |
6.Click "Next" to continue. The following screen is displayed.
7.Click "Save" to save your data to the NAS.
On the resulting screen, click "Exit" to close the Setup Utility. The NAS is now operational.
Other Configuration
After the configuration above, all Windows users can access the NAS with "guest" access rights. This allows access to the public shares (by default, DISK and FLASH or USB HDD).
However, we recommend creating an NAS "User" for each person on your LAN. This will provide each person on your LAN with their own login (name and password) as well as their own personal folder on the NAS.
See the Administration chapter for details on creating users via the
Page 8