NOTE: Because improper connections may potentially make very loud noises, it’s a good idea to have all monitor levels set low or muted while hooking up audio equipment
1.Plug the first microphone into the 1010LT’s Analog Input 1 XLR jack. Plug the second microphone into the Analog Input 2 XLR jack.
2.Plug the hardware outputs 1 & 2 of the Delta 1010LT, that is the RCA output jacks 1 and 2, to a sound system or power amp with speakers.
4.Turn on your equipment in this suggested order:
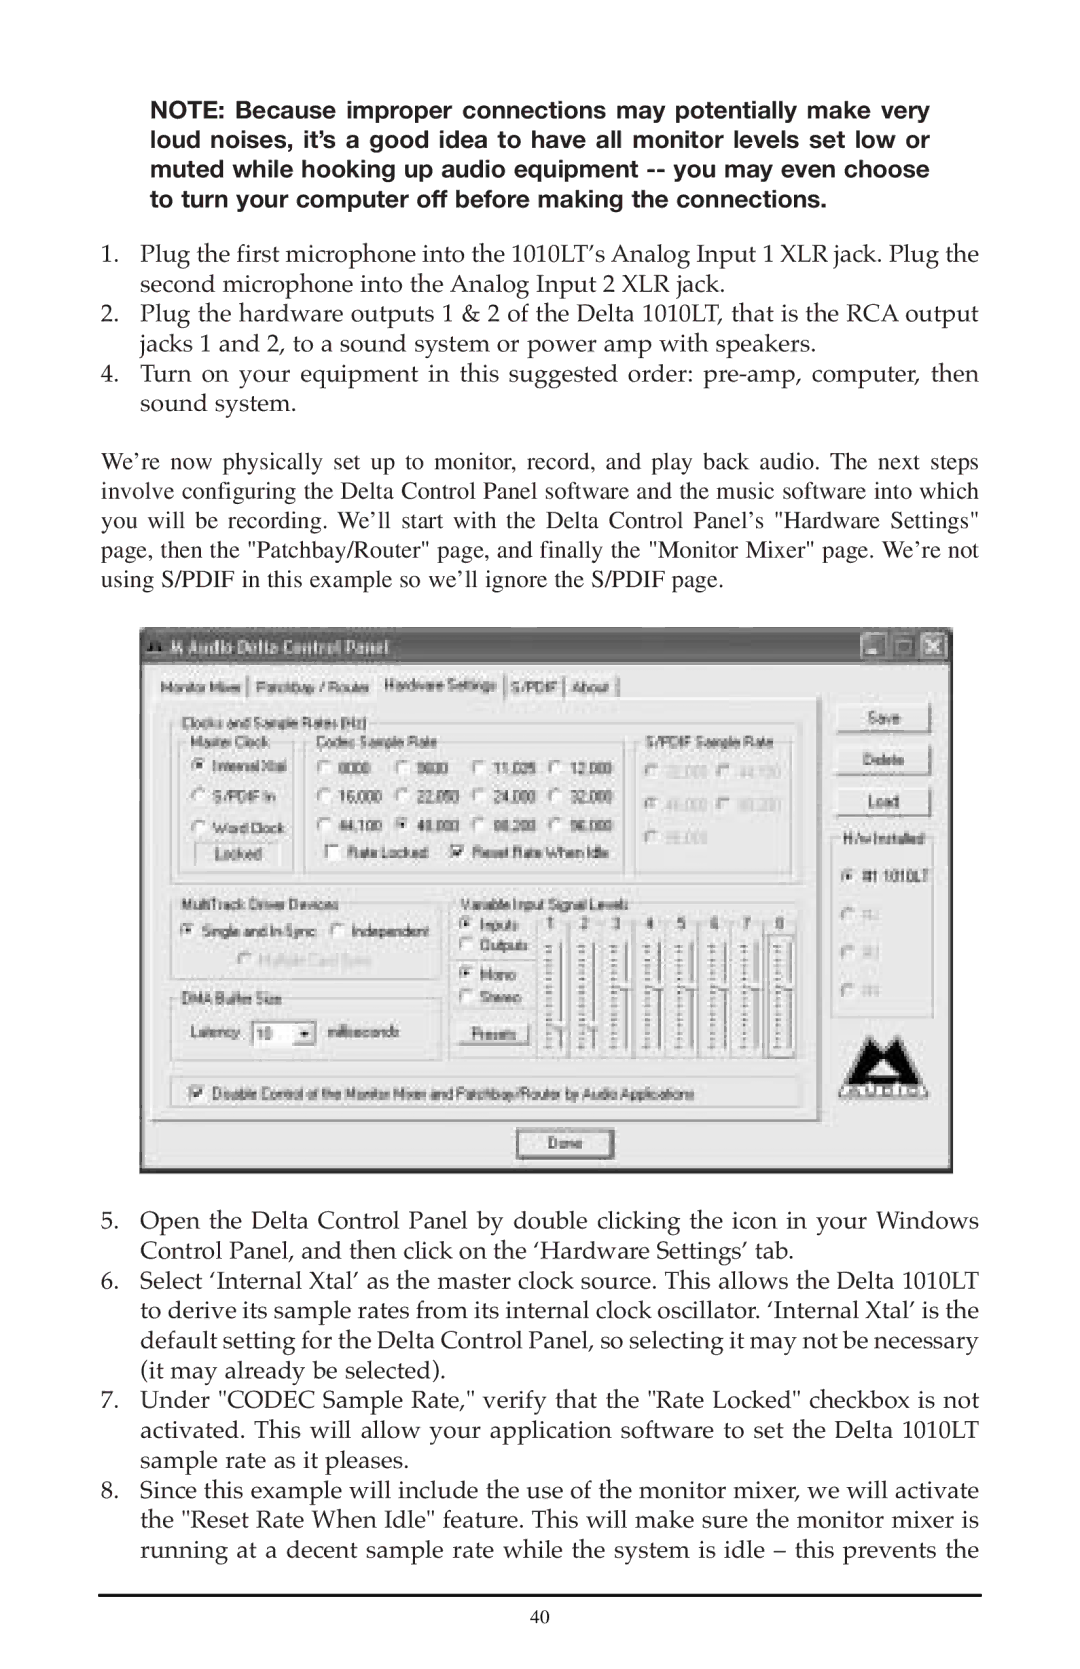
We’re now physically set up to monitor, record, and play back audio. The next steps involve configuring the Delta Control Panel software and the music software into which you will be recording. We’ll start with the Delta Control Panel’s "Hardware Settings" page, then the "Patchbay/Router" page, and finally the "Monitor Mixer" page. We’re not using S/PDIF in this example so we’ll ignore the S/PDIF page.
5.Open the Delta Control Panel by double clicking the icon in your Windows Control Panel, and then click on the ‘Hardware Settings’ tab.
6.Select ‘Internal Xtal’ as the master clock source. This allows the Delta 1010LT to derive its sample rates from its internal clock oscillator. ‘Internal Xtal’ is the default setting for the Delta Control Panel, so selecting it may not be necessary (it may already be selected).
7.Under "CODEC Sample Rate," verify that the "Rate Locked" checkbox is not activated. This will allow your application software to set the Delta 1010LT sample rate as it pleases.
8.Since this example will include the use of the monitor mixer, we will activate the "Reset Rate When Idle" feature. This will make sure the monitor mixer is running at a decent sample rate while the system is idle – this prevents the
40
