DFU RC9500 Ver1_2.qxd 5/28/2004 10:33 AM Page 50
Reference
7.
User Guide
Creating and Editing Timers
With the Timer Mode, you can define actions to be carried out at predefined times.
For instance, you can switch on the lights or program your VCR to record your favourite daily
Note When a timer is executed, you will hear a beep and a Timer message appears on screen. If RC9500 is performing another task (sending out IR codes, testing a macro, ...) when a timer is due to be executed, RC9500 first continues performing the current task.
Adding a Timer
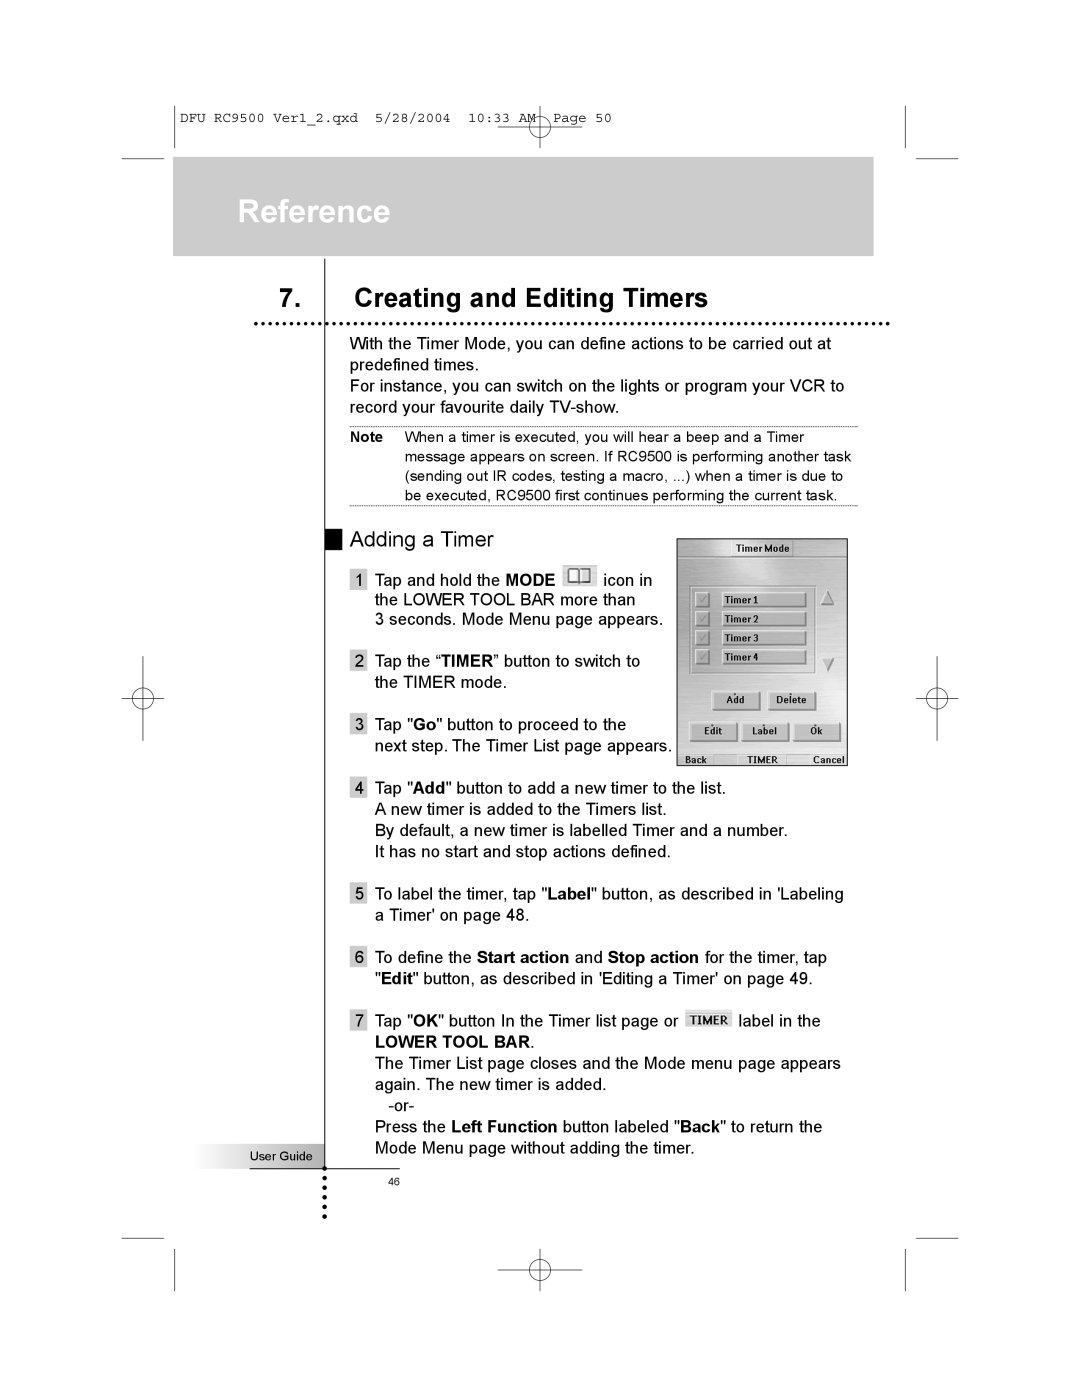
1Tap and hold the MODE ![]() icon in the LOWER TOOL BAR more than
icon in the LOWER TOOL BAR more than
3 seconds. Mode Menu page appears.
2Tap the “TIMER” button to switch to the TIMER mode.
3Tap "Go" button to proceed to the
next step. The Timer List page appears.
4Tap "Add" button to add a new timer to the list. A new timer is added to the Timers list.
By default, a new timer is labelled Timer and a number. It has no start and stop actions defined.
5To label the timer, tap "Label" button, as described in 'Labeling a Timer' on page 48.
6To define the Start action and Stop action for the timer, tap "Edit" button, as described in 'Editing a Timer' on page 49.
7Tap "OK" button In the Timer list page or ![]() label in the
label in the
LOWER TOOL BAR.
The Timer List page closes and the Mode menu page appears again. The new timer is added.
Press the Left Function button labeled "Back" to return the Mode Menu page without adding the timer.
46