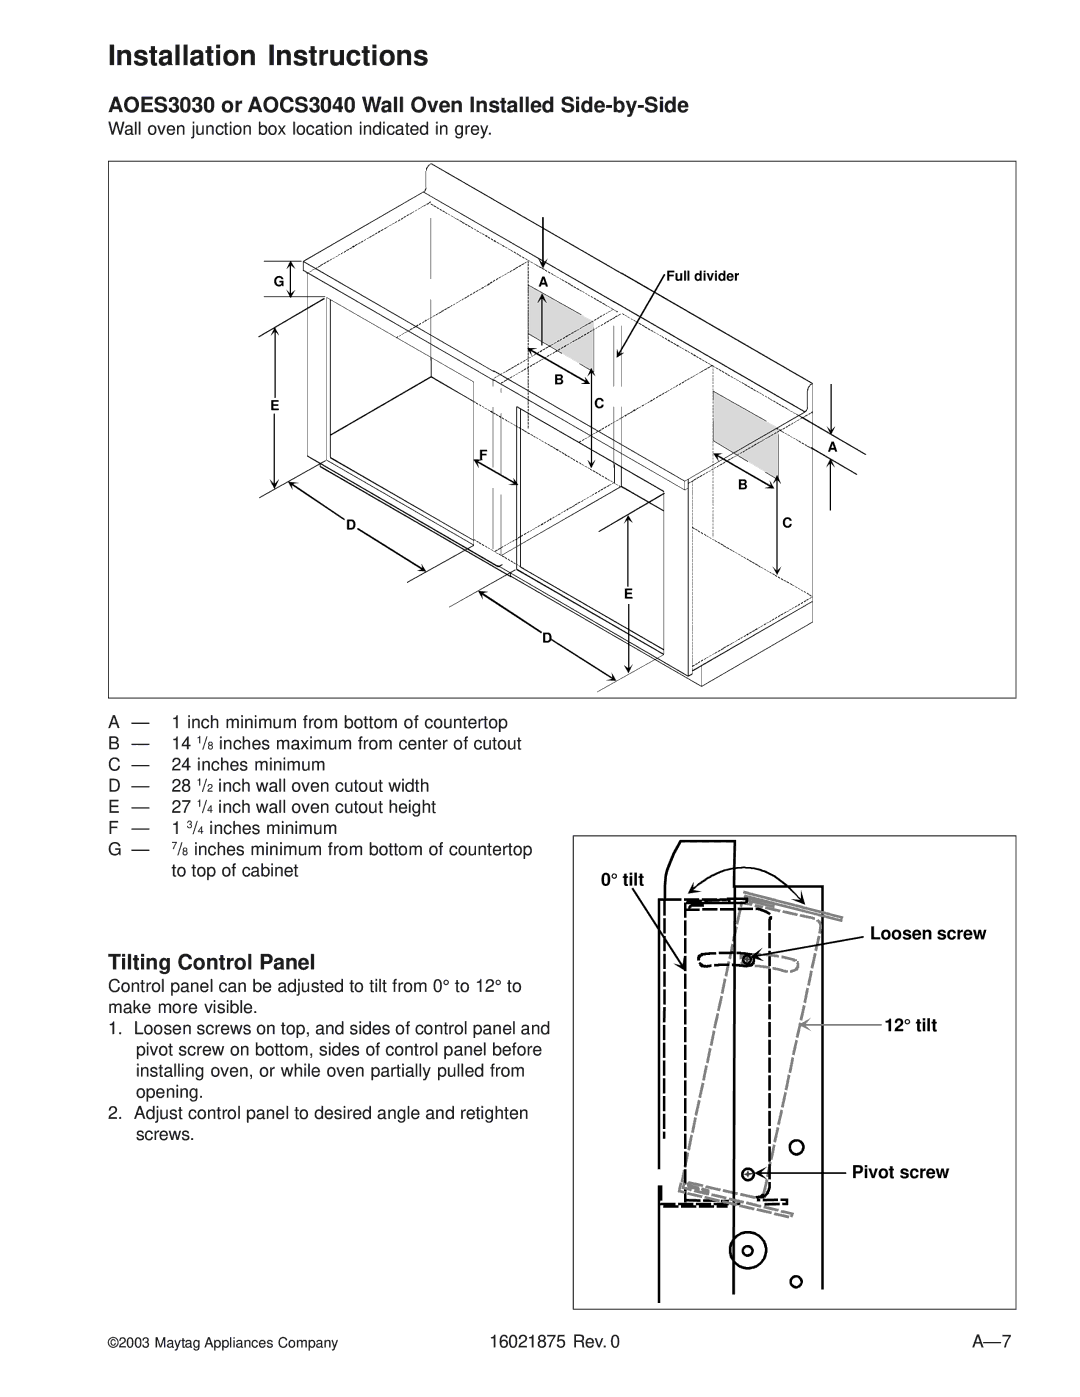
AOCS3040, AOES3030 specifications
The Maytag AOES3030 and AOCS3040 are two standout models in the Maytag lineup, offering robust performance and thoughtful design, making them ideal for modern households. These models reflect Maytag's commitment to durability, convenience, and user-friendly features.The AOES3030 is known for its spaciousness, featuring a large oven capacity that allows home cooks to prepare multiple dishes at once, making it perfect for family gatherings or meal prepping. Its cooking surface is crafted with high-quality materials, ensuring durability and ease of cleaning. One of the key technologies incorporated into the AOES3030 is the Precision Cooking System. This innovation optimizes the cooking process by utilizing advanced sensors that monitor and adjust cooking times and temperatures, ensuring perfectly cooked meals every time.
In contrast, the AOCS3040 offers a versatile cooking solution with its unique range of features. The AOCS3040 is equipped with a powerful induction cooktop that allows for rapid heating and precise temperature control. Induction cooking is known for its energy efficiency as it directly heats pots and pans without heating the surrounding area, thus minimizing energy waste. Furthermore, the AOCS3040 includes a built-in oven with a self-cleaning feature, taking the hassle out of maintaining a pristine cooking environment.
Both models showcase Maytag's commitment to reliable performance, incorporating heavy-duty components that are built to last. They are designed with user-friendly controls that are intuitive, enhancing the overall cooking experience. Another noteworthy aspect of both models is their sleek, modern design, which includes stainless steel finishes that can seamlessly blend into any kitchen decor.
Safety features are also a priority, with each model incorporating child locks and automatic shut-off options, making them suitable for households with children. With their blend of innovative technologies, user-focused features, and robust construction, the Maytag AOES3030 and AOCS3040 set a high standard for kitchen appliances, offering both style and function for the modern chef. These models demonstrate that Maytag continues to innovate while honoring the brand's legacy of reliability.

