4-Connecting Users
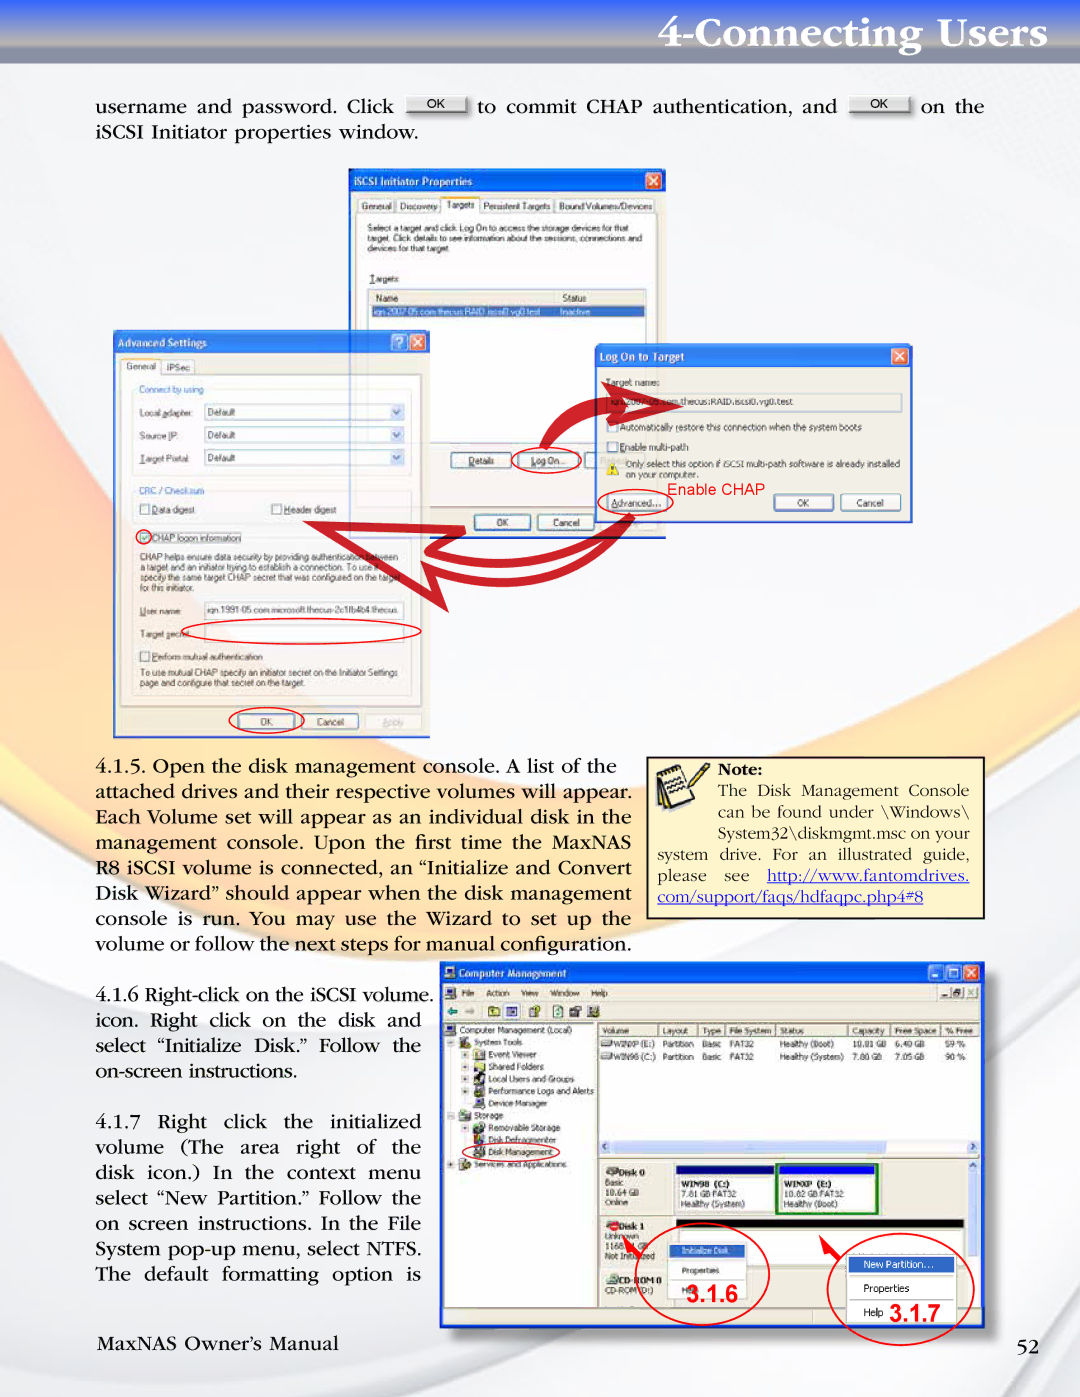
username and password. Click OK to commit CHAP authentication, and OK on the iSCSI Initiator properties window.
Enable CHAP
4.1.5.Open the disk management console. A list of the attached drives and their respective volumes will appear. Each Volume set will appear as an individual disk in the management console. Upon the first time the MaxNAS R8 iSCSI volume is connected, an “Initialize and Convert Disk Wizard” should appear when the disk management console is run. You may use the Wizard to set up the volume or follow the next steps for manual configuration.
Note:
The Disk Management Console can be found under \Windows\ System32\diskmgmt.msc on your system drive. For an illustrated guide,
please see http://www.fantomdrives. com/support/faqs/hdfaqpc.php4#8
4.1.6
select “Initialize Disk.” Follow the
4.1.7Right click the initialized
volume (The area right of the disk icon.) In the context menu select “New Partition.” Follow the on screen instructions. In the File System
3.1.6
3.1.7
MaxNAS Owner’s Manual | 52 |