4-Connecting Users
5. Connecting to MaxNAS R8 Attached Printers
With a USB Printer attached, the MaxNAS R8 can offer central network printing to all your networked computers.
!IMPORTANT! Before you begin, please make sure the driver for your printer is properly installed on your computer. Please consult your printer manufacturer for up to date drivers for your host operating system
5.1Windows XP SP2
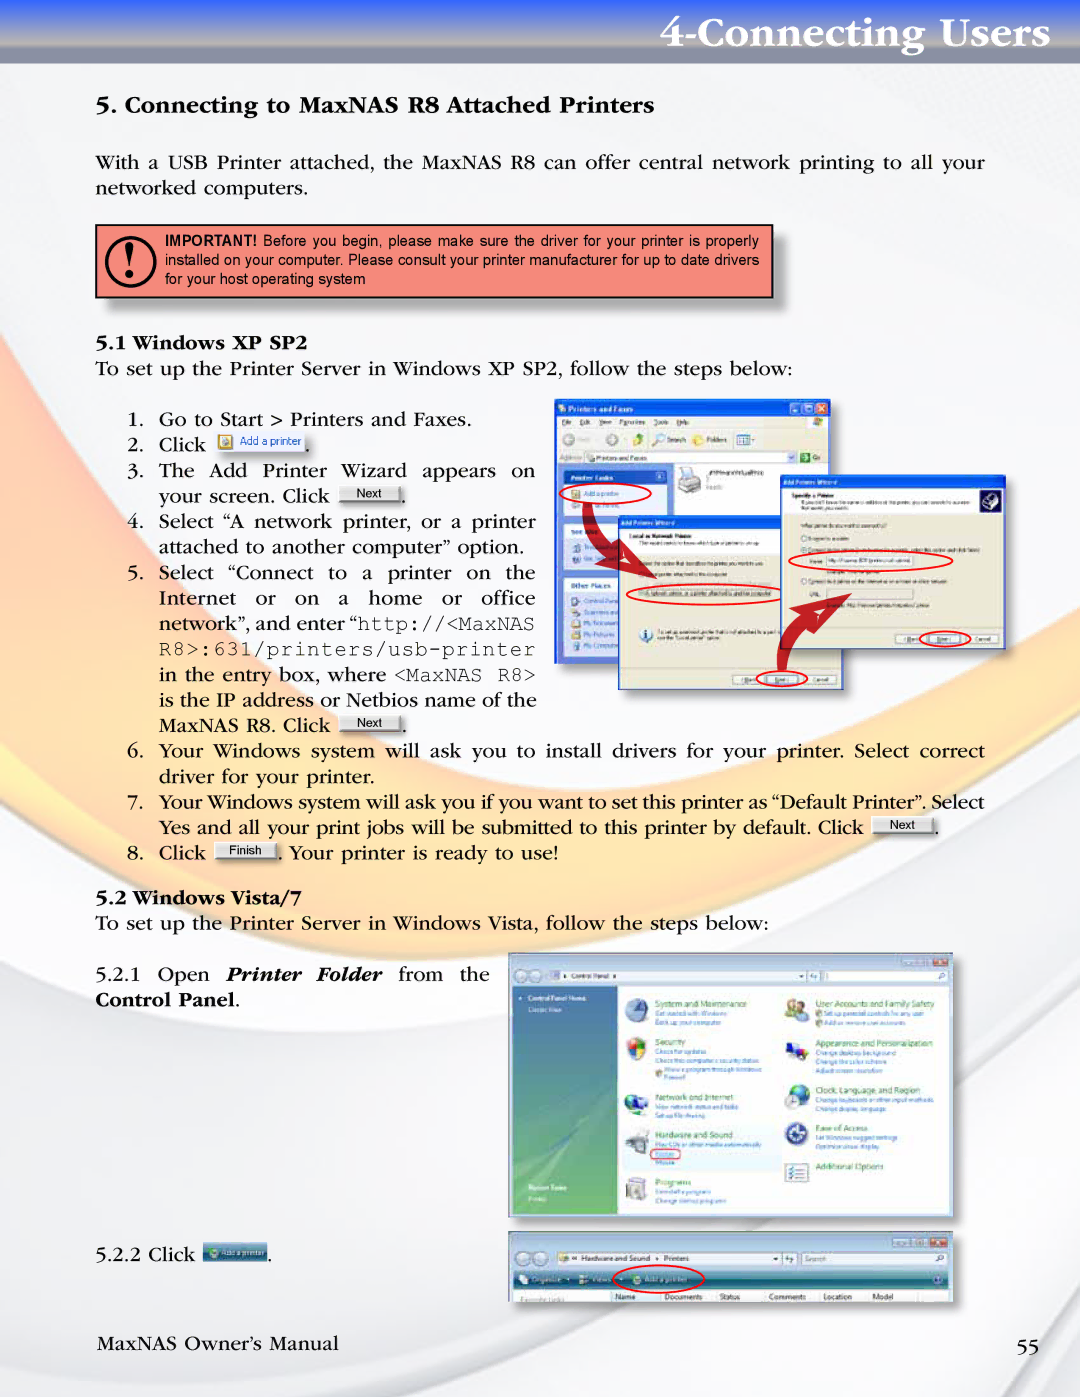
To set up the Printer Server in Windows XP SP2, follow the steps below:
1.Go to Start > Printers and Faxes.
2.Click  .
.
3.The Add Printer Wizard appears on
your screen. Click Next .
4.Select “A network printer, or a printer attached to another computer” option.
5.Select “Connect to a printer on the
Internet or on a home or office network”, and enter “http://<MaxNAS
MaxNAS R8. Click Next .
6.Your Windows system will ask you to install drivers for your printer. Select correct driver for your printer.
7.Your Windows system will ask you if you want to set this printer as “Default Printer”. Select
Yes and all your print jobs will be submitted to this printer by default. Click Next .
8. Click Finish . Your printer is ready to use!
5.2 Windows Vista/7
To set up the Printer Server in Windows Vista, follow the steps below:
5.2.1Open Printer Folder from the Control Panel.
5.2.2 Click  .
.
MaxNAS Owner’s Manual | 55 |