162. TV Setup
Setting Up TV Inputs, continued
1.See chapter 3, “TV Connections,” for recommen- dations on connecting your devices.
2.Connect your devices to the TV, making note of which TV input is used for each device.
The TV and the devices can be either on or off when connecting.
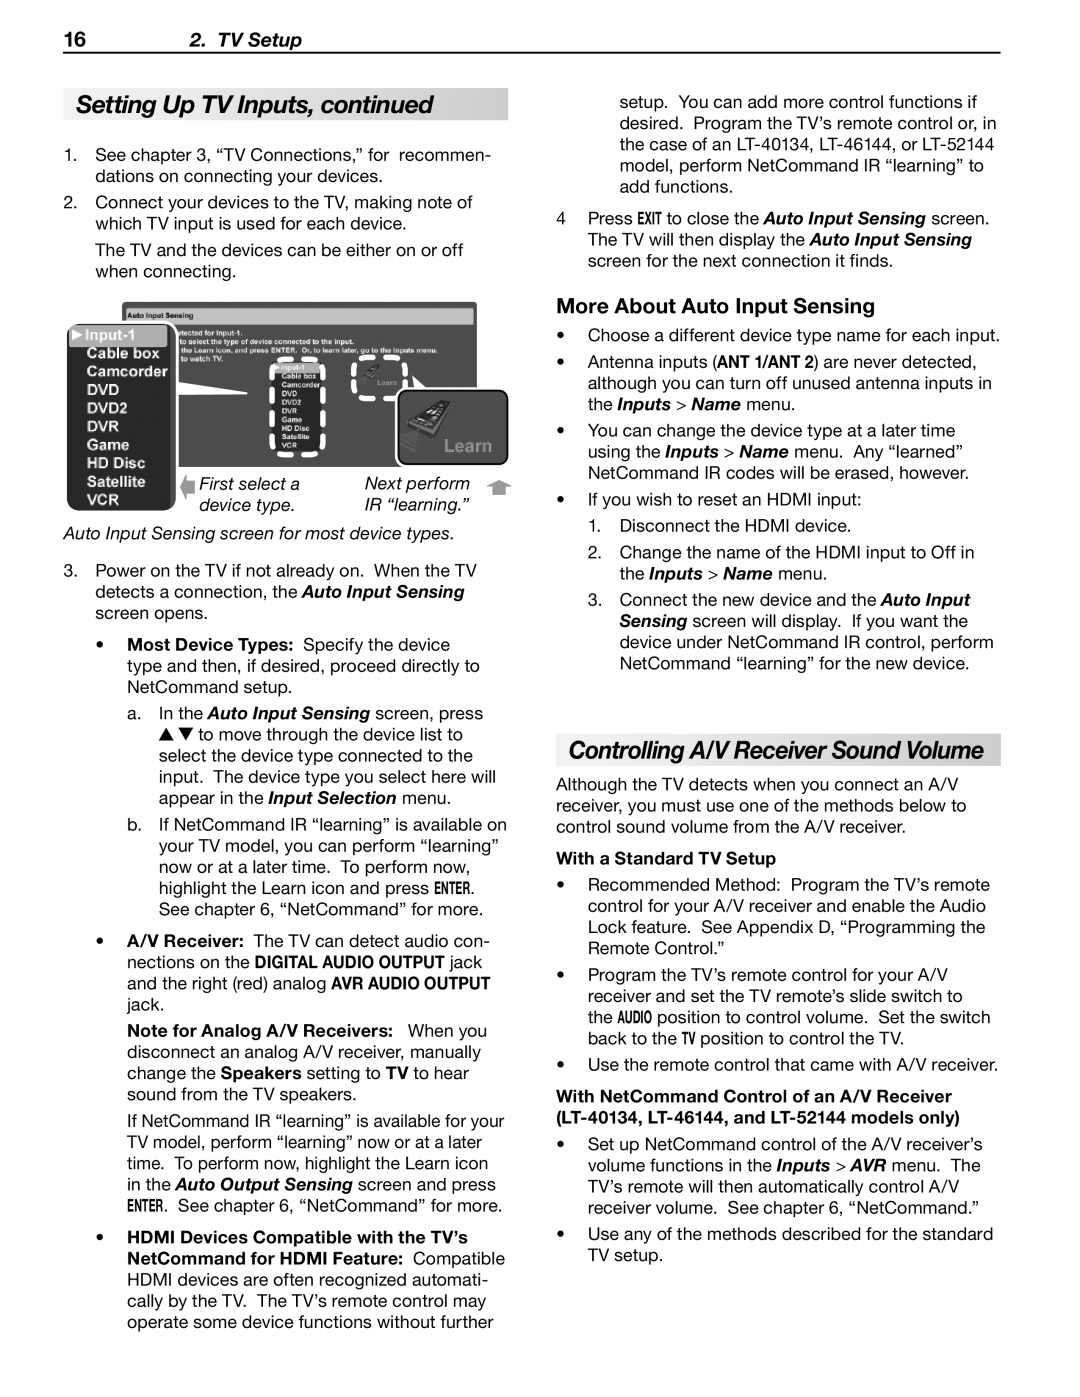
First select a | Next perform |
device type. | IR “learning.” |
Auto Input Sensing screen for most device types.
3.Power on the TV if not already on. When the TV detects a connection, the Auto Input Sensing screen opens.
•Most Device Types: Specify the device type and then, if desired, proceed directly to NetCommand setup.
a.In the Auto Input Sensing screen, press ![]()
![]() to move through the device list to select the device type connected to the input. The device type you select here will appear in the Input Selection menu.
to move through the device list to select the device type connected to the input. The device type you select here will appear in the Input Selection menu.
b.If NetCommand IR “learning” is available on your TV model, you can perform “learning” now or at a later time. To perform now, highlight the Learn icon and press ENTER. See chapter 6, “NetCommand” for more.
•A/V Receiver: The TV can detect audio con- nections on the DIGITAL AUDIO OUTPUT jack and the right (red) analog AVR AUDIO OUTPUT jack.
Note for Analog A/V Receivers: When you disconnect an analog A/V receiver, manually change the Speakers setting to TV to hear sound from the TV speakers.
If NetCommand IR “learning” is available for your TV model, perform “learning” now or at a later time. To perform now, highlight the Learn icon in the Auto Output Sensing screen and press ENTER. See chapter 6, “NetCommand” for more.
•HDMI Devices Compatible with the TV’s NetCommand for HDMI Feature: Compatible HDMI devices are often recognized automati- cally by the TV. The TV’s remote control may operate some device functions without further
setup. You can add more control functions if desired. Program the TV’s remote control or, in the case of an
4Press EXIT to close the Auto Input Sensing screen. The TV will then display the Auto Input Sensing screen for the next connection it finds.
More About Auto Input Sensing
•Choose a different device type name for each input.
•Antenna inputs (ANT 1/ANT 2) are never detected, although you can turn off unused antenna inputs in the Inputs > Name menu.
•You can change the device type at a later time using the Inputs > Name menu. Any “learned” NetCommand IR codes will be erased, however.
•If you wish to reset an HDMI input:
1.Disconnect the HDMI device.
2.Change the name of the HDMI input to Off in the Inputs > Name menu.
3.Connect the new device and the Auto Input Sensing screen will display. If you want the device under NetCommand IR control, perform NetCommand “learning” for the new device.
Controlling A/V Receiver Sound Volume
Although the TV detects when you connect an A/V receiver, you must use one of the methods below to control sound volume from the A/V receiver.
With a Standard TV Setup
•Recommended Method: Program the TV’s remote control for your A/V receiver and enable the Audio Lock feature. See Appendix D, “Programming the Remote Control.”
•Program the TV’s remote control for your A/V receiver and set the TV remote’s slide switch to the AUDIO position to control volume. Set the switch back to the TV position to control the TV.
•Use the remote control that came with A/V receiver.
With NetCommand Control of an A/V Receiver
•Set up NetCommand control of the A/V receiver’s volume functions in the Inputs > AVR menu. The TV’s remote will then automatically control A/V receiver volume. See chapter 6, “NetCommand.”
•Use any of the methods described for the standard TV setup.