ADDING THE PAPER TRAY 2 UNIT
Order #4005
1.Make sure the printer is turned off and disconnected.
2.Make sure there is plenty of room around and above the printer to work. Remove the optional Paper Tray 2 unit from its packaging. Find the packet of brackets and thumb screws and set aside.
3.Remove the .75”x 2” Connector Cable Door from the unit. Extend the Connector Cable away from the unit.
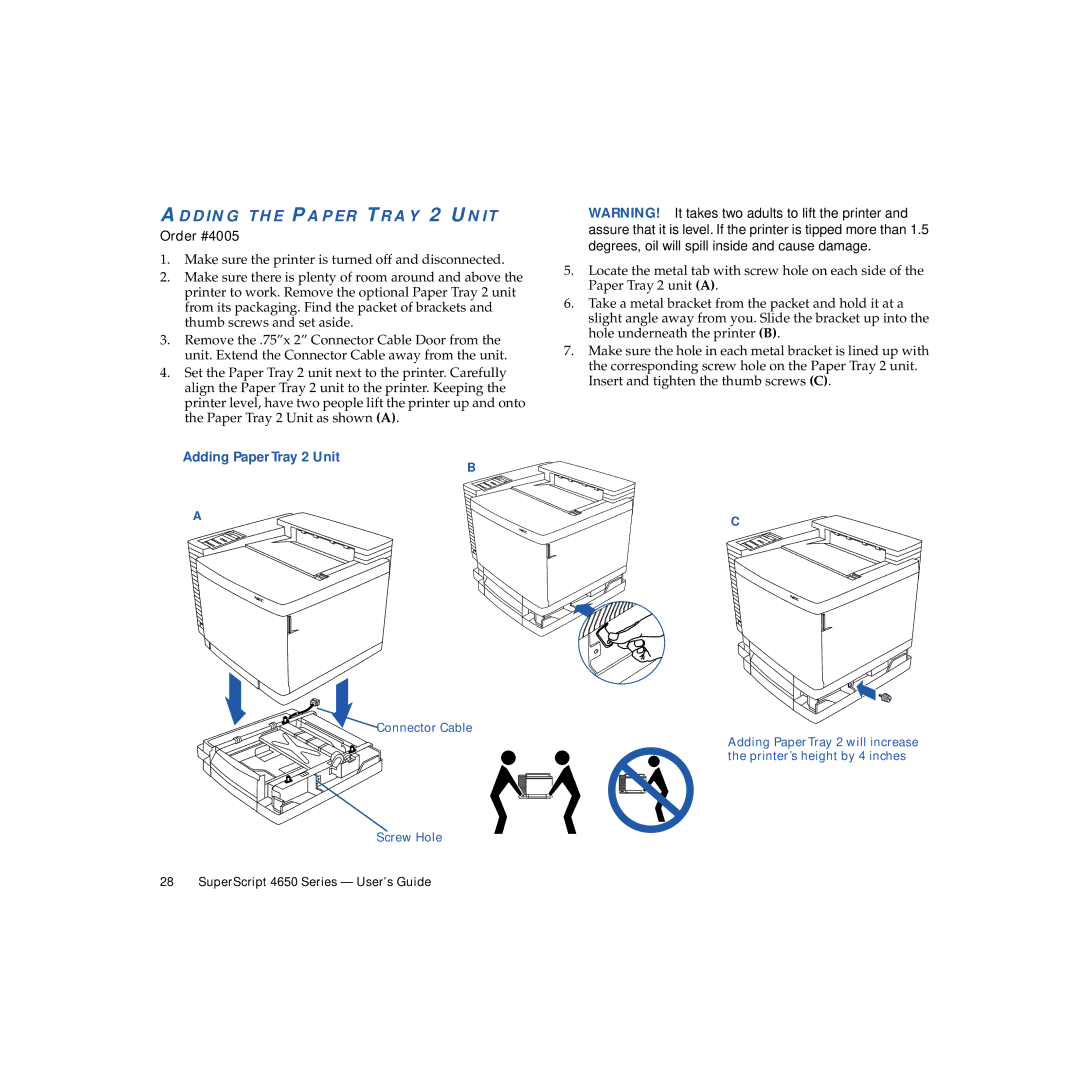
4.Set the Paper Tray 2 unit next to the printer. Carefully align the Paper Tray 2 unit to the printer. Keeping the printer level, have two people lift the printer up and onto the Paper Tray 2 Unit as shown (A).
Adding Paper Tray 2 Unit
B
A
![]() Connector Cable
Connector Cable
Screw Hole
28 SuperScript 4650 Series — User’s Guide
WARNING! It takes two adults to lift the printer and assure that it is level. If the printer is tipped more than 1.5 degrees, oil will spill inside and cause damage.
5.Locate the metal tab with screw hole on each side of the Paper Tray 2 unit (A).
6.Take a metal bracket from the packet and hold it at a slight angle away from you. Slide the bracket up into the hole underneath the printer (B).
7.Make sure the hole in each metal bracket is lined up with the corresponding screw hole on the Paper Tray 2 unit. Insert and tighten the thumb screws (C).
C
Adding Paper Tray 2 will increase the printer’s height by 4 inches