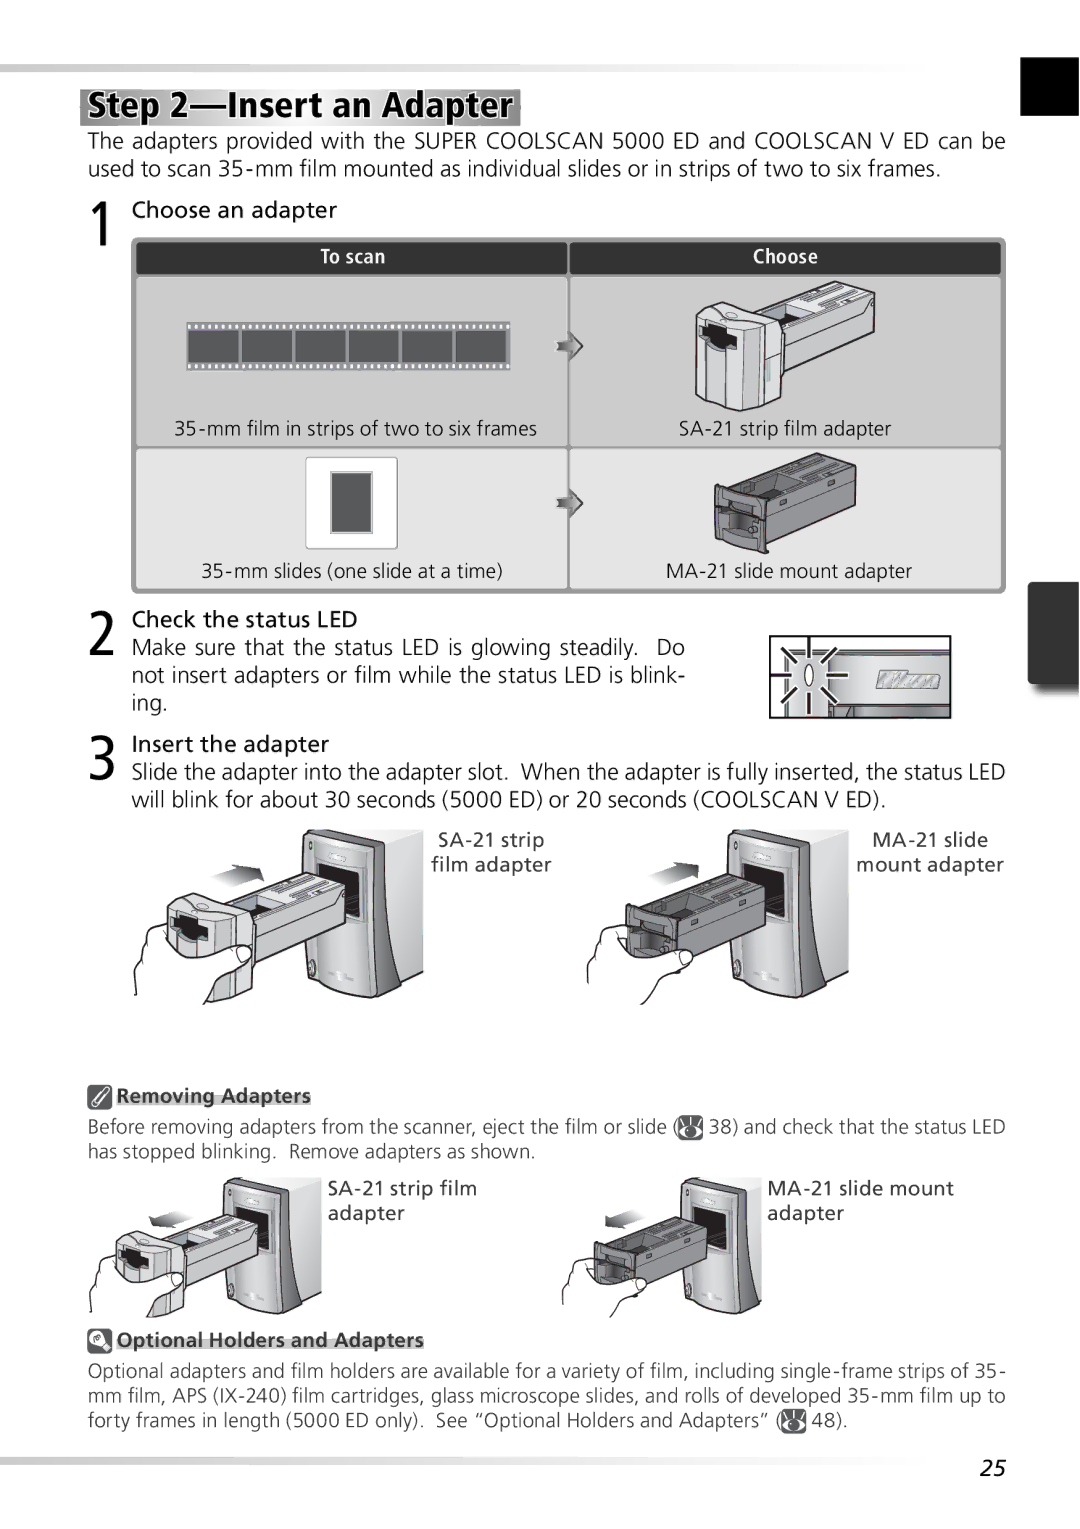
Step 2—Insert an Adapter
The adapters provided with the SUPER COOLSCAN 5000 ED and COOLSCAN V ED can be used to scan
1 Choose an adapter
To scan |
|
|
|
| Choose | ||
|
|
|
|
|
|
|
|
|
|
|
|
|
|
|
|
|
|
|
|
|
|
|
|
Check the status LED |
|
|
|
|
|
|
|
|
2 Make sure that the status LED is glowing steadily. | Do |
|
|
|
| |||
|
|
|
|
|
| |||
not insert adapters or film while the status LED is blink- |
|
|
|
| ||||
|
| |||||||
ing. |
|
|
|
|
|
|
|
|
|
|
|
|
|
|
|
| |
|
|
|
|
|
|
|
|
|
Insert the adapter |
|
3 Slide the adapter into the adapter slot. When the adapter is fully inserted, the status LED | |
will blink for about 30 seconds (5000 ED) or 20 seconds (COOLSCAN V ED). | |
film adapter | mount adapter |
 Removing Adapters
Before removing adapters from the scanner, eject the film or slide (![]() 38) and check that the status LED has stopped blinking. Remove adapters as shown.
38) and check that the status LED has stopped blinking. Remove adapters as shown.
adapter | adapter |
 Optional Holders and Adapters
Optional adapters and film holders are available for a variety of film, including
mmfilm, APS ![]() 48).
48).
25