Inserting the Holder
1 Insert the
After confirming that the status LED is not blinking, slide the ![]() 25). When the adapter is fully inserted, the status LED will blink while the scanner initializes (
25). When the adapter is fully inserted, the status LED will blink while the scanner initializes (![]() 24). Wait until the status LED stops blinking.
24). Wait until the status LED stops blinking.
2 Insert the
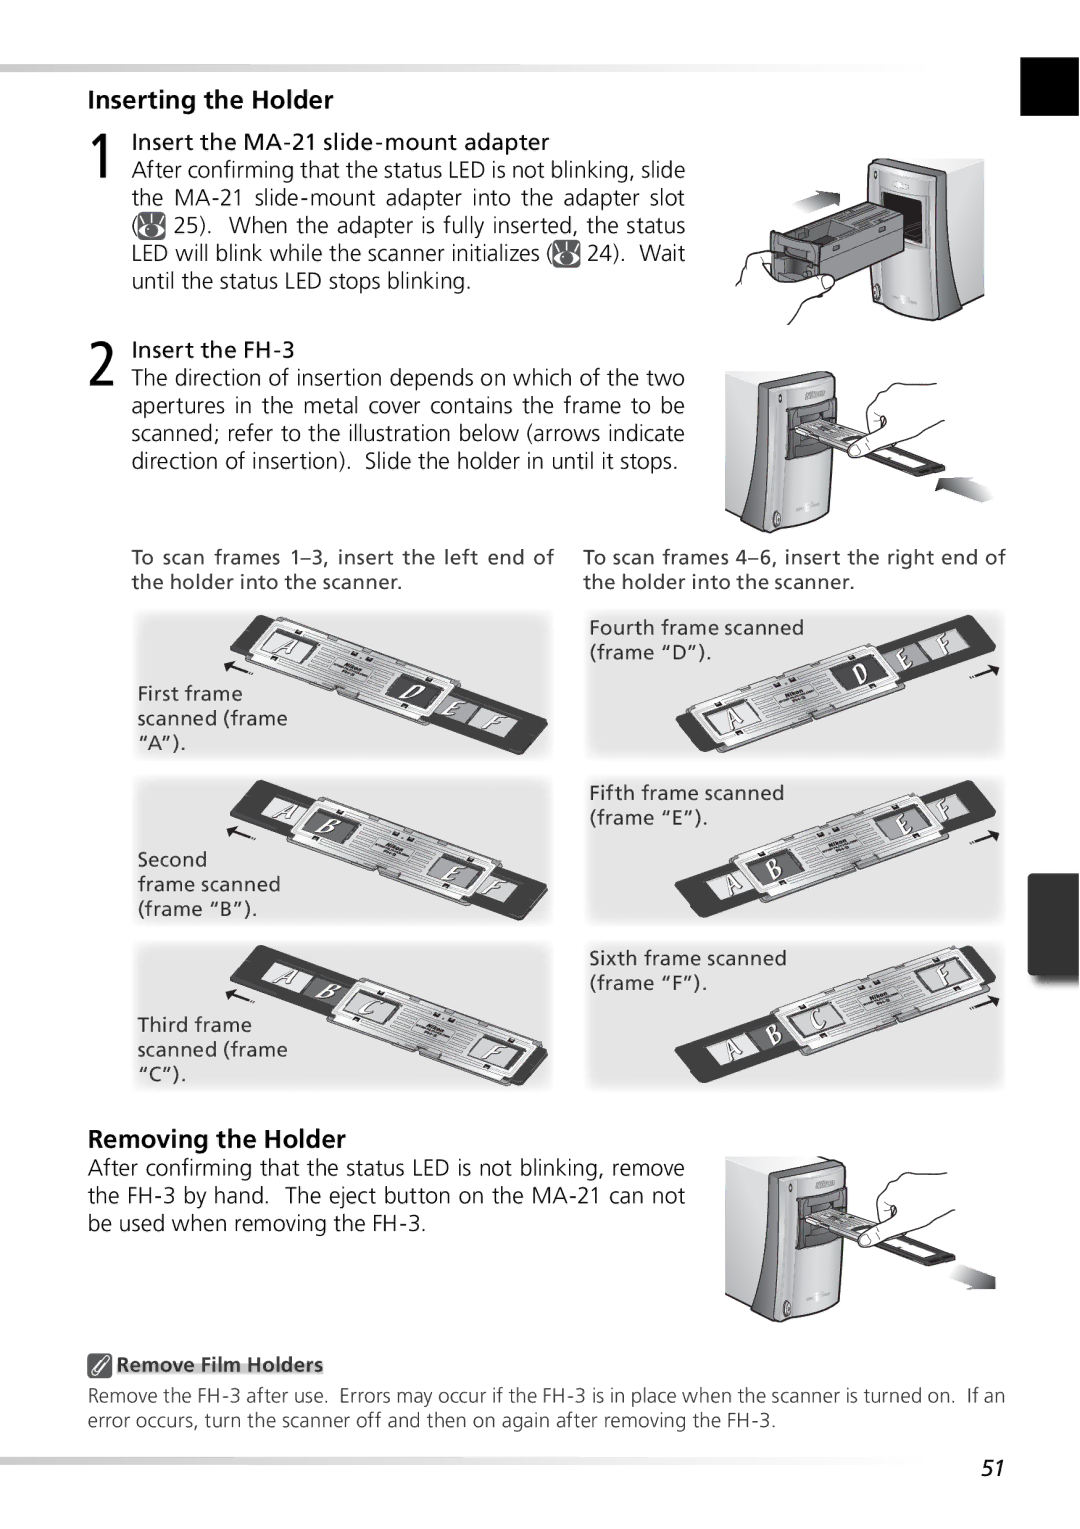
The direction of insertion depends on which of the two apertures in the metal cover contains the frame to be scanned; refer to the illustration below (arrows indicate direction of insertion). Slide the holder in until it stops.
To scan frames
To scan frames
Fourth frame scanned (frame “D”).
First frame scanned (frame “A”).
Fifth frame scanned (frame “E”).
Second
frame scanned (frame “B”).
Sixth frame scanned (frame “F”).
Third frame scanned (frame “C”).
Removing the Holder
After confirming that the status LED is not blinking, remove the
 Remove Film Holders
Remove the
51