Setting Date/Time
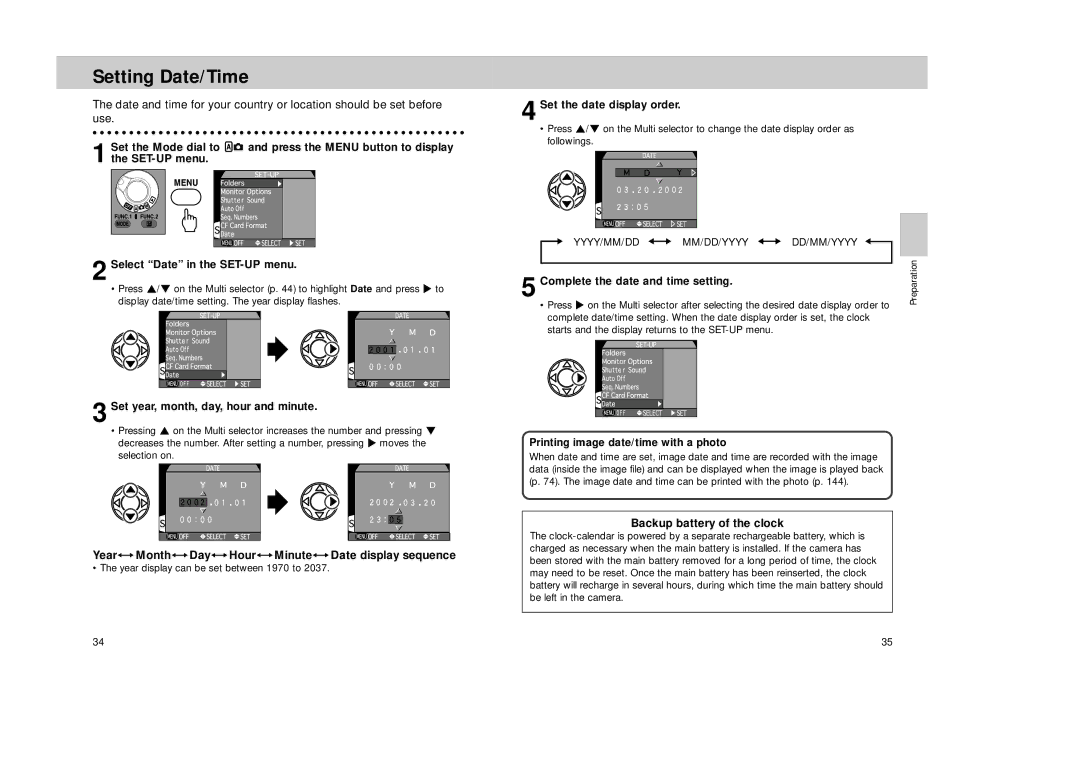
The date and time for your country or location should be set before use.
1 Set the Mode dial to ![]()
![]() and press the MENU button to display the
and press the MENU button to display the
2 Select “Date” in the
•Press ≤/≥ on the Multi selector (p. 44) to highlight Date and press > to display date/time setting. The year display flashes.
3 Set year, month, day, hour and minute.
•Pressing ≤ on the Multi selector increases the number and pressing ≥ decreases the number. After setting a number, pressing > moves the selection on.
Year<—Month<—Day<—Hour<—Minute<—Date display sequence
• The year display can be set between 1970 to 2037.
4 Set the date display order.
•Press ≤/≥ on the Multi selector to change the date display order as followings.
YYYY/MM/DD | MM/DD/YYYY | DD/MM/YYYY |
5 Complete the date and time setting. | Preparation | |
| ||
• Press > on the Multi selector after selecting the desired date display order to complete date/time setting. When the date display order is set, the clock starts and the display returns to the
Printing image date/time with a photo
When date and time are set, image date and time are recorded with the image data (inside the image file) and can be displayed when the image is played back (p. 74). The image date and time can be printed with the photo (p. 144).
Backup battery of the clock
The
34 | 35 |
