Optional Equipment (for qualified installers only) | 63 |
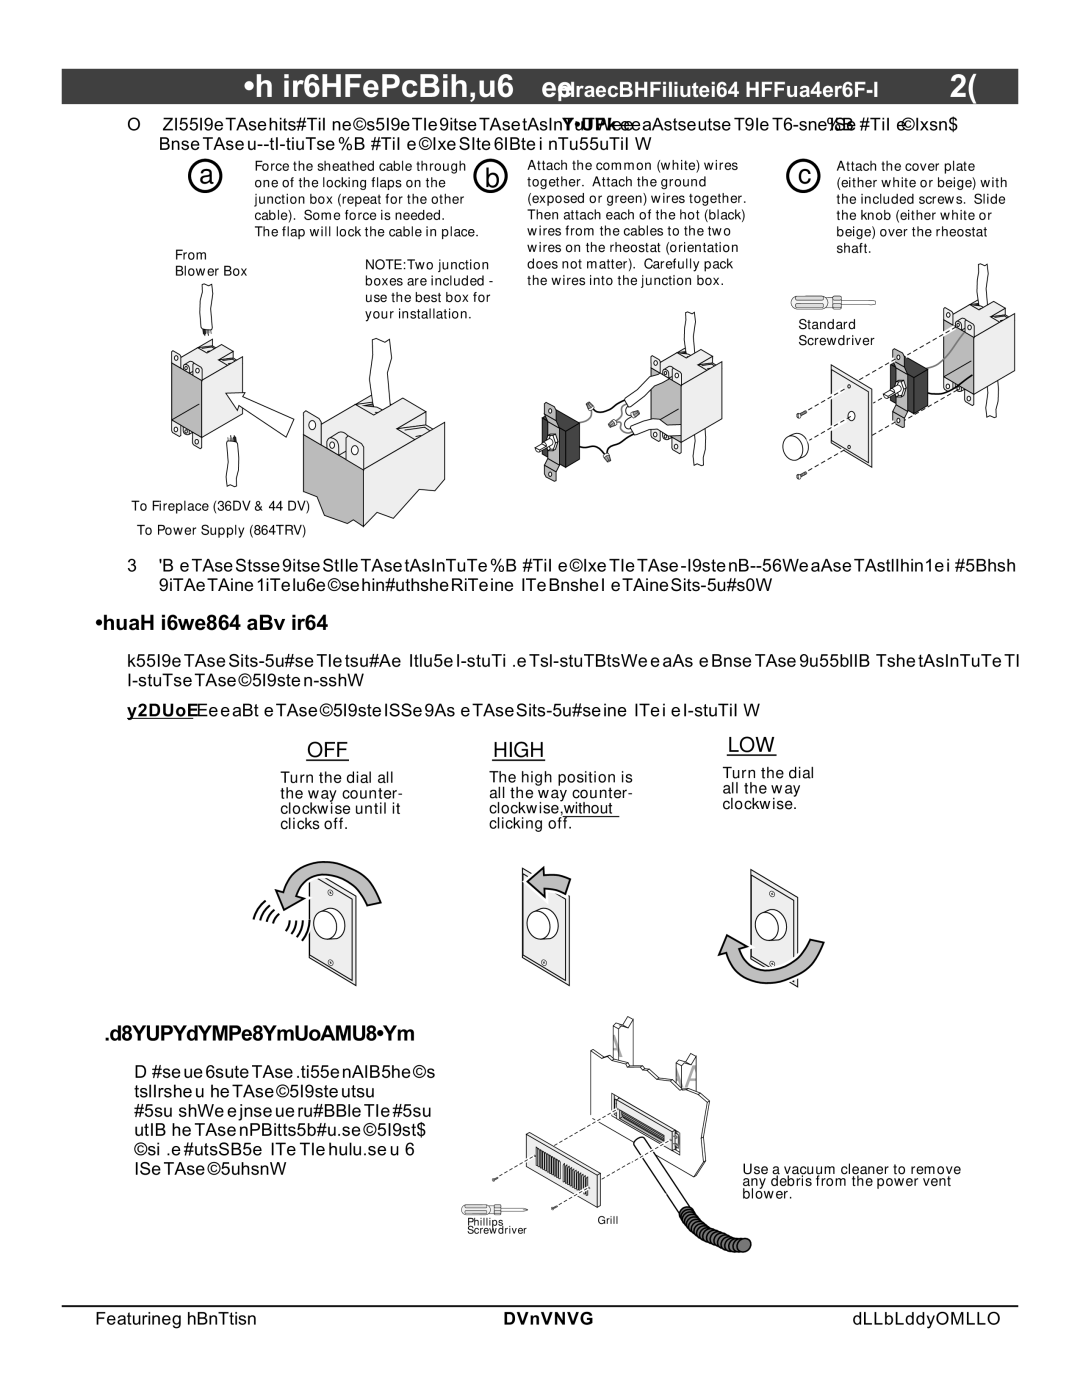
2Follow the directions below to wire the rheostat. NOTE: There are two types of junction boxes, use the appropriate junction box for your installation.
Force the sheathed cable through a one of the locking flaps on the
junction box (repeat for the other cable). Some force is needed. The flap will lock the cable in place.
From
Blower Box
Attach the common (white) wires b together. Attach the ground
(exposed or green) wires together. Then attach each of the hot (black) wires from the cables to the two wires on the rheostat (orientation does not matter). Carefully pack the wires into the junction box.
Attach the cover plate
c (either white or beige) with the included screws. Slide the knob (either white or beige) over the rheostat shaft.
Standard
Screwdriver
To Fireplace (36DV & 44 DV)
To Power Supply (864TRV)
3Run the free wire from the rheostat junction box to the power supply. The thermodisk included with this kit may be discarded (it is not used on this fireplace).
Operating Instructions
Allow the fireplace to reach normal operating temperature. Then use the
864TRV: Turn the blower off when the fireplace is not in operation.
OFF
Turn the dial all the way counter- clockwise until it clicks off.
MAINTENANCE INSTRUCTIONS
Once a year the grill should be removed and the blower area cleaned. Use a vacuum to clean around the
HIGH
The high position is all the way counter- clockwise, without clicking off.
PhillipsGrill Screwdriver
LOW
Turn the dial all the way clockwise.
Use a vacuum cleaner to remove any debris from the power vent blower.
© Travis Industries | 4070201 |
