Finalizing the Installation (for qualified installers only) | 43 |
Steps for Finalizing the Installation
1.Remove the glass (see page 45).
NOTE: If using propane (LP) convert the appliance prior to installing the logs.
2.We recommend you purge the gas line at this time (with the glass removed). This allows gas to be detected once it enters the firebox, ensuring gas does not build up.
3.Install the logs (see page 47).
4.Turn on the gas to the fireplace. Turn on gas to the heater. Leak test all gas joints prior to starting the appliance. Start the pilot.
Starting the Pilot Flame
WARNING: When lighting or
aRemove the glass.
bPush the gas control knob in slightly and turn it to the "OFF" position. The knob will not turn from "ON" to "OFF" unless the knob is depressed slightly. Wait five minutes to let any gas that may have accumulated inside the firebox escape. If you smell leaking gas, follow the directions on the cover "IF YOU SMELL GAS".
cTurn the gas control knob to the "PILOT" position and press the knob in, this will allow gas to flow to the pilot light. Press the button on the pilot igniter repeatedly until you see the pilot light.
WARNING: | If the pilot does not light after 15 seconds, release the knob and call your dealer |
| for service. Do not attempt to light pilot until service has been performed. |
NOTE: |
|
You may wish to remove the log set to gain a better view of the pilot (see page 47).
dKeep the gas control knob depressed for 30 seconds once it is lit.
eRelease the gas control knob. If the pilot goes out, repeat step C. If the pilot refuses to stay lit, call your dealer for service. With the pilot lit, proceed to step “f”.
fReplace the glass.
gTurn the gas control knob
5. Check the pilot flame following the directions below.
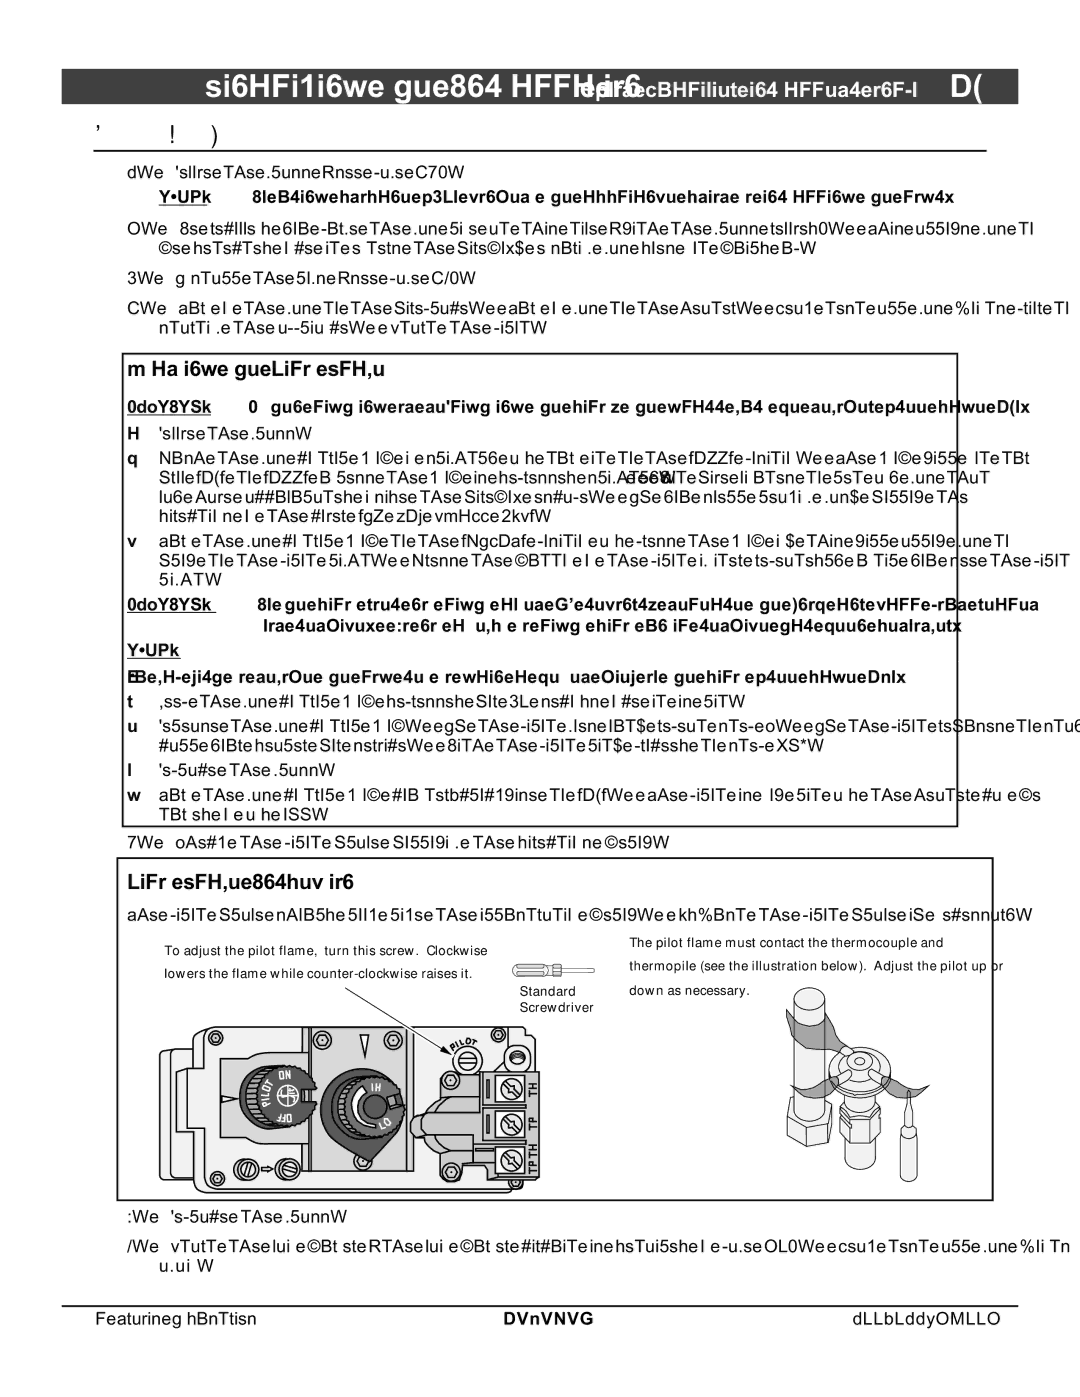
Pilot Flame Inspection
The pilot flame should look like the illustration below. Adjust the pilot flame if necessary.
To adjust the pilot flame, turn this screw. Clockwise | The pilot flame must contact the thermocouple and |
| |
lowers the flame while | thermopile (see the illustration below). Adjust the pilot up or |
| |
Standard | down as necessary. |
Screwdriver |
|
6.Replace the glass.
7.Start the main burner (the main burner circuit is detailed on page 20). Leak test all gas joints again.
© Travis Industries | 4070201 |