NOTE
The procedure may be aborted at any time, if desired, by
pressing the ![]()
![]()
![]()
![]() key.
key.
NOTE
If the quality of the test result still fails to meet your expecta- tions after carrying out the cleaning procedure, continue as follows, stopping when you get a satisfactory printing quality:
-Make a copy of a document with the desired type of graphics or text on the fax machine and evaluate its quality.
-Change the type of paper (the paper in use could be excessively porous) and repeat the procedure.
-Remove and reinsert the print head.
-Remove the print head and check that there are no foreign bodies on the print nozzles; if there are, re- move them carefully, taking care not to touch the elec- trical contacts. Finally, reinstall the print head.
-Remove the print head and clean the electrical con- tacts both on the print head and on the print head carriage, see "To clean the electrical contacts of the print head", below.
-Reinstall the print head.
-Call the engineering service.
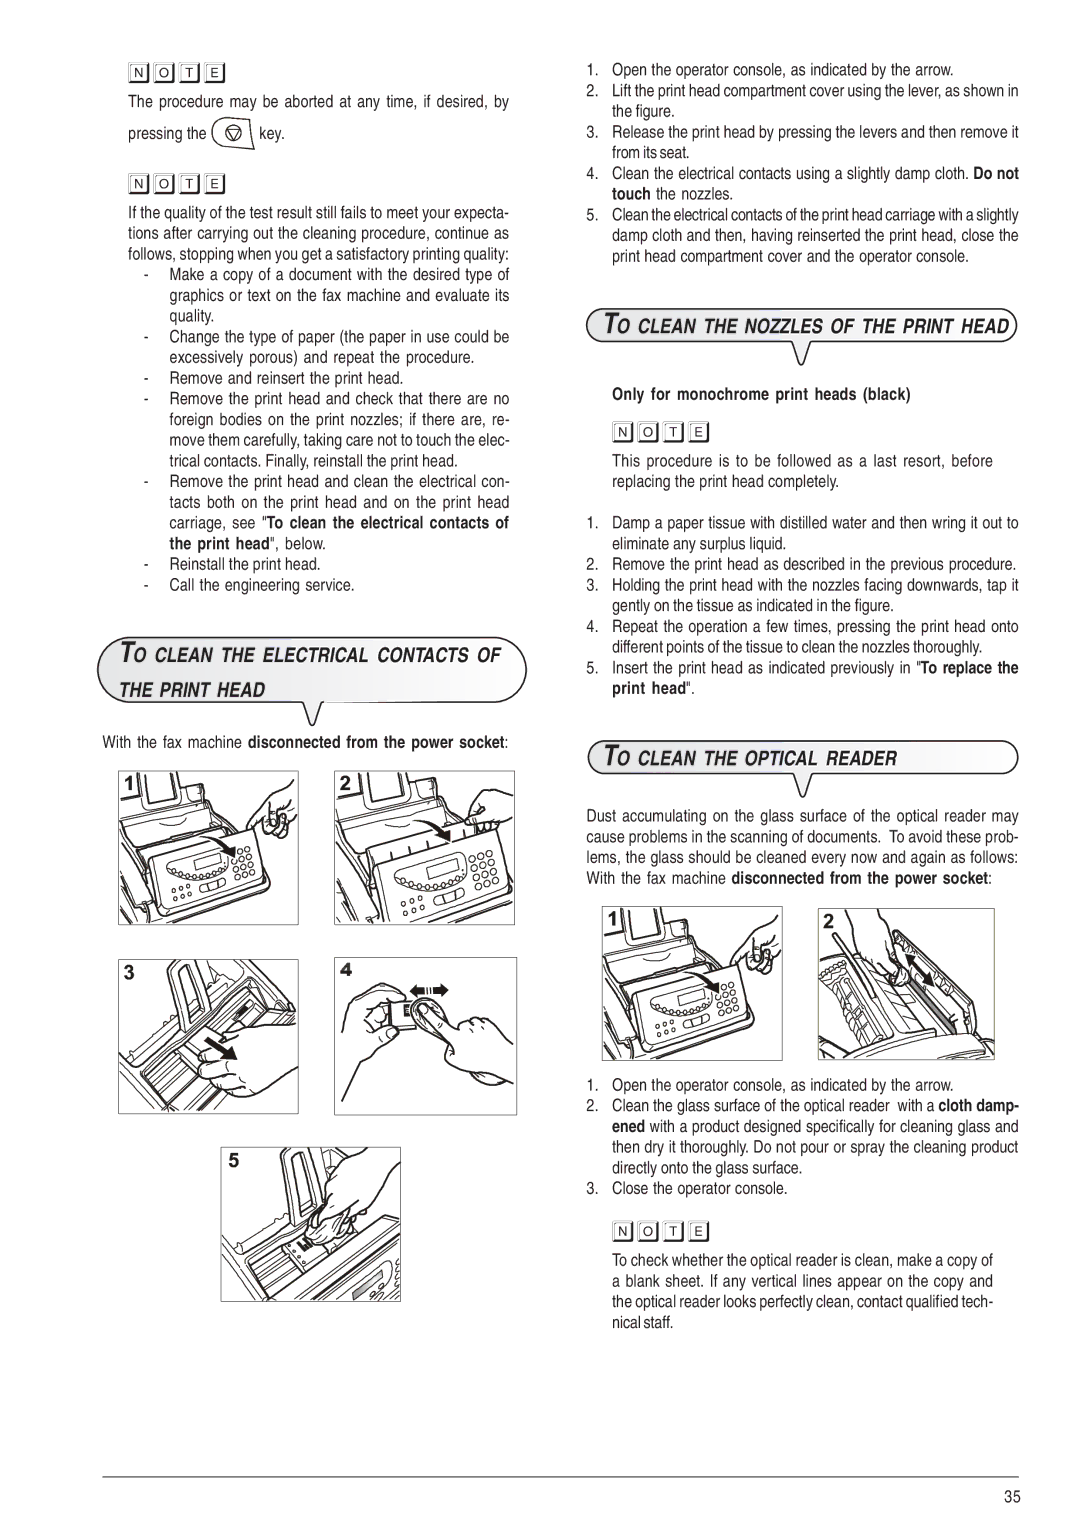
TO CLEAN THE ELECTRICAL CONTACTS OF
THE PRINT HEAD
With the fax machine disconnected from the power socket:
1.Open the operator console, as indicated by the arrow.
2.Lift the print head compartment cover using the lever, as shown in the figure.
3.Release the print head by pressing the levers and then remove it from its seat.
4.Clean the electrical contacts using a slightly damp cloth. Do not touch the nozzles.
5.Clean the electrical contacts of the print head carriage with a slightly damp cloth and then, having reinserted the print head, close the print head compartment cover and the operator console.
TO CLEAN THE NOZZLES OF THE PRINT HEAD
Only for monochrome print heads (black)
NOTE
This procedure is to be followed as a last resort, before replacing the print head completely.
1.Damp a paper tissue with distilled water and then wring it out to eliminate any surplus liquid.
2.Remove the print head as described in the previous procedure.
3.Holding the print head with the nozzles facing downwards, tap it gently on the tissue as indicated in the figure.
4.Repeat the operation a few times, pressing the print head onto different points of the tissue to clean the nozzles thoroughly.
5.Insert the print head as indicated previously in "To replace the print head".
TO CLEAN THE OPTICAL READER
Dust accumulating on the glass surface of the optical reader may cause problems in the scanning of documents. To avoid these prob- lems, the glass should be cleaned every now and again as follows: With the fax machine disconnected from the power socket:
1.Open the operator console, as indicated by the arrow.
2.Clean the glass surface of the optical reader with a cloth damp- ened with a product designed specifically for cleaning glass and then dry it thoroughly. Do not pour or spray the cleaning product directly onto the glass surface.
3.Close the operator console.
NOTE
To check whether the optical reader is clean, make a copy of a blank sheet. If any vertical lines appear on the copy and the optical reader looks perfectly clean, contact qualified tech- nical staff.
35