Transfer the voice files to your PC
The 5 voice folders of this recorder are named as [Folder A], [Folder B], [Folder C], [Folder D] and [Folder E], and the recorded voice files are saved in these folders.
Windows
1 | Connect the recorder to your PC |
| (☞ P.87). |
| Open the Explorer window. |
2 | |
| • When you connect the recorder to |
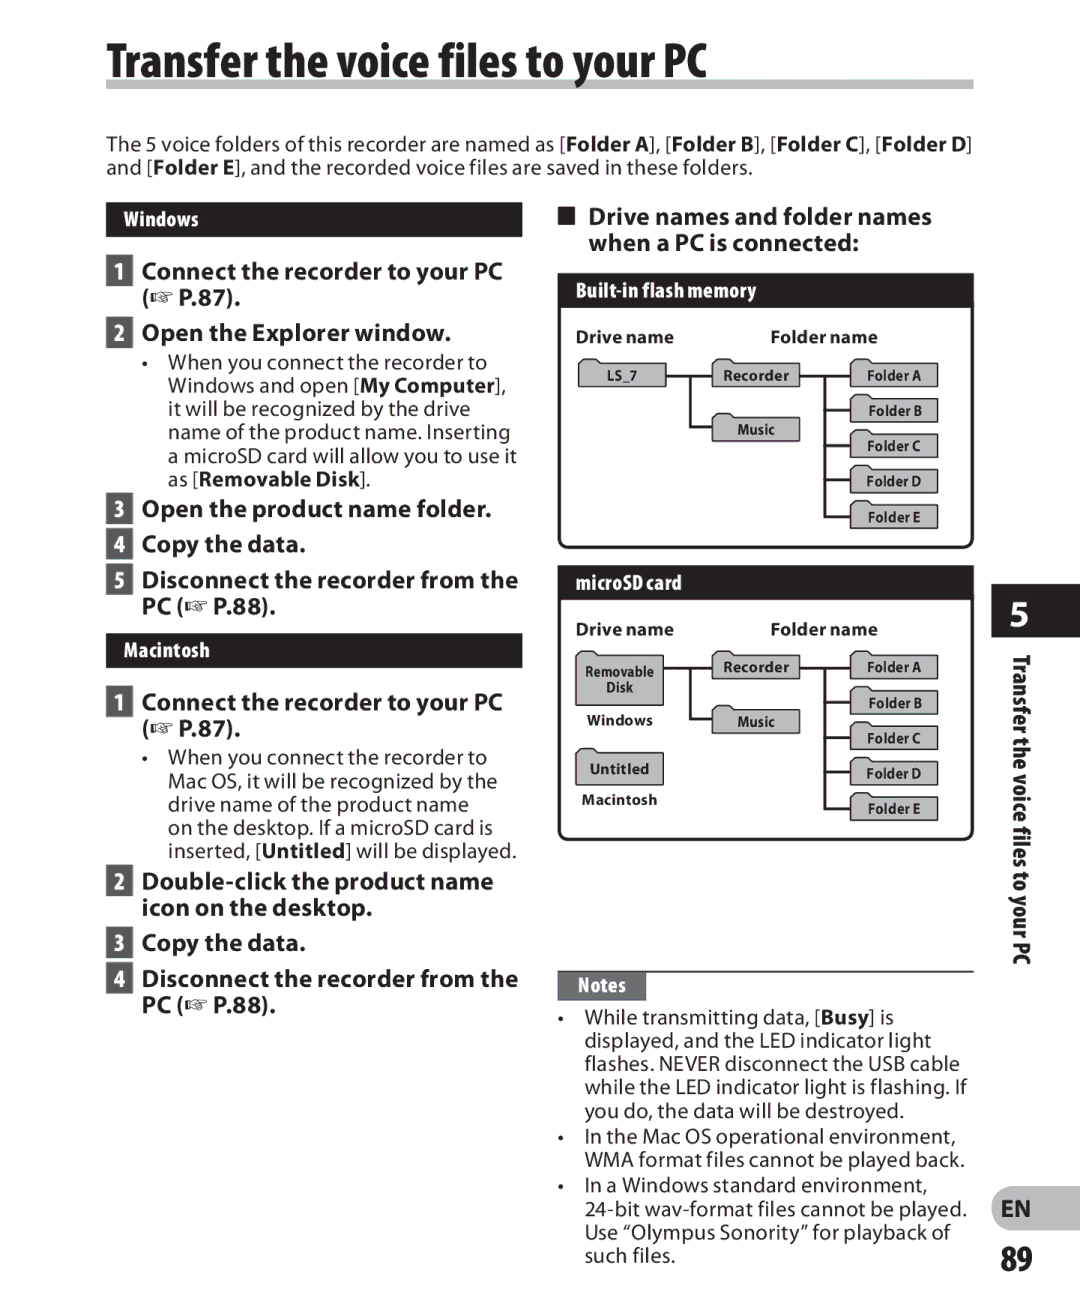
4Drive names and folder names when a PC is connected:
Built-in flash memory
Drive name | Folder name |
| Windows and open [My Computer], |
| it will be recognized by the drive |
| name of the product name. Inserting |
| a microSD card will allow you to use it |
| as [Removable Disk]. |
3 | Open the product name folder. |
| Copy the data. |
4 |
LS_7
Recorder |
Music |
Folder A |
Folder B |
Folder C |
Folder D |
Folder E |
5 Disconnect the recorder from the |
PC (☞ P.88). |
Macintosh
microSD card
Drive name | Folder name |
5
1Connect the recorder to your PC (☞ P.87).
•When you connect the recorder to Mac OS, it will be recognized by the drive name of the product name on the desktop. If a microSD card is inserted, [Untitled] will be displayed.
Removable
Disk
Windows
Untitled
Macintosh
Recorder |
Music |
Folder A |
Folder B |
Folder C |
Folder D |
Folder E |
Transfer the voice files
2
3Copy the data.
4Disconnect the recorder from the PC (☞ P.88).
Notes
•While transmitting data, [Busy] is displayed, and the LED indicator light flashes. NEVER disconnect the USB cable while the LED indicator light is flashing. If you do, the data will be destroyed.
•In the Mac OS operational environment, WMA format files cannot be played back.
•In a Windows standard environment,
to your PC
EN
89