Setting time and date [Time & Date]
| If you set the time and date beforehand, | |
| the information when the file is recorded is | |
| automatically stored for each file. Setting | |
| the time and date beforehand enables easier | |
| file management. | |
| When you use the recorder for | |
1 | the first time after purchasing it, | |
or when the batteries have been | ||
Setting | inserted without the device having | |
the “Hour” is flashing, conduct the | ||
| been used in a long time, the | |
timeanddate | [Set Time & Date] will appear. When | |
setup from Step 1. | ||
|
+− button
90button `OK button
2Press the + or − button to set.
•Follow the same steps by pressing the 9or 0button to select the next item, and pressing the + or − button to set.
•You can select between 12 and 24 hour display by pressing the F1 button while setting the hour and minute.
Example: 10:38 P.M
10:38 PM22:38 (Initial setting)
•You can select the order of the “Month”, “Day” and “Year” by pressing the F1 button while setting them.
Example: March 24, 2011
3M 24D 2011Y (Initial setting)
24D 3M 2011Y
2011Y 3M 24D
3Press the `OK button to complete the setting.
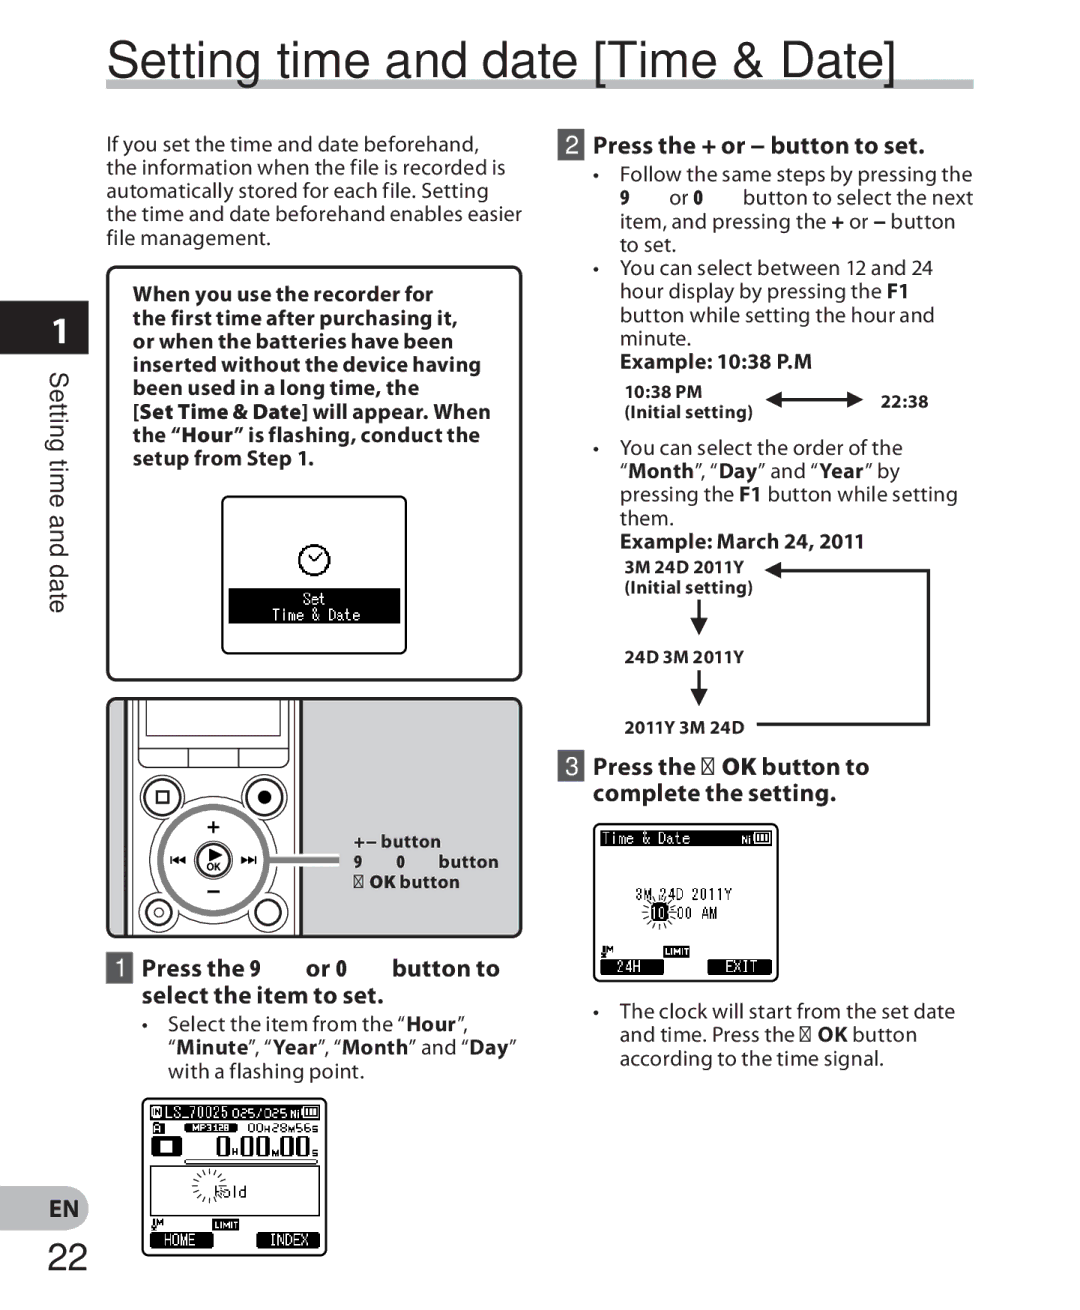
1 Press the 9or 0button to
select the item to set. | • The clock will start from the set date | |
• Select the item from the “Hour”, | ||
and time. Press the `OK button | ||
“Minute”, “Year”, “Month” and “Day” | ||
according to the time signal. | ||
with a flashing point. | ||
|
EN
22