4.2 Setting a New IP Address over the Network
Besides using the iConnect software, you may use the Meter’s default IP address to access it and assign a new IP address to it.
The Meter is shipped with a default IP address of 192.168.1.200 and Subnet Mask of 255.255.255.0. You can configure your PC’s Network connection with an IP address that is in the same range as the Meter’s IP address (192.168.1.x) and connect to the Meter using a crossover network cable between your PC and the Meter.
With this completed, you can go to the
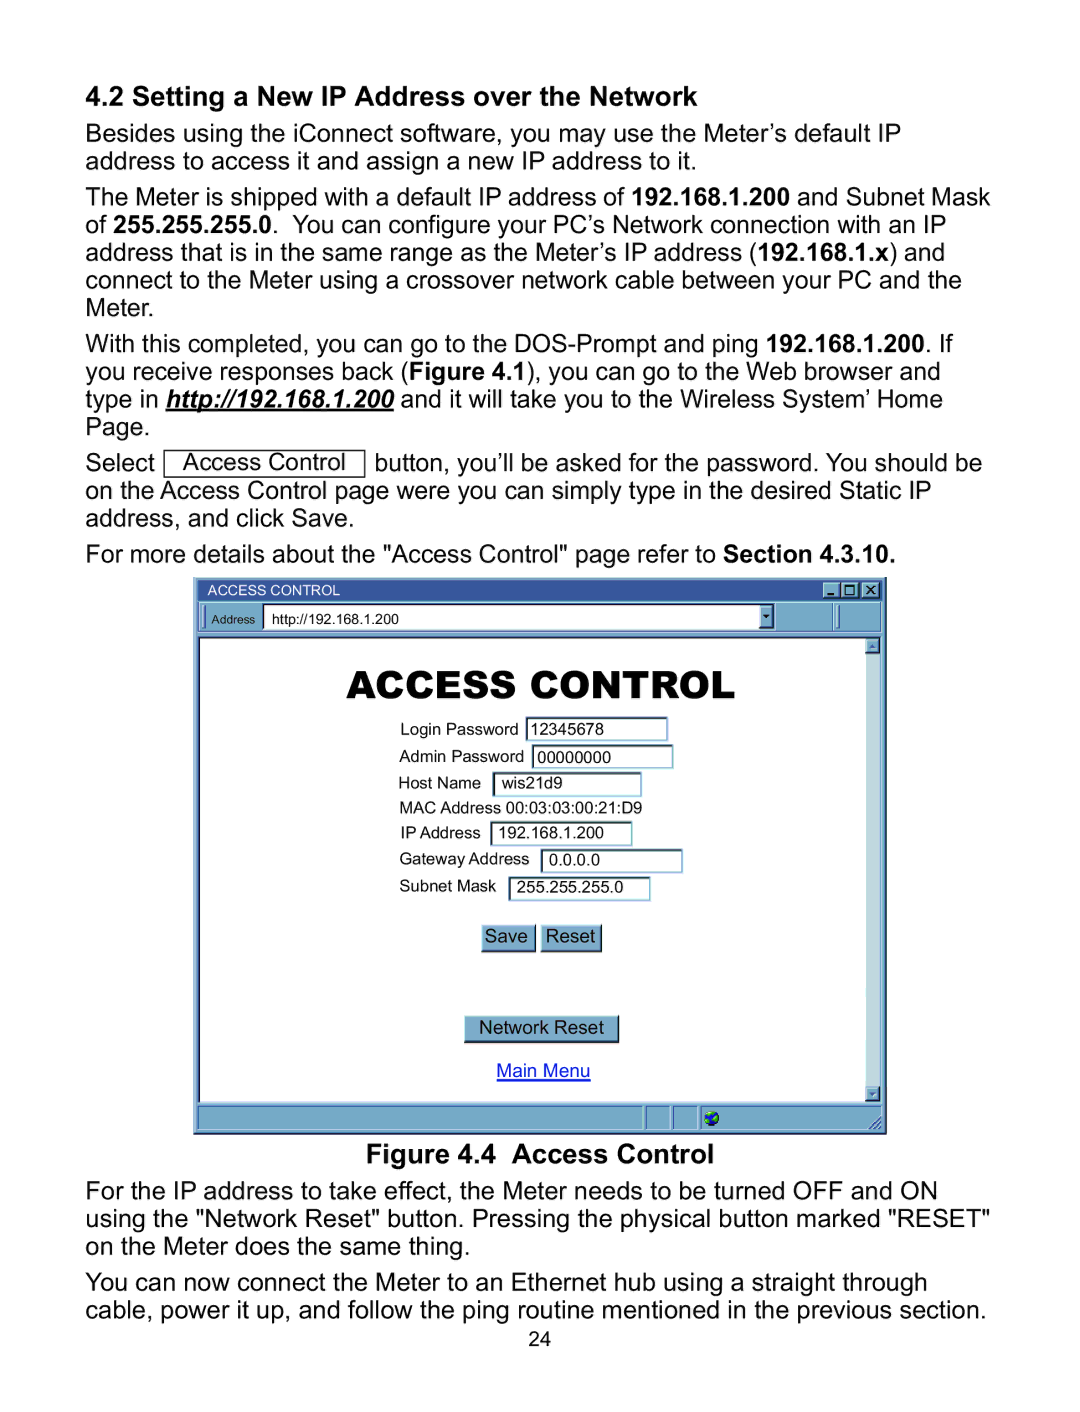
Select Access Control button, you’ll be asked for the password. You should be on the Access Control page were you can simply type in the desired Static IP address, and click Save.
For more details about the "Access Control" page refer to Section 4.3.10.
ACCESS CONTROL
Address http://192.168.1.200
ACCESS CONTROL
Login Password 12345678
Admin Password 00000000
Host Name wis21d9
MAC Address 00:03:03:00:21:D9
IP Address 192.168.1.200
Gateway Address 0.0.0.0
Subnet Mask 255.255.255.0
Save Reset
Network Reset
Main Menu
Figure 4.4 Access Control
For the IP address to take effect, the Meter needs to be turned OFF and ON using the "Network Reset" button. Pressing the physical button marked "RESET" on the Meter does the same thing.
You can now connect the Meter to an Ethernet hub using a straight through cable, power it up, and follow the ping routine mentioned in the previous section.
24