Operating Instructions
Setting | Description |
|
|
Camera Name | • The camera name is displayed on the Single camera page. |
| • Enter ASCII characters (see page 163) or characters in |
| each language |
| and |
| ["], ['], [&], [<], and [>] are not available. |
|
|
Vertical | When selecting the video of 640 × 480 dot resolution on the |
Resolution | Single page, scanning lines may appear to record the fast |
(for 640 × 480 | moving objects. When selecting 240, correct the scanning |
mode) | lines. |
|
|
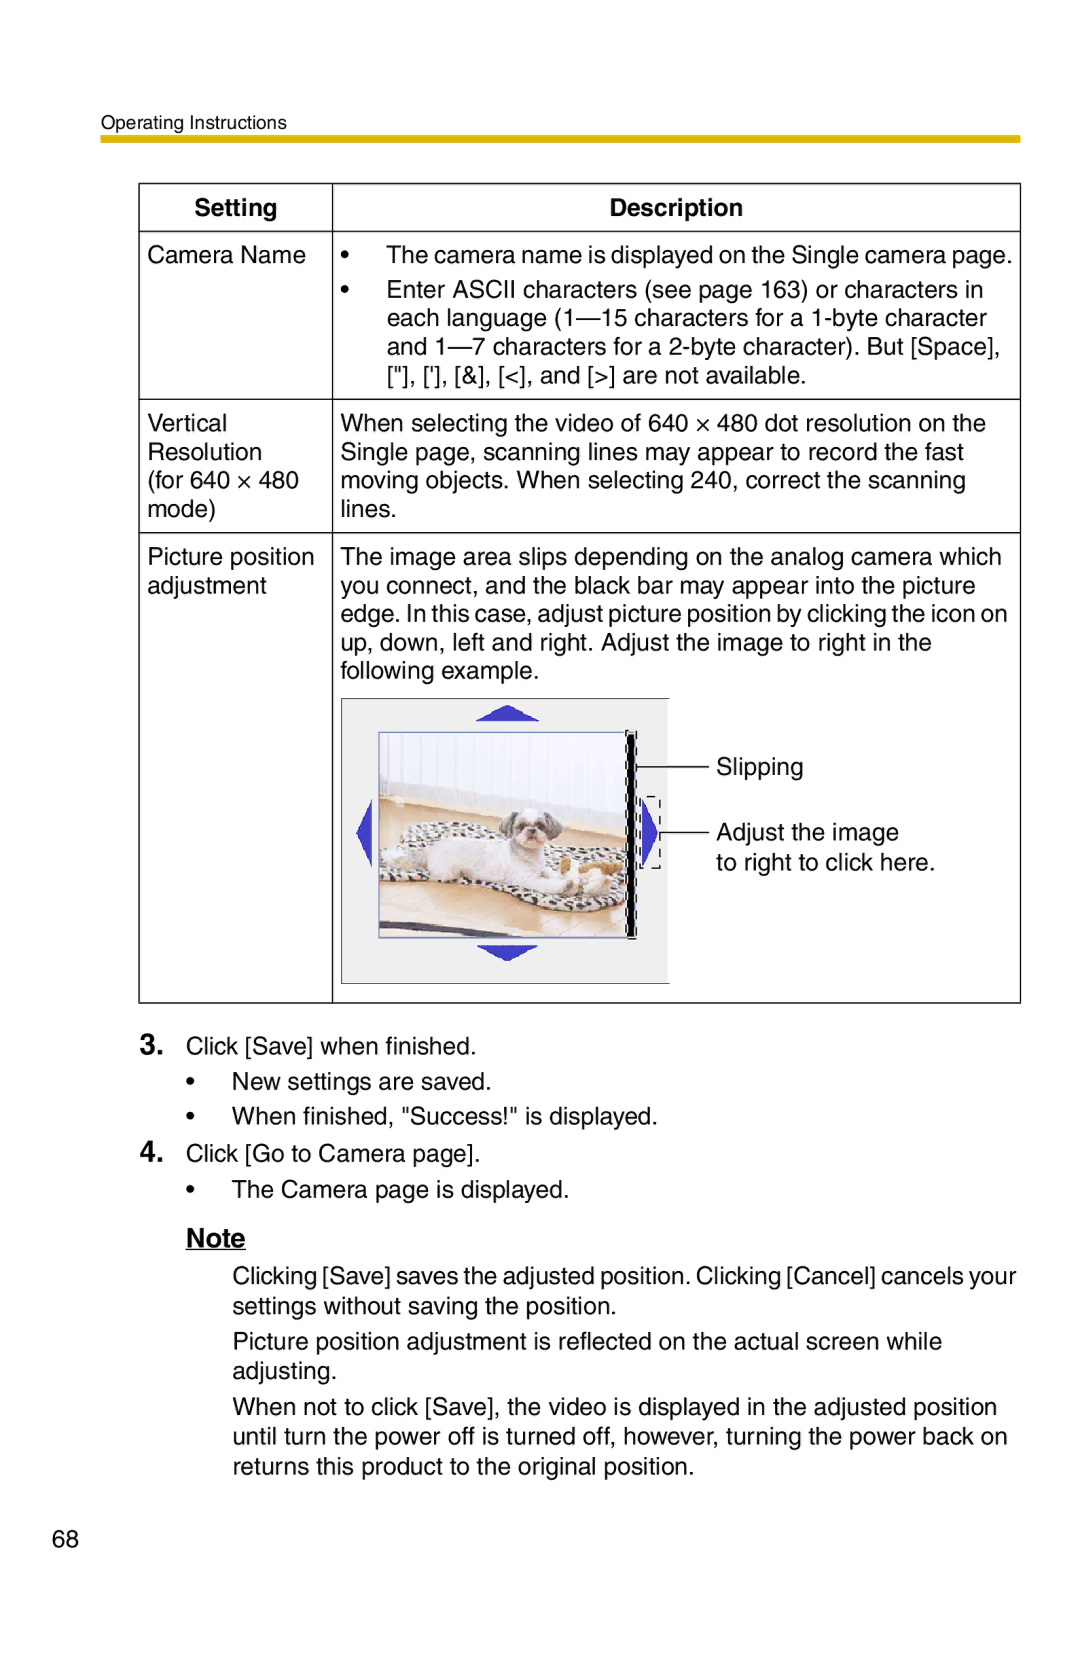
Picture position | The image area slips depending on the analog camera which |
adjustment | you connect, and the black bar may appear into the picture |
| edge. In this case, adjust picture position by clicking the icon on |
| up, down, left and right. Adjust the image to right in the |
| following example. |
Slipping
Adjust the image
to right to click here.
3.Click [Save] when finished.
•New settings are saved.
•When finished, "Success!" is displayed.
4.Click [Go to Camera page].
•The Camera page is displayed.
Note
Clicking [Save] saves the adjusted position. Clicking [Cancel] cancels your settings without saving the position.
Picture position adjustment is reflected on the actual screen while adjusting.
When not to click [Save], the video is displayed in the adjusted position until turn the power off is turned off, however, turning the power back on returns this product to the original position.
68