
CS-KS18B4UW & CZ-18BT1U, CS-KS12NB41 & CZ-18BT1U, CU-KS12NK1A, CU-KS18NKUA specifications
Panasonic has long been a reputable name in the HVAC (Heating, Ventilation, and Air Conditioning) industry, continuously innovating to provide efficient and sustainable solutions. Among their latest offerings, the CU-KS18NKUA, CS-KS18B4UW, CU-KS12NK1A, and CS-KS12NB41 split systems stand out for their advanced features and technologies designed to enhance user comfort while minimizing environmental impact.The CU-KS18NKUA and CS-KS18B4UW units are high-capacity air conditioning systems that cater to larger spaces. One of their defining features is the inverter technology, which allows the compressor to adjust its speed according to the demand, leading to significant energy savings. The units operate quietly, contributing to a peaceful environment whether in homes or offices. Furthermore, the super-efficient energy consumption aligns with modern sustainability practices, reducing users' carbon footprints.
The advanced R32 refrigerant used in these systems is another highlight. R32 is known for its lower global warming potential compared to traditional refrigerants, making it an eco-friendly choice. These models are equipped with a powerful cooling capability while maintaining a compact and sleek design, seamlessly integrating into various interior styles.
In terms of indoor air quality, both models incorporate a multi-stage filtration system. This system effectively filters out dust, allergens, and harmful particles, ensuring cleaner indoor air. Additionally, the nanoe-G technology helps in deodorizing and purifying the air, enhancing the overall comfort and health of the environment.
The CU-KS12NK1A and CS-KS12NB41 models cater to smaller rooms but do not compromise on performance. They share similar inverter technology and energy-efficient characteristics as their larger counterparts, ensuring that users can enjoy a comfortable climate in a smaller footprint.
With an emphasis on user-friendly design, all these models come with intuitive remote controls, allowing for easy temperature adjustments and scheduling. Some units even offer Wi-Fi connectivity for remote access and monitoring via smartphone apps.
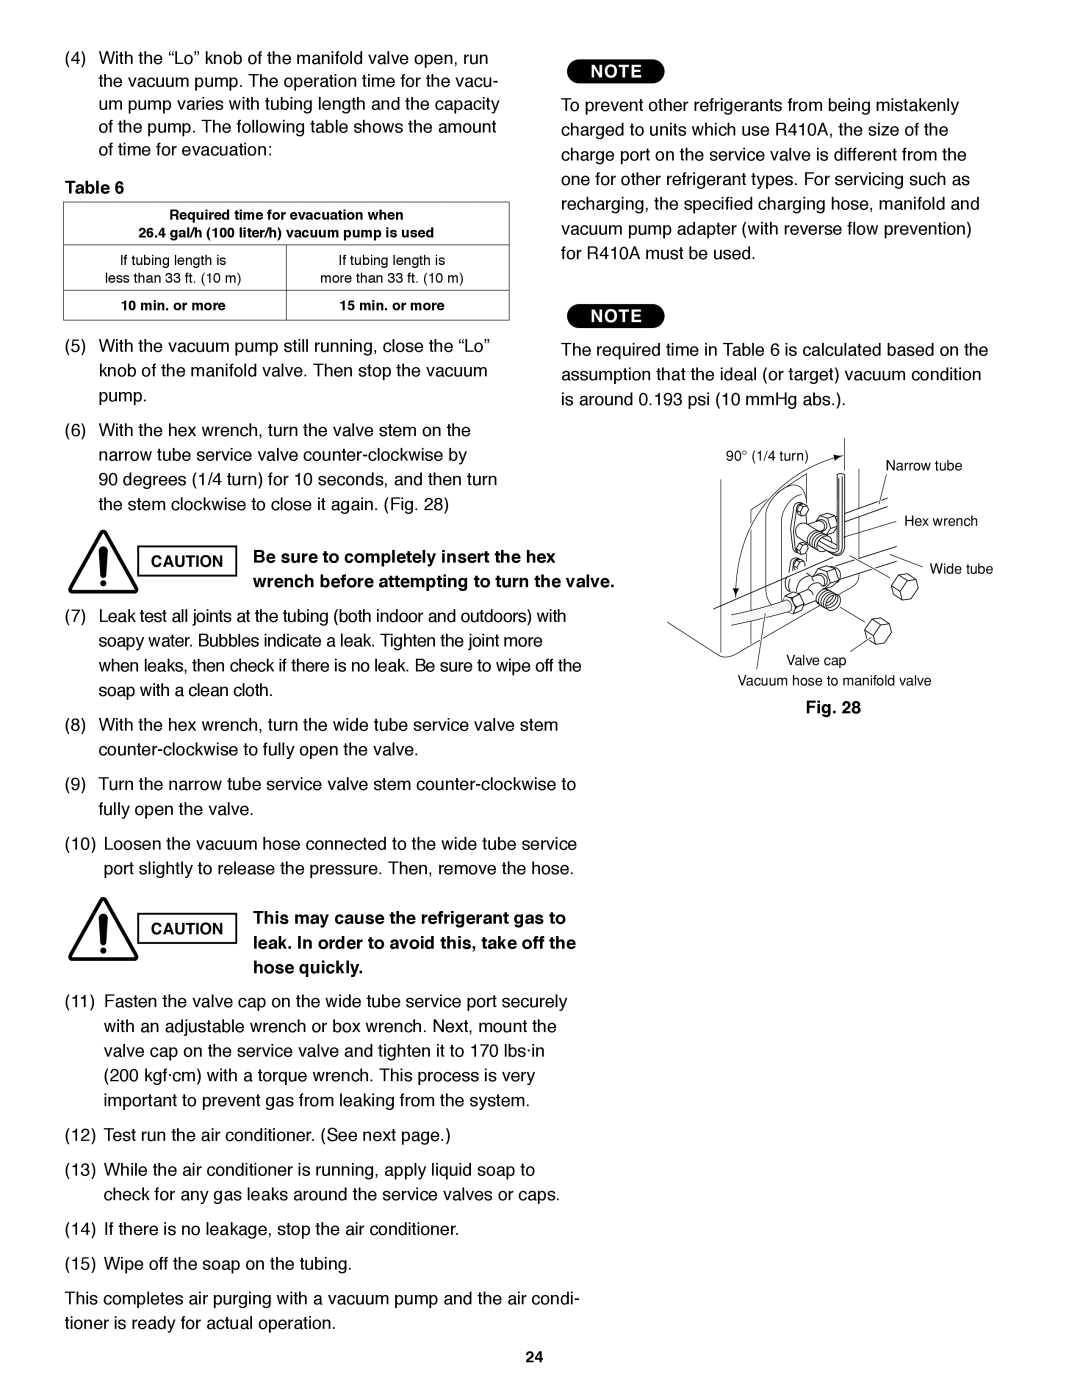
The CZ-18BT1U, often paired with these outdoor units, serves as an innovative air conditioning solution that supports energy efficiency and provides reliable cooling performance.
Overall, the Panasonic CU-KS and CS series units are ideal for consumers looking for modern, efficient, and environmentally friendly air conditioning solutions. Their combination of advanced technologies, user-centric design, and eco-conscious operation set them apart in the competitive HVAC market.