DVD-V7300D
For USE in the United Kingdom
La note suivante se trouve sur votre lecteur
Emplacement Sur le couvercle du lecteur
Following caution label appear on the player
Location On the bonnet of the player
Ge/It
Lage Auf der Haube des Players
La nota seguente si trova
Ubicazione Sul comperchio del lettore
Ubicación En la cubierta del reproductor
Before using
Check Accessories
Inserting batteries into Remote control
Component Features and Functions
Connection/etc
Contents
Basic Operations Settings
OperationsAdvanced
Precaution regarding use
Précautions à prendre concernant l’utilisation
Vorsichtshinweise zum Gebrauch
Precauzioni riguardo l’uso
Precauciones relacionadas con la utilizació n
Number of the audio
Disc types compatible with this unit
DVD identification markings
Disc operation methods
Frame/Time button FRM/TIME Search button Clear button
Names and Functions
Monaural audio out connector
PAL/NTSC indicator
U S E / K E Y B OA R D connector
Your amp Settings
Press §
Remote Control Operations
Playing DVDs, CDs Video CDs
Press
Press Return
When the menu screen has been displayed
Basic Operations
Press Menu
Stopping playback
Chapter Track skip Forward/skip back
Searching by chapter/track Number
Direct search with the title Numbers in the stop mode
Searching for a desired scene Search
Direct search with title numbers During playback
Still picture
Still frame Frame advance Frame reverse
Searching for a desired scene
Time search/Frame search
Repeat Play
Slow motion Play
Program Play
With , select the mode
Press Memory three times
Adding a program
Erasing the contents of a Program one by one
To stop program play
Programming a pause
Erasing the Program Disc which is used
Program Play
Viewing disc information While stopped
Press Display repeatedly during play- back
Viewing disc information During playback
Press theSUBTITLE button again
Switching the Angle Image Multi-Angle
Switching Subtitles during Playback
Press Subtitle during playback
Switching the stereo Left/right Audio
Switching the Audio During Playback
Video
Index Graphical User Interface GUI
Selecting Aspect ratio
Operating the Initial Setup Menu
Displaying the initial setup menu
Settings that cannot be changed during play Back
Wide TV
Selecting the aspect ratio
Images which appear in the TV
Regular TV
Switching still pictures
Changing visual settings
Switching the screen display on/off
Selecting the position
Changing visual settings
Turning the mark on/off
Details
Setting the Language
Setting the audio language
Setting a subtitle language
Select Other Press Enter
Setting the Language
Automatically setting the audio and subtitles
Audio language/ DVD language setting
Turning the subtitle display on/off
Setting the DVD menu language
Setting the language of the subtitles with enforced Display
With , select the appropriate number for the level
Setting viewing and listening restrictions Parental Lock
Setting the restriction level
Select General with
Press , select Password Change, and press Enter
Setting viewing and listening restrictions Parental Lock
Changing the code number
Select the background color
Making the ordinary settings
Setting the screen saver
Adjust the coloring with the screen
Dolby Digital Output
Setting the Digital Output
DTS Output
Or decoder that supports Mpeg
When the connected amplifier supports MPEG, set to Mpeg
KHz PCM Output
Mpeg Output
Surround Setting
Settings to Optimize Audio Quality
Setting the Digital Output
Setting the Digital Output
TruSurround and Virtual Dolby Digital
Dynamic Range Compression Setting
Setting which is not returned to the default status
Returning to the default settings at the time Shipment
Language code list
Setting which is returned to the default status
÷ Barcode/command stack function
Advanced Feature Operations
÷ Using the ADV.SETUP Menu
÷ Player control using mouse
÷ Video blackboard function
How to use
Above picture indicates the initial settings
ADV. Setup Menu settings
To access the ADV. Setup menu
Press and hold Setup for one second
Always Off The icon control panel is not displayed
ADV. Setup Menu settings
Case of a DVD
Player control using a mouse
Button Selection
Player control icon
Setting/correcting the current time
Weekly timer function operation/display
Set the time of the day
Example 1 To turn power on at 1030 on Wednesday
Setting the weekly timer
When the setting screen appears in step
Set the power ON/OFF time
Press =
Weekly timer function operation/display
Clearing the set time
Playing the specified title and chapter
Press 5 = Next Press or to select 005 and press
Setting to turn on player Power only
Setup for recalling the barcode/command stack
Groups from memory
When the setting area below on is blink
Setting the Weekly Timer Expandable Functions
Setting the day for the Weekly Timer
Select the Weekly Timer setup screen
Example
Setting the power to turn on Off in the other day
Setting the power to turn on and off more than two times
Same day
Overlap
Examples of when the times set for the Weekly Timer
Will be ignored
Playing the specified title and chapter
Power on start function
Setting the power on start Function
Playing the top menu
Press 5 = Next Press or to select 005 and press Enter
Power on start function
Turning off the Power on
Example To execute Barcode/Command stack group
Changed.Advanced Operations
Barcode/Command stack function
Basic usage
Advanced usage
÷ BARCODE/COMMAND is displayed
Barcode/Command stack setting
Displaying the Barcode Command stack screen
Barcode/Command screen
Press and hold
Direct setting using a barcode reader
Setting using the remote Control unit
Read a barcode with a barcode reader Send it to the player
Barcode/Command stack setting
Perform steps 1 to 4 in Example
When the word Title is blinking, enter 00 in the Title
Press RPT A-Bwhile the Title number is Blinking
Angle
Barcode/Command stack setting
Setting the Subtitle, Audio
To cancel input in the middle
Press Memory
Saving Barcode Command stack
Imput Barcode/ Command stack
To delete a previously
Input Barcode/ Command Stack
Adding a step in a previously input Barcode/Command Stack
Correcting a previously
Select no with or and press
Grouping some Barcode/Command Stacks
Grouping some Barcode/Command Stacks
Methods of Grouping
Switching the Barcode Command Stack group
Grouping some Barcode/Command Stacks
Deleting a group
Cursor button Right direction Press Enter
Select the group to be deleted by pressing
÷This deletes the selected group
Dividing a previously Input group
Ton Right direction and press Enter
Advanced
Move the ‰ pointer to INS by pressing Press Enter
Move the ‰pointer to Save by pressing the cursor but
Change the group with Prev
Joining two Barcode Command Stack groups
Operation is performed in step
To execute steps in a command group
Using a Barcode/Command Stacks
Recalling/executing barcode Commands in memory
To excute a barcode command group
Select a step by pressing
Function. OperationsAdvanced
Press Recall
Select a group by pressing Prev Next
Activating the blackboard Function
Operation using the mouse Or keyboard
Inputting characters
Drawing a picture
Using the drawing tools
Details on the blackboard
Character Input/Output drawing DVD video blackboard
Saving characters or pictures
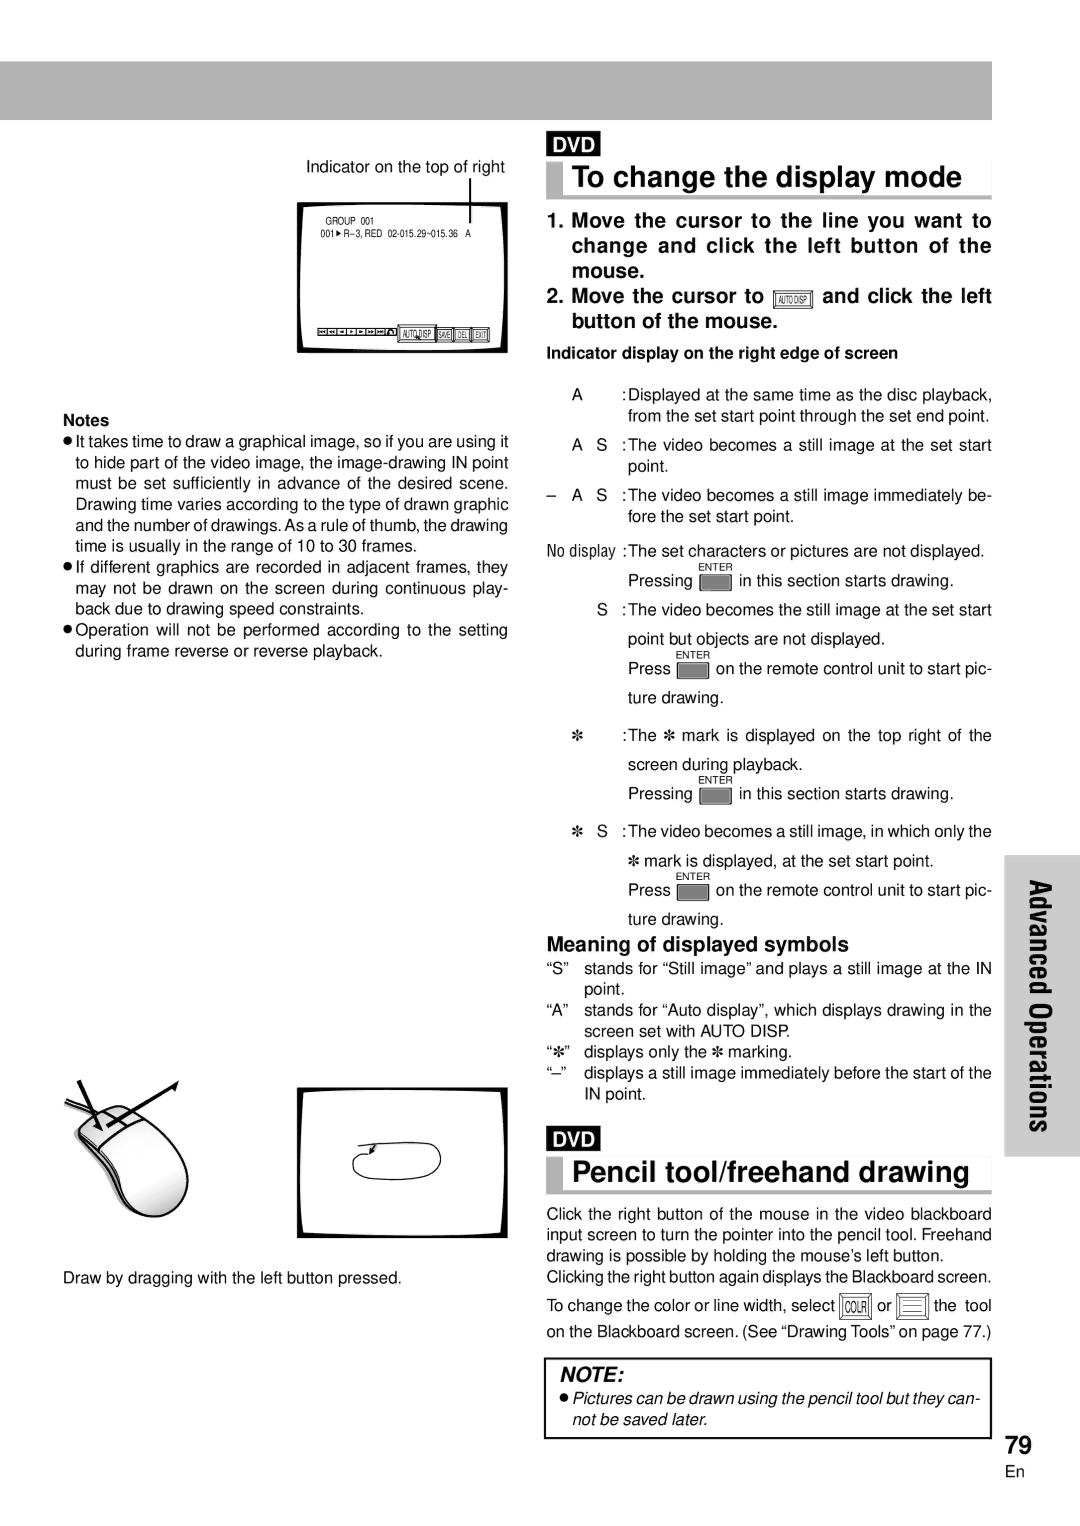
Pencil tool/freehand drawing
To change the display mode
Meaning of displayed symbols
Indicator display on the right edge of screen
To execute steps in a group
Grouping video blackboards
Grouping blackboards
To select the group
Select a step by pressing Press
Recalling/executing
Previously input blackboards while observing their list
Select a group by pressing
External synchronizing function
Video text retrieval
Synchronized use of 2 or more players
Screen shows the following
How to display total
Connecting the player
Precautions when connecting the player
About MOD. Modulation PAL
TV System selector
Sync signal output terminal
Connect to the Component Video input
DVD, LD, Audio PCM/ /DTS Video
Connection example Digital Audio recorder
Connection example AV amplifier
UC-V108BC
When used in wireless mode
When used in wired mode
Laser Barcode Scanner
Troubleshooting
Terms
Caractéristiques Techniques
Specifications
Dati tecnici
Technische Daten
Especificaciones
Connection/etc
Information about this product