LCD Monitor Instructions
Adjustment Procedure (Picture Menu)
8Adjust the scaling
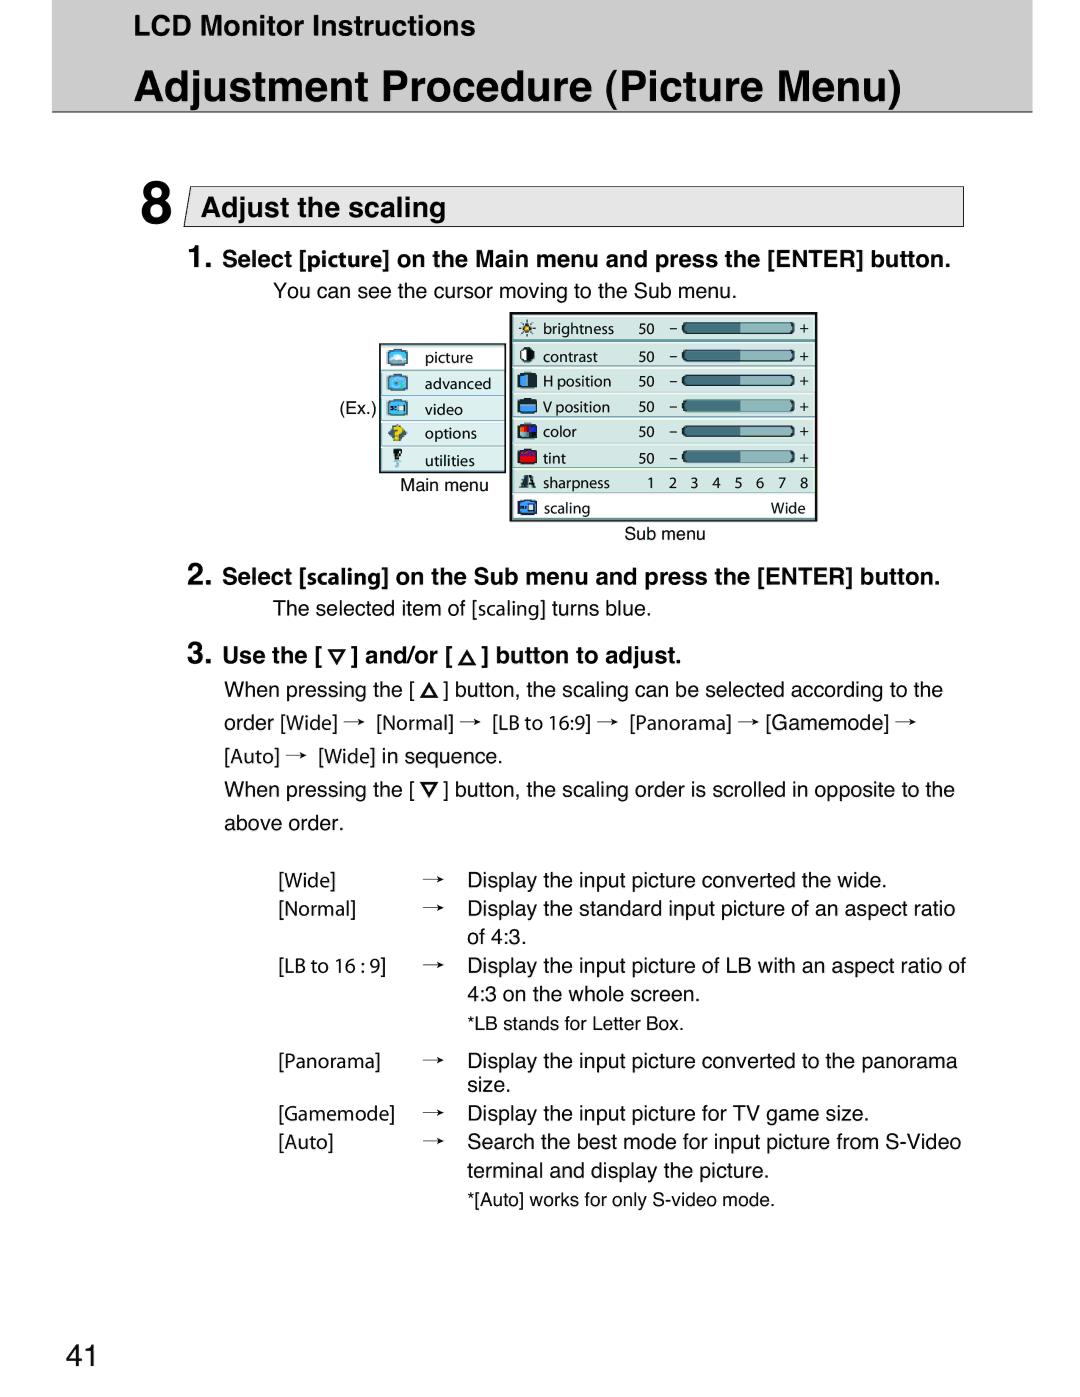
1. Select [picture] on the Main menu and press the [ENTER] button.
You can see the cursor moving to the Sub menu.
|
| brightness | 50 | - | + |
| picture | contrast | 50 | - | + |
| advanced | H position | 50 | - | + |
(Ex.) | video | V position | 50 | - | + |
| options | color | 50 | - | + |
| utilities | tint | 50 | - | + |
| Main menu | sharpness | 1 | 2 3 4 5 | 6 7 8 |
|
| scaling |
|
| Wide |
Sub menu
2. Select [scaling] on the Sub menu and press the [ENTER] button.
The selected item of [scaling] turns blue.
3. Use the [  ] and/or [
  ] button to adjust.
When pressing the [ ![]() ] button, the scaling can be selected according to the order [Wide] / [Normal] / [LB to 16:9] / [Panorama] / [Gamemode] / [Auto] / [Wide] in sequence.
] button, the scaling can be selected according to the order [Wide] / [Normal] / [LB to 16:9] / [Panorama] / [Gamemode] / [Auto] / [Wide] in sequence.
When pressing the [ ![]() ] button, the scaling order is scrolled in opposite to the above order.
] button, the scaling order is scrolled in opposite to the above order.
[Wide] | / Display the input picture converted the wide. |
[Normal] | / Display the standard input picture of an aspect ratio |
| of 4:3. |
[LB to 16 : 9] | / Display the input picture of LB with an aspect ratio of |
| 4:3 on the whole screen. |
| *LB stands for Letter Box. |
[Panorama] | / Display the input picture converted to the panorama |
| size. |
[Gamemode] | / Display the input picture for TV game size. |
[Auto] | / Search the best mode for input picture from |
| terminal and display the picture. |
| *[Auto] works for only |
41
