|
| VPN | |
|
|
|
|
| Subject Name | This is the name which other organizations will see as | |
|
| the Holder (owner) of this Certificate. This should be | |
|
| your registered business name or official company | |
|
| name. Generally, all Certificates should have the same | |
|
| value in the Subject field. |
|
| Hash Algorithm | Select the desired option. | |
|
|
|
|
| Signature Algorithm | Select the desired option. RSA is recommended. | |
|
|
|
|
| Signature Key | Select the desired option. Normally, 1024 bits provides | |
| Length | adequate security. |
|
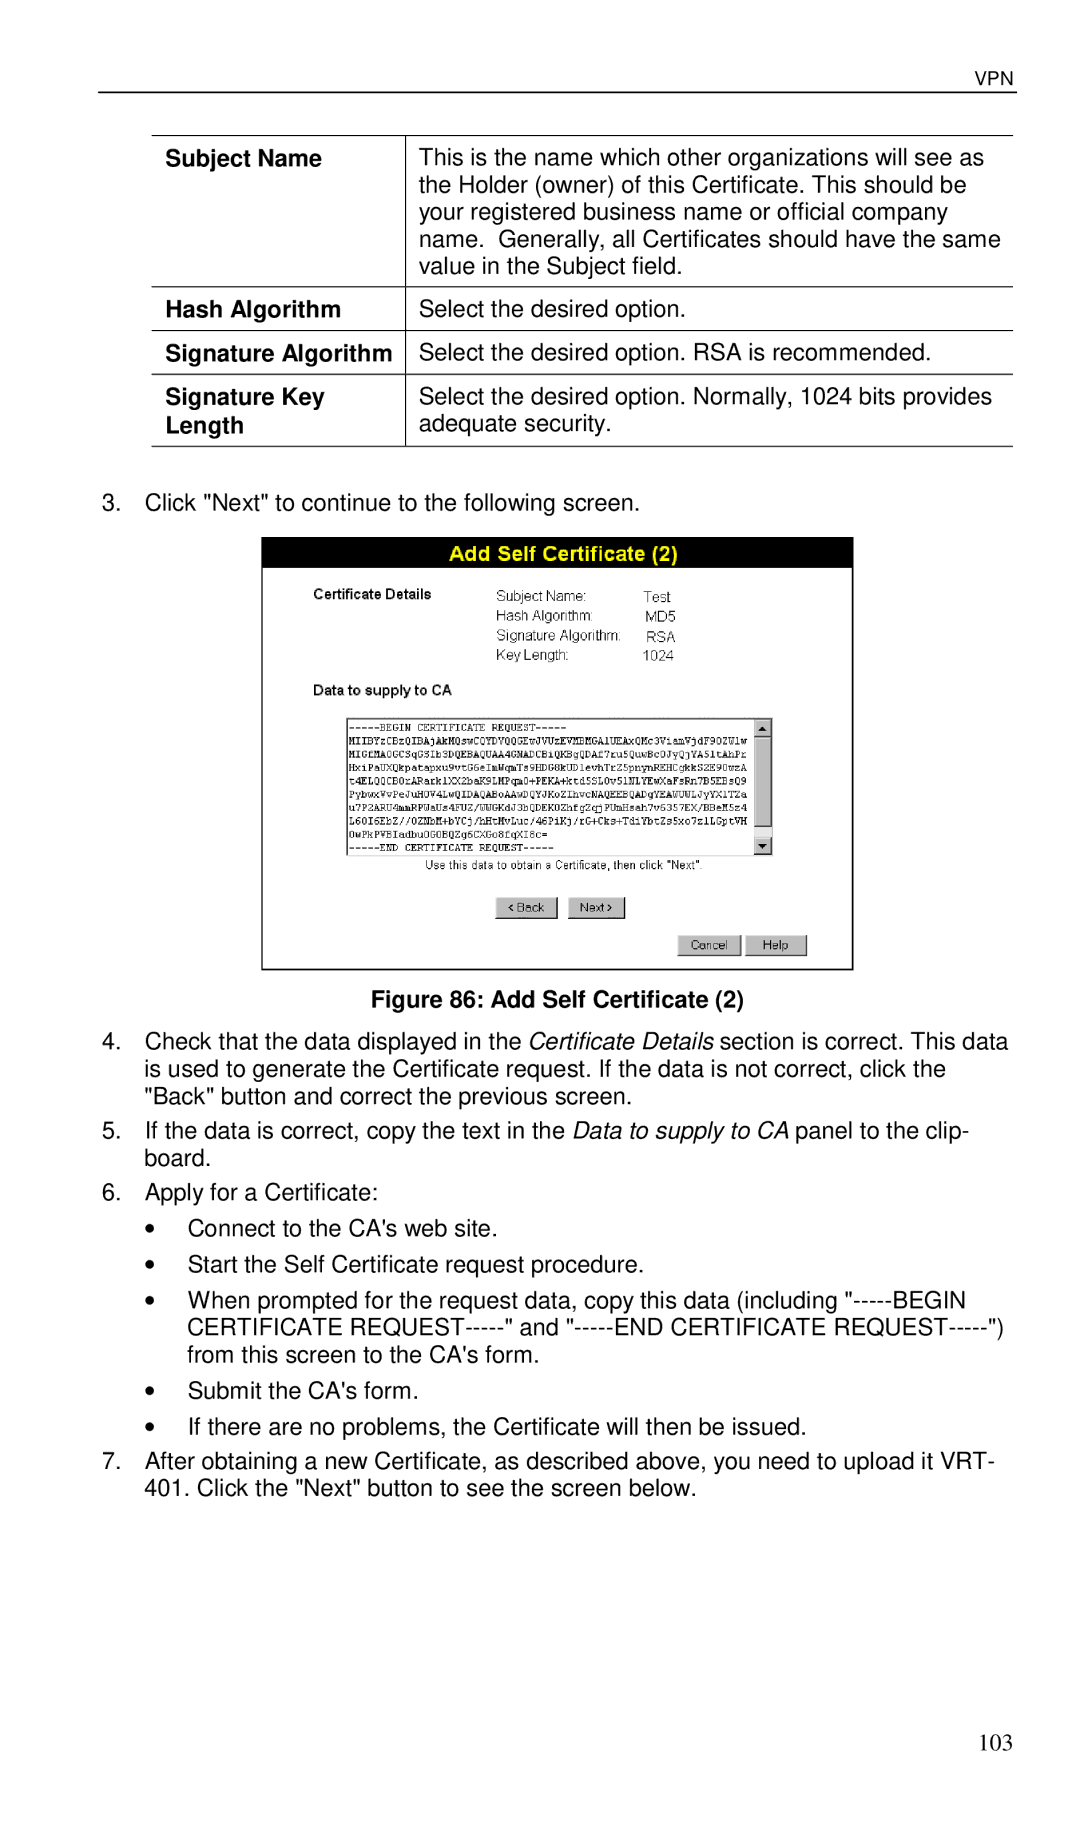
3. Click "Next" to continue to the following screen.
Figure 86: Add Self Certificate (2)
4.Check that the data displayed in the Certificate Details section is correct. This data is used to generate the Certificate request. If the data is not correct, click the "Back" button and correct the previous screen.
5.If the data is correct, copy the text in the Data to supply to CA panel to the clip- board.
6.Apply for a Certificate:
∙Connect to the CA's web site.
∙Start the Self Certificate request procedure.
∙When prompted for the request data, copy this data (including
∙Submit the CA's form.
∙If there are no problems, the Certificate will then be issued.
7.After obtaining a new Certificate, as described above, you need to upload it VRT- 401. Click the "Next" button to see the screen below.
103
