Tsunami MP.11 Installation and Management
MOUNTING THE MP.11
The following are the mounting options for the MP.11:
▪
▪
▪
Desktop Mount
Wall Mount
Ceiling Mount
Desktop Mounting
This procedure consists of attaching the metal base to the MP.11 unit. See “Installing the MP.11” on page 9.
Wall Mounting
Follow these steps to mount the MP.11 on a wall.
1.Identify the location where you intend to mount the unit.
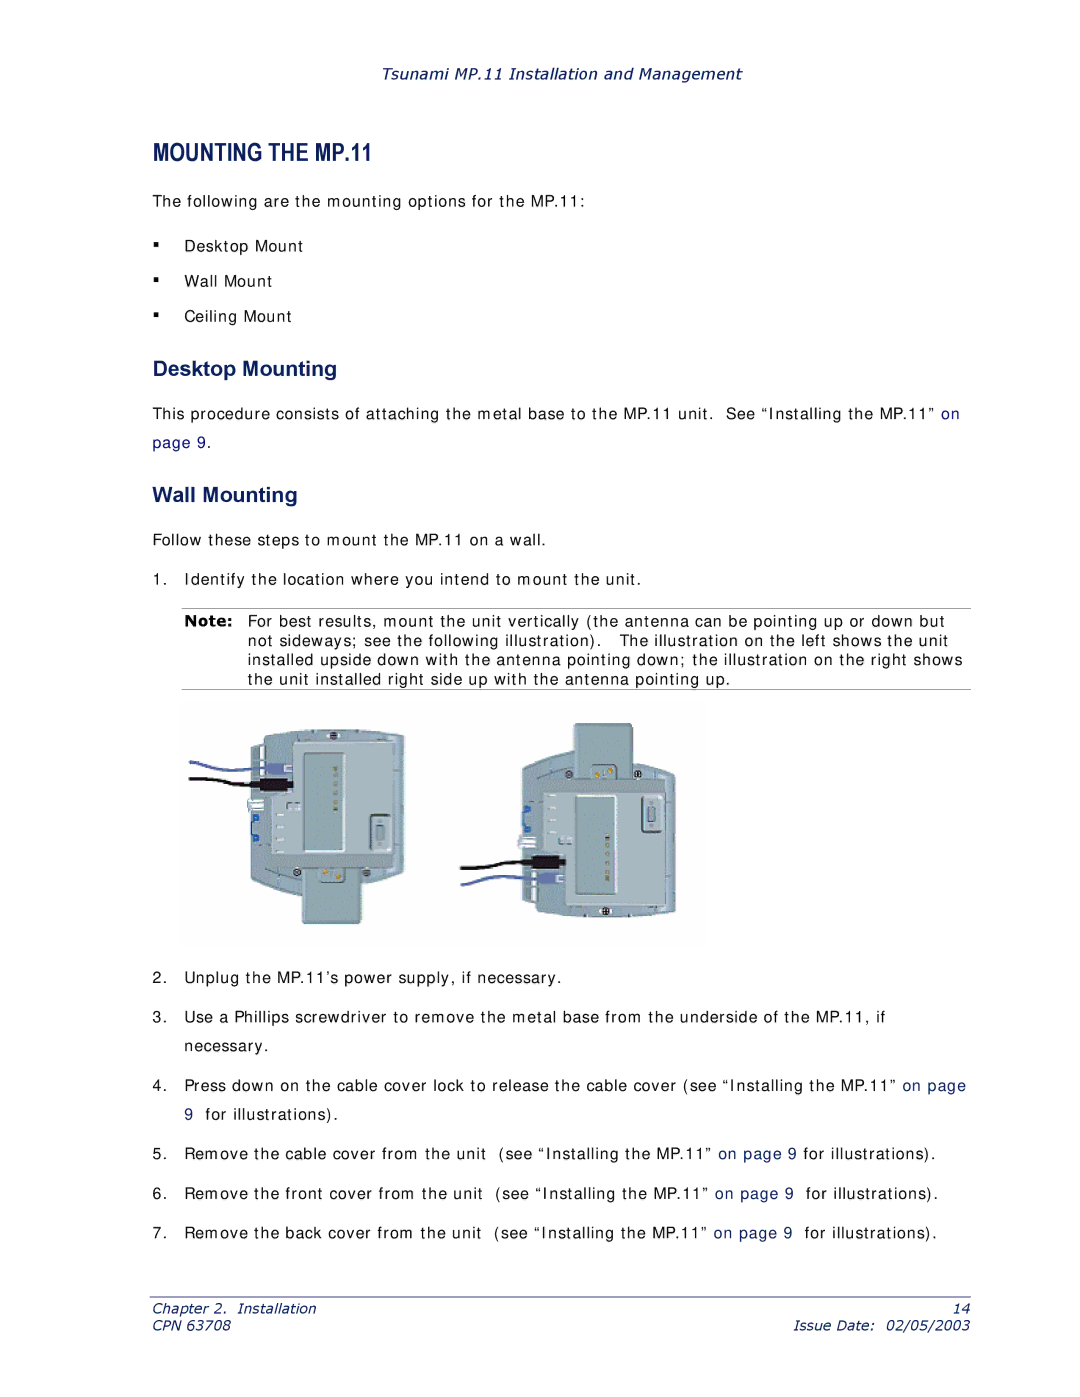
Note: For best results, mount the unit vertically (the antenna can be pointing up or down but not sideways; see the following illustration). The illustration on the left shows the unit installed upside down with the antenna pointing down; the illustration on the right shows the unit installed right side up with the antenna pointing up.
2.Unplug the MP.11’s power supply, if necessary.
3.Use a Phillips screwdriver to remove the metal base from the underside of the MP.11, if necessary.
4.Press down on the cable cover lock to release the cable cover (see “Installing the MP.11” on page 9 for illustrations).
5.Remove the cable cover from the unit (see “Installing the MP.11” on page 9 for illustrations).
6.Remove the front cover from the unit (see “Installing the MP.11” on page 9 for illustrations).
7.Remove the back cover from the unit (see “Installing the MP.11” on page 9 for illustrations).
Chapter 2. Installation | 14 |
CPN 63708 | Issue Date: 02/05/2003 |