
AutoSet CS 2 specifications
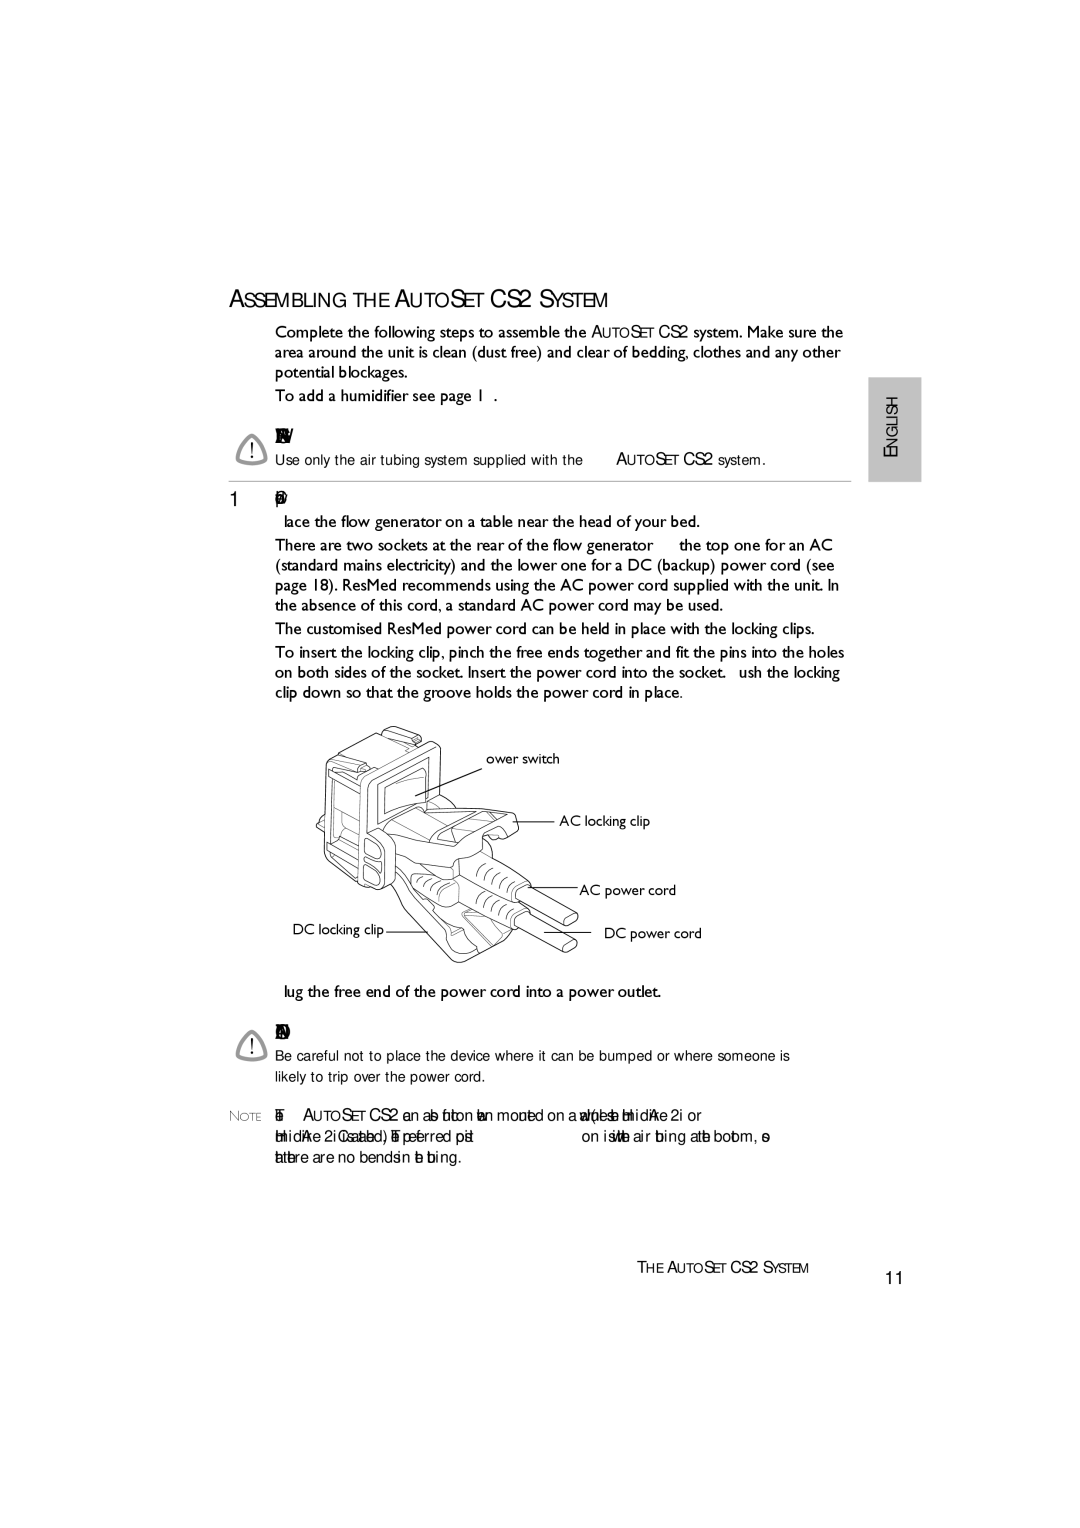
ResMed AutoSet CS 2 is a state-of-the-art device designed for individuals suffering from complex sleep apnea and central sleep apnea. This advanced treatment solution leverages innovation and cutting-edge technology to provide optimal comfort and effective therapy during sleep, ultimately helping users achieve a better quality of life.One of the standout features of the AutoSet CS 2 is its sophisticated auto-adjusting pressure capabilities. The device automatically detects and responds to the patient's breathing patterns throughout the night, adjusting the pressure levels in real time to ensure that airway obstructions are effectively managed. This technology helps prevent both hypopneas and apneas, providing a seamless therapy experience.
The device is equipped with ResMed's proprietary Easy-Breathe technology, which allows for smooth pressure changes that mimic the user's natural breathing cycle. This feature enhances user comfort, making it easier for individuals to adapt to CPAP therapy and continue using the device consistently over time.
Another remarkable characteristic of the AutoSet CS 2 is its integrated wireless connectivity. This connectivity facilitates remote monitoring and data sharing with healthcare professionals, enabling more effective management of treatment progress. By analyzing sleep data, providers can make informed adjustments to therapy, ensuring that the patient receives the best possible care.
The AutoSet CS 2 also includes a user-friendly interface with a high-resolution color display, making it easy for users to navigate menus and access vital information about their sleep patterns and therapy effectiveness. With its compact design, the device is portable and can easily be used at home or while traveling.
In terms of comfort, the AutoSet CS 2 features a quiet operation, enabling a peaceful sleep environment. It is compatible with various masks, providing flexibility for users to find the best fit for their personal comfort preferences.
Overall, the ResMed AutoSet CS 2 is a leading choice for individuals with complex sleep apnea. With its combination of advanced features, user-centric design, and state-of-the-art technology, it empowers users to take control of their sleep and improve their overall health and well-being.