Setting the clock format
The clock display used in standby mode and on the playing mode screens can be set to 12 or 24 hour format. The selected format is then also used when setting the alarms.
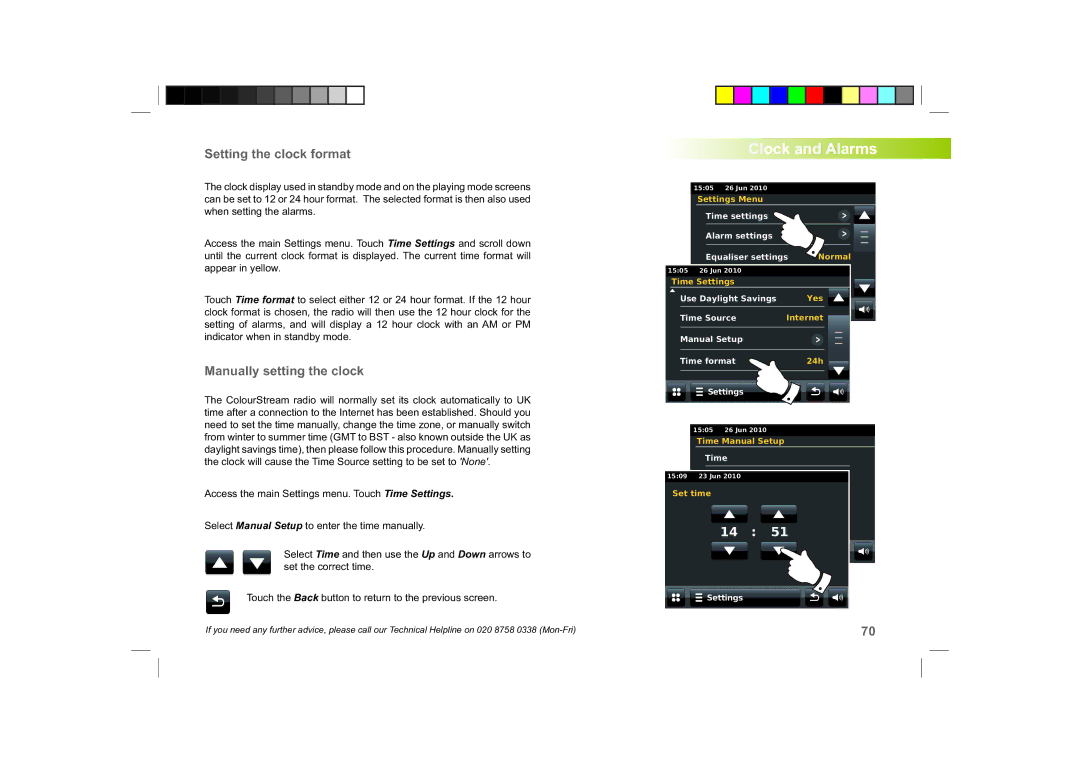
Access the main Settings menu. Touch Time Settings and scroll down until the current clock format is displayed. The current time format will appear in yellow.
Touch Time format to select either 12 or 24 hour format. If the 12 hour clock format is chosen, the radio will then use the 12 hour clock for the setting of alarms, and will display a 12 hour clock with an AM or PM indicator when in standby mode.
Manually setting the clock
The ColourStream radio will normally set its clock automatically to UK time after a connection to the Internet has been established. Should you need to set the time manually, change the time zone, or manually switch from winter to summer time (GMT to BST - also known outside the UK as daylight savings time), then please follow this procedure. Manually setting the clock will cause the Time Source setting to be set to 'None'.
Access the main Settings menu. Touch Time Settings.
Select Manual Setup to enter the time manually.
Select Time and then use the Up and Down arrows to set the correct time.
Touch the Back button to return to the previous screen.
Clock and Alarms
15:05 26 Jun 2010
Settings Menu
Time settings
Alarm settings
| Equaliser settings | Normal | ||
15:05 | 26 Jun 2010 |
|
| |
| Network settings |
|
| |
Time Settings |
|
| ||
Use Daylight Savings |
| Yes | ||
|
| Settings | Internet | |
Time Source | ||||
Manual Setup |
|
| ||
Time format |
| 24h | ||
| Settings |
|
| |
| 15:05 | 26 Jun 2010 |
|
|
Time Manual Setup
| Time |
|
|
15:09 | 23 Jun 2010 |
|
|
Set time |
|
| |
| 14 | : | 51 |
| Settings |
| |
| Settings |
|
|
If you need any further advice, please call our Technical Helpline on 020 8758 0338 | 70 |
