Editing an automix
As part of the new software, select the area to edit. You can now select an area (marker), and edit the automix data in that area. To edit the automix data, you must first select the area to which your editing will apply.
Erasing data from a specific area (Erase)
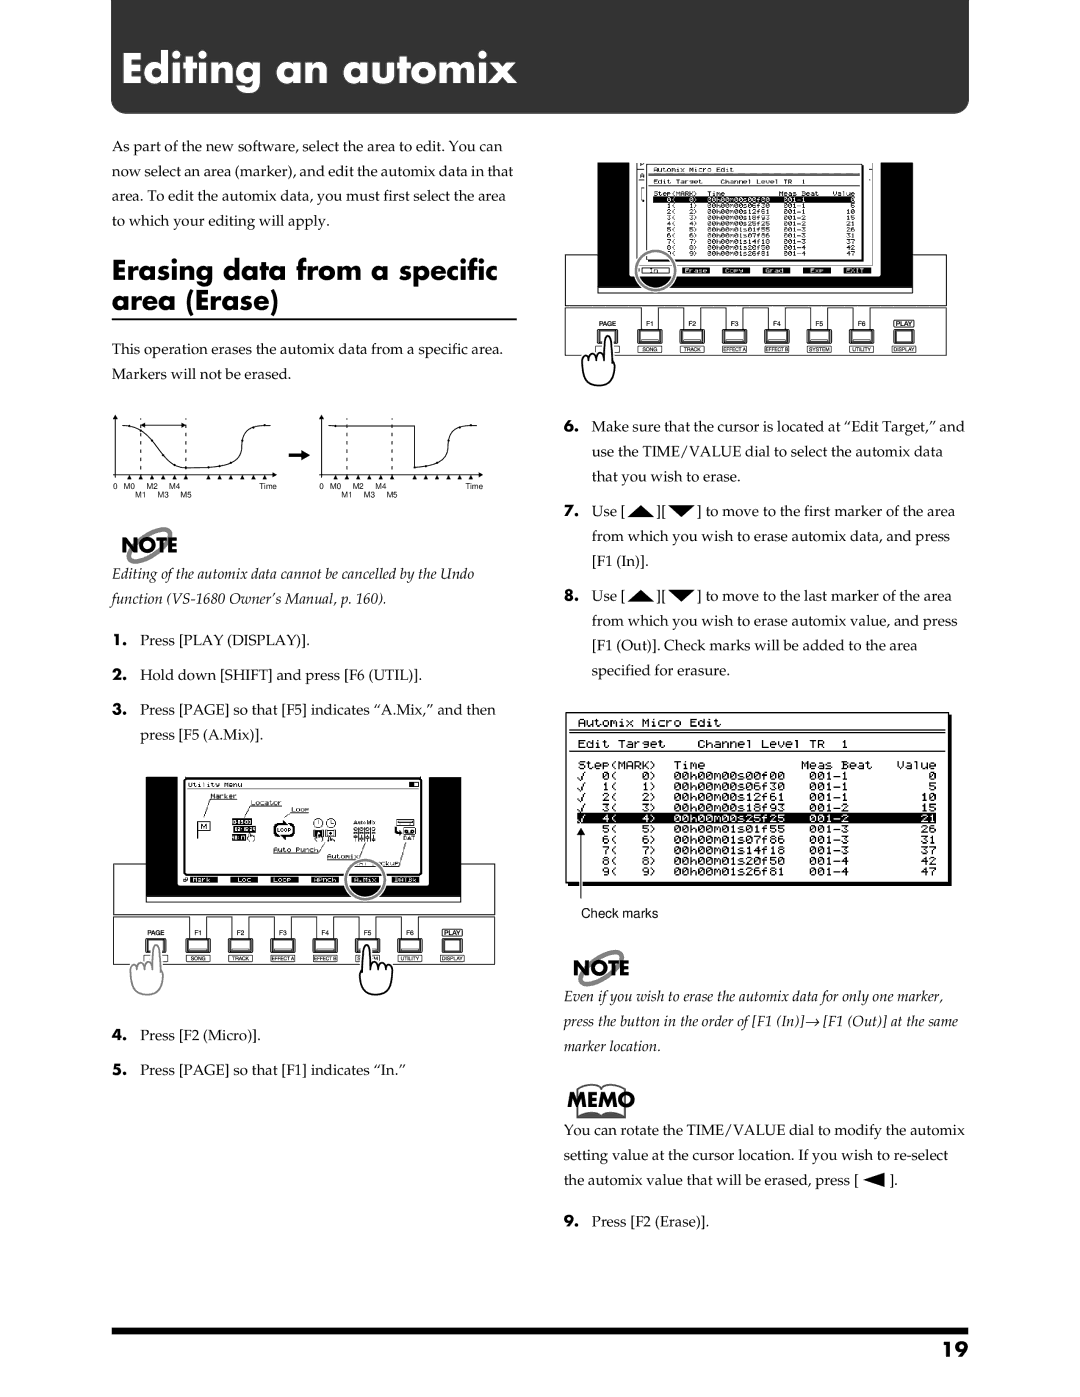
This operation erases the automix data from a specific area. Markers will not be erased.
fig.4-01.e
0 M0 | M2 | M4 | Time | 0 M0 | M2 M4 | Time |
M1 | M3 | M5 |
| M1 | M3 | M5 |
NOTE
Editing of the automix data cannot be cancelled by the Undo function
1.Press [PLAY (DISPLAY)].
2.Hold down [SHIFT] and press [F6 (UTIL)].
3.Press [PAGE] so that [F5] indicates “A.Mix,” and then press [F5 (A.Mix)].
4.Press [F2 (Micro)].
5.Press [PAGE] so that [F1] indicates “In.”
6.Make sure that the cursor is located at “Edit Target,” and use the TIME/VALUE dial to select the automix data that you wish to erase.
7.Use [![]() ][
][![]() ] to move to the first marker of the area from which you wish to erase automix data, and press [F1 (In)].
] to move to the first marker of the area from which you wish to erase automix data, and press [F1 (In)].
8.Use [![]() ][
][![]() ] to move to the last marker of the area from which you wish to erase automix value, and press [F1 (Out)]. Check marks will be added to the area
] to move to the last marker of the area from which you wish to erase automix value, and press [F1 (Out)]. Check marks will be added to the area
specified for erasure.
fig.4-04.e
Check marks
NOTE
Even if you wish to erase the automix data for only one marker, press the button in the order of [F1 (In)]→ [F1 (Out)] at the same marker location.
MEMO
You can rotate the TIME/VALUE dial to modify the automix setting value at the cursor location. If you wish to
the automix value that will be erased, press [ ![]() ].
].
9.Press [F2 (Erase)].
19