Installation
AutoScope Lens Motor (Rear)
Power AC Input
Switch
3.5-mm  mini plug
Retractable Screen orSe ial Noother
Union City, CA
device
OUTPUTS
R/PrG/Y
|
|
|
|
|
|
|
|
| DHD Controller |
| |
|
|
|
|
|
|
|
|
| Rear Panel |
| |
|
|
|
|
|
|
| SYSTEM CONTROL INTERFACE | CAUTION | ! | ||
|
| INPUTS |
|
|
|
|
|
|
| RISK OF ELECTRIC SHOCK | |
|
|
|
|
|
|
|
|
| DO NOT OPEN | ||
R/Pr | G/Y | B/Pb | H | V |
|
|
|
|
| AVIS: RISQUE DE CHOC | |
|
|
|
|
|
|
| TRIGGERS |
|
| CAUTION: TO REDUCE THE RISK OF ELECTRIC | |
|
|
|
|
|
|
|
|
|
| ||
|
|
|
|
| HD1 |
|
|
|
| SHOCK, DO NOT REMOVE COVER. NO USER- |
|
|
|
|
|
|
|
|
|
| SERVICEABLE PARTS INSIDE. REFER SERVICING | ||
|
|
|
|
|
| 1 | 2 | 3 | IR | TO QUALIFIED SERVICE CENTER. |
|
|
|
|
|
|
|
|
| ||||
|
|
|
|
| HD2 |
|
|
|
|
|
|
R/Pr | G/Y | B/Pb | H | V |
|
|
| WARNING: TO REDUCE THE RISK OF FIRE |
|
| |
|
|
|
| OR ELECTRIC SHOCK, DO NOT EXPOSE |
|
| |||||
|
|
|
|
|
|
|
|
| THIS APPLIANCE TO RAIN OR MOISTURE. |
|
|
|
|
| SDI | Pb | Pr | Y |
|
|
|
| |
|
|
|
|
|
|
|
| ||||
|
|
|
|
|
|
|
|
|
| ||
DVI 1 |
| DVI 2 | Option |
| Component Video | Video | Made In USA |
| |||
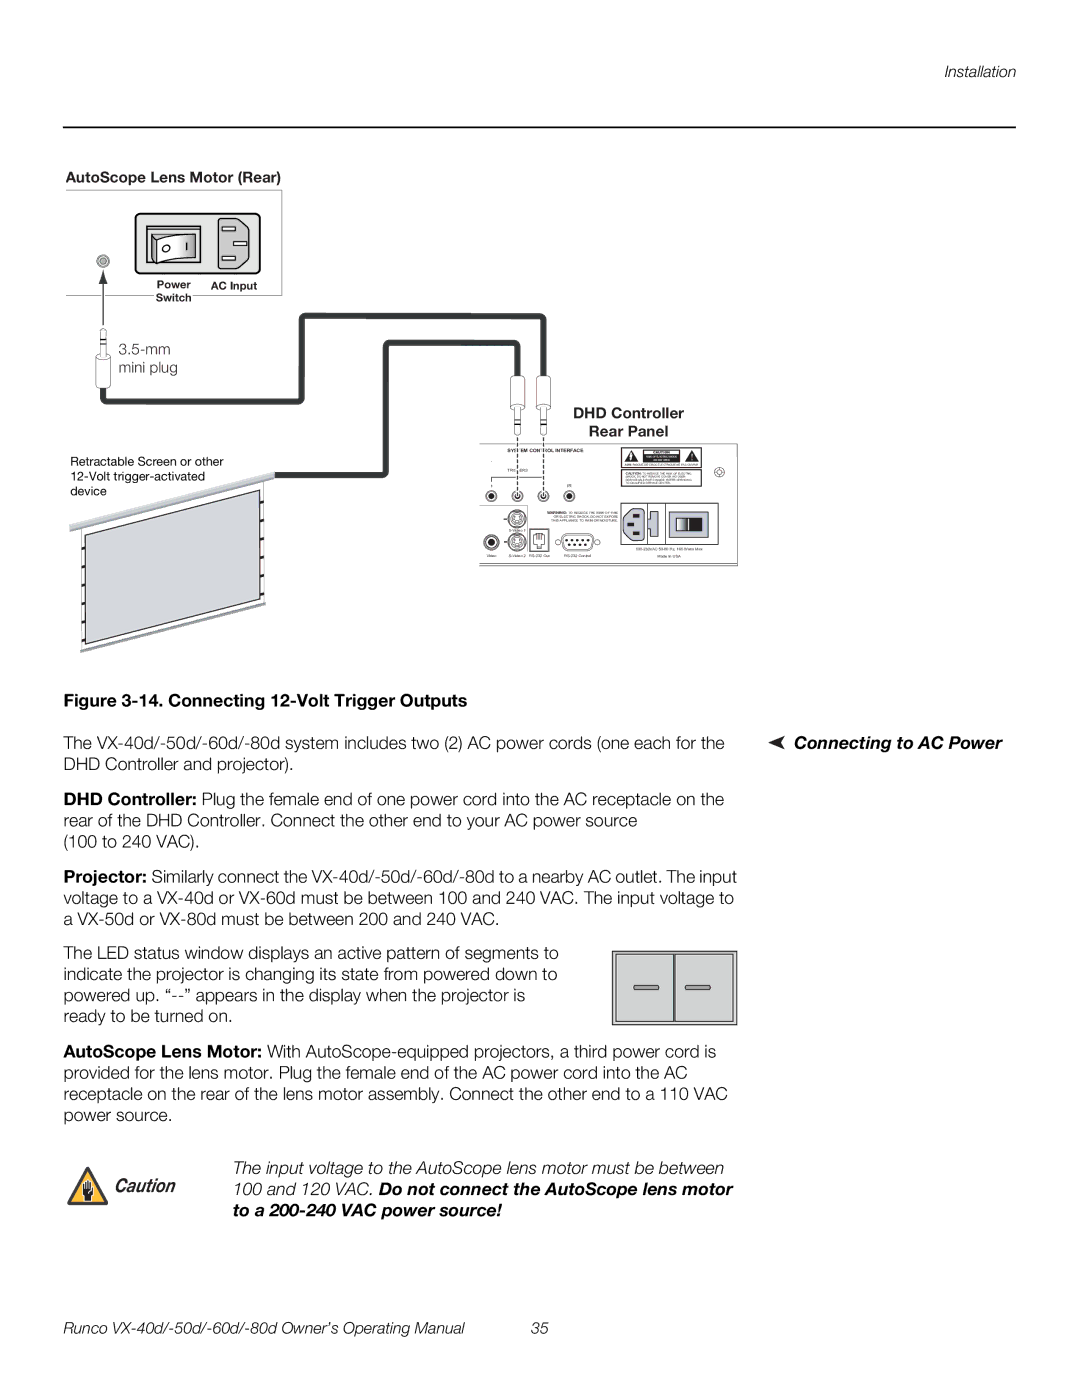
Figure |
| ||
The | Connecting to AC Power | ||
DHD Controller and projector). |
| ||
DHD Controller: Plug the female end of one power cord into the AC receptacle on the |
| ||
rear of the DHD Controller. Connect the other end to your AC power source |
| ||
(100 to 240 VAC). |
|
|
|
Projector: Similarly connect the |
| ||
voltage to a |
| ||
a |
| ||
The LED status window displays an active pattern of segments to |
|
| |
|
| ||
indicate the projector is changing its state from powered down to |
|
| |
powered up. |
|
| |
ready to be turned on. |
|
|
|
AutoScope Lens Motor: With |
| ||
provided for the lens motor. Plug the female end of the AC power cord into the AC |
| ||
receptacle on the rear of the lens motor assembly. Connect the other end to a 110 VAC |
| ||
power source. |
|
|
|
Caution | The input voltage to the AutoScope lens motor must be between |
| |
100 and 120 VAC. Do not connect the AutoScope lens motor |
| ||
to a
Runco | 35 |