Manuals
/
Samsung
/
Photography
/
Digital Camera
Samsung
Digimax 101
manual
Removing the USB Driver for Windows
Models:
Digimax 101
1
95
128
128
Download
128 pages
25.53 Kb
92
93
94
95
96
97
98
99
Specifications
Install
FAQ
Default camera setting
SELF-TIMER/ Right button
About the symbols
LCD monitor indicator
Connecting to Power
Symptom Causes Remedy
Reset YES Setup 2/3 Date Setup
Page 95
Image 95
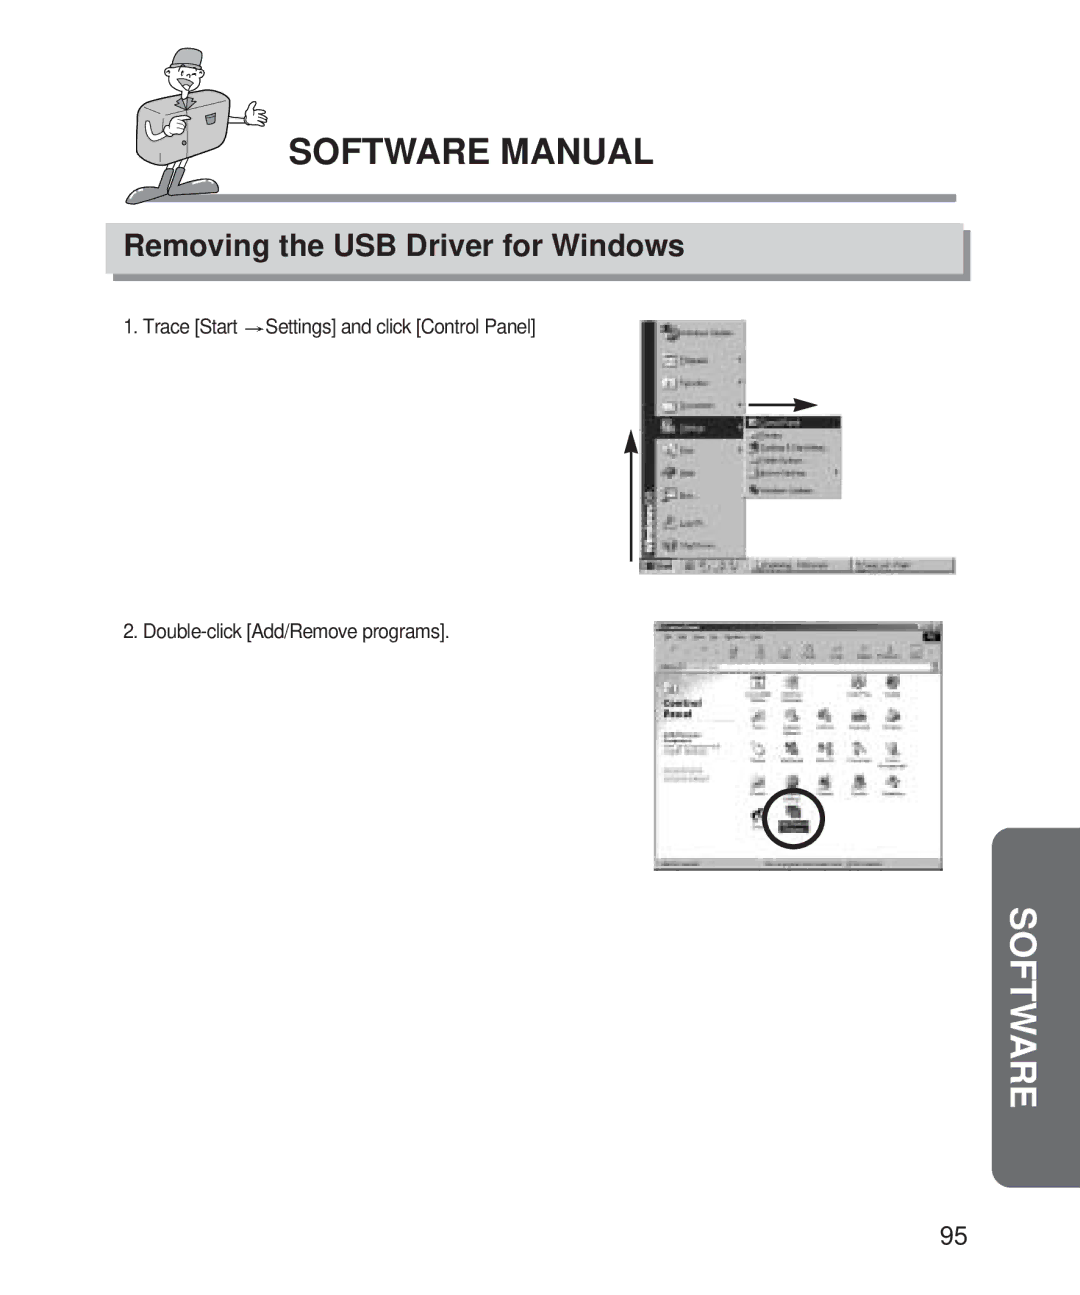
SOFTWARE MANUAL
Removing the USB Driver for Windows
1. Trace [Start
Settings] and click [Control Panel]
2.
Double-click
[Add/Remove programs].
SOFTWARE
95
Page 94
Page 96
Page 95
Image 95
Page 94
Page 96
Contents
English
Instructions
An FCC warning
Special Features
Contents
Advanced Software
Keep the manual in a safe place
About the symbols
Getting to Know Your Camera
Foreign objects into the camera through access
Safety Note
Do not use the flash in close proximity to people or animals
Ready
Viewing images on TV refer to
This Digital Camera can be Used for
This Digital Camera can be Used for
Manufacturer S Contents
Product ExteriorFront / Top / Side
Identification of Features
Card slot Battery chamber Strap eyelet
OK button p.38 Delete / Down button p.39
SELF-TIMER/ Right button
Product Exterior Back/bottom
Thumbnail / UP button p.39
Camera status LED
Viewfinder/Camera status LED
Camera status LED Picture area frame
0315
LCD monitor indicator
Recording mode
2002/09/01
100-0003
Play mode
0015
0050
Camera mode definition
Pressing
Selecting camera mode and menu
Pressing Mode button
Pressing Menu button
640X512
LCD monitor menu indicator
Camera mode Main menu Sub menu
Still Image 1/2 Setup Image Size
~0*~+5
Still Image 2/2
Auto Daylight Cloudy Sunset Tungsten
Quick View OFF LCD Brightness
Movie Clip Setup Exposure
ALL Image Lock Unlock YES
Setup Slide Show Protect Delete ALL
Lock
Unlock
Date Imprint YES Date Type
Setup 1/3
Beep OFF Format YES Power OFF
Reset YES Setup 2/3 Date Setup
NTSC/60Hz PAL/50Hz
Setup 2/3 Setup 3/3
Language Video OUT
English Français Deutsch Español Italiano
Preparation
Connecting to Power
Using the batteries
Battery condition indicator
Ready
Attaching the strap
Using the AC power adapter
Inserting the SD memory Card
Removing the SD memory card
Memory capacity
Instructions on how to use the SD memory card
Using a new Card for the first time
Maintenance of the SD memory card
Preserving the SD memory card data
Recording a Movie clip
Recording Mode
Starting Recording Mode
Recording a still image
Backlight compensated shot
Camera shake warning
Used for turning the camera power on / off
Using the camera button to adjust the camera
Mode button
Explanation of the 5-function button
Still Image mode Movie Clip mode
Digital zoom
OK button
Still Image mode Auto flash Movie Clip mode Flash offfixed
Selecting the flash mode
Default of each mode is listed below
Operate automatically
Flash mode indicator
Indicator Definition
If the subject or background is dark, the camera flash will
Selecting the self-timer
SELF-TIMER / Right button
Using the LCD monitor to adjust the camera
1280X1024
Still Image 1/2 Setup Image Size Quality Exposure
Image Size
Selecting the image size
Jpeg
Image Quality
Selecting the image quality
Selecting the exposure value
Movie Clip Setup Exposure White Balance LCD Brightness
EV Compensation
Information
Selecting the white balance
White Balance
Still Image 2/2 Quick View LCD Brightness On OFF
Quick View
Selecting the quick view function
Still Image 2/2 White Balance Quick View LCD Brightness
LCD Brightness
Selecting the LCD brightness
Brightness
Playing back a still image
Play Mode
Starting Play Mode
Playing back a movie clip
Play mode functions are listed below
Information
AV Aperture value
TV Shutter speed
Mode button Play mode
Button
Image enlargement
Thumbnail display
Press the UP button in the Play mode
Selects a up image
Digital zoom
On the LCD display
Deleting an image
Delete IMAGE? No YES
Left button
Starting the slide show
Setting up the play back function using the LCD monitor
Slide Show
Images can be displayed continuously at pre-set intervals
ONE Image ALL Image Lock Unlock
Protect
Protecting images
Deleting all images
Delete ALL
Copying image files to the Card
Copy to Card
Ex 100SSCAM, 101SSCAM, 102SSCAM, 103SSCAM
Number of the stored image in the Play mode
Copy to Card Dpof LCD Brightness
Setting up Dpof
Dpof
Formatting on a PC
Dpof # of Prints
Press UP /DOWN and select LCD
You may adjust the LCD brightness
Setup 1/3 Beep Format Power OFF Reset On OFF
Setting UP the Camera System
Starting Setup mode
Selecting the Setup mode
Beep sound
Beep
Selecting the beep sound
Formatting the memory
Selecting no Setup menu will be displayed Default is no
Setup 1/3 Beep Format Power OFF Reset No YES
Format
Setup 1/3 Beep Format Power OFF Reset MIN
Power OFF
Selecting the power off function
Time for the power off
Setup 1/3 Beep Format Power OFF Reset YES no
Reset
Selecting the default camera setting
Default camera setting
Right
Date Setup
Changing the date/time
Left
Imprint YES
Date Imprint
Selecting the date imprint function
Selecting the date type
Date Type
You can select date type that is imprinted on the image
Selecting a language
Language
Ntsc
Setup 3/3 Video OUT Ntsc PAL
Video OUT
Selecting the video out type
Connecting to an external monitor
Disconnecting the camera and PC
PC Mode
Starting PC mode
Connecting the camera to PC
Downloading stored images
Important Notes
Important Notes
Card
Causes Remedy
Symptom Causes Remedy
Before Contacting a Service Center
Lens or LCD monitor is Clean the lens or LCD
Switch camera on
White Balance setting is Select appropriate White
Exposure is excessive Reset exposure
Check the connection cables
Switch the Date imprint function
Incorrectly
ON. p.74
ISO
Specifications
AC adapter Optional
Weight Approx g / 4.4oz without batteries and card Software
Specifications are subject to change without prior notice
AA alkaline / 2 x Ni-MH / CR-V3 batteries
About software
Software Manual
Software Notes
For windows only
Click Storage Driver menu
Setting up the USB driver for Windows 98SE
Start Installation window will open
Will open to install DirectX8.1
Setting up DirectX
Information
Software Manual
Removing the USB Driver for Windows
Click
Removable Disk
Important information whilst using the Removable Disk
Windows 2000/ME/XP
Removing the removable disk
Windows 98SE
Software
Setting up the USB Driver for MAC
Using the USB Driver for MAC
Click Digimax Viewer 1.0 on the Autorun frame
Setting up Digimax Viewer
This software is only compatible with Windows
Select a destination folder and click Next
Copied file. Click the right mouse
Digimax Viewer
Open Allows you to view a selected
Copy
Click the MGI PhotoSuite lll SE menu on the autorun frame
Setting up MGI PhotoSuite lll SE
Choose Setup Language window will open. Select language
Custom
Install
Options
107
MGI PhotoSuite III SE
Organize your photos and other media files into albums
Save your results to show to others
An introduction to the Welcome screen
Get images
Get
Introduction to navigation bar Back
Home
Help
To obtain images from the computer
GET
When you obtain images from the digital camera
Computer and Album Only
Acquiring images from an Album
Special Effects
Prepare
Menu of Prepare steps Rotate & Crop
Touchup
Compose
Choose a photo album to view or edit
Organize
Menu of Organize steps
Master Album window will open. Click OK button
Creating an Album
Click Computer in Add Photos menu
Add images to the album
Adding images is complete
Send E-mail
Share
Menu of Share step Save
Save As
Printing images
Print
You can print images
Menu for the Print step
About USB
FAQ
124
Memo
126
127
6806-1369
Top
Page
Image
Contents