SETTING UP THE CAMERA SYSTEM
DATE IMPRINT |
|
|
| |
|
|
|
| |
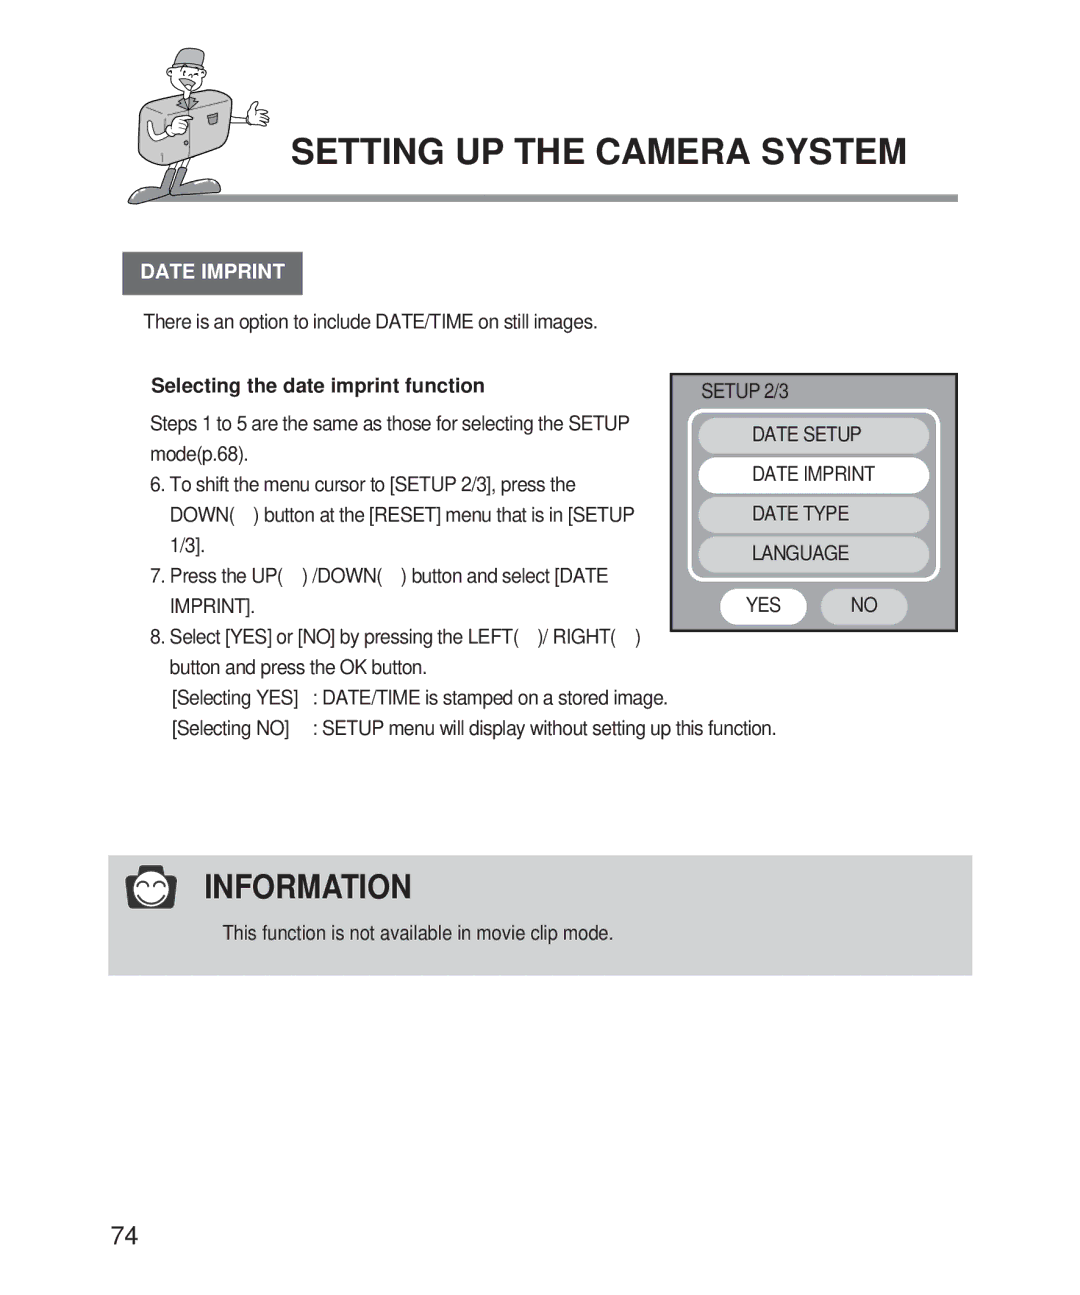
There is an option to include DATE/TIME on still images. |
|
| ||
|
|
| ||
Selecting the date imprint function | SETUP 2/3 |
| ||
Steps 1 to 5 are the same as those for selecting the SETUP | DATE SETUP | |||
mode(p.68). |
| |||
| DATE IMPRINT | |||
6. To shift the menu cursor to [SETUP 2/3], press the | ||||
|
| |||
DOWN( ) button at the [RESET] menu that is in [SETUP | DATE TYPE |
| ||
1/3]. |
| LANGUAGE |
| |
7. Press the UP( | ) /DOWN( ) button and select [DATE |
| ||
|
| |||
IMPRINT]. |
| YES | NO | |
8. Select [YES] or [NO] by pressing the LEFT( )/ RIGHT( ) |
|
| ||
|
| |||
button and press the OK button. |
|
| ||
[Selecting YES] | : DATE/TIME is stamped on a stored image. |
|
| |
[Selecting NO] | : SETUP menu will display without setting up this function. |
| ||
INFORMATION
![]() This function is not available in movie clip mode.
This function is not available in movie clip mode.
74