ENGLISH
Photo Mode : Setting Various Functions
Setting the Light
The Light only works in Photo Mode and allows the user to take photos where there is insufficient light.
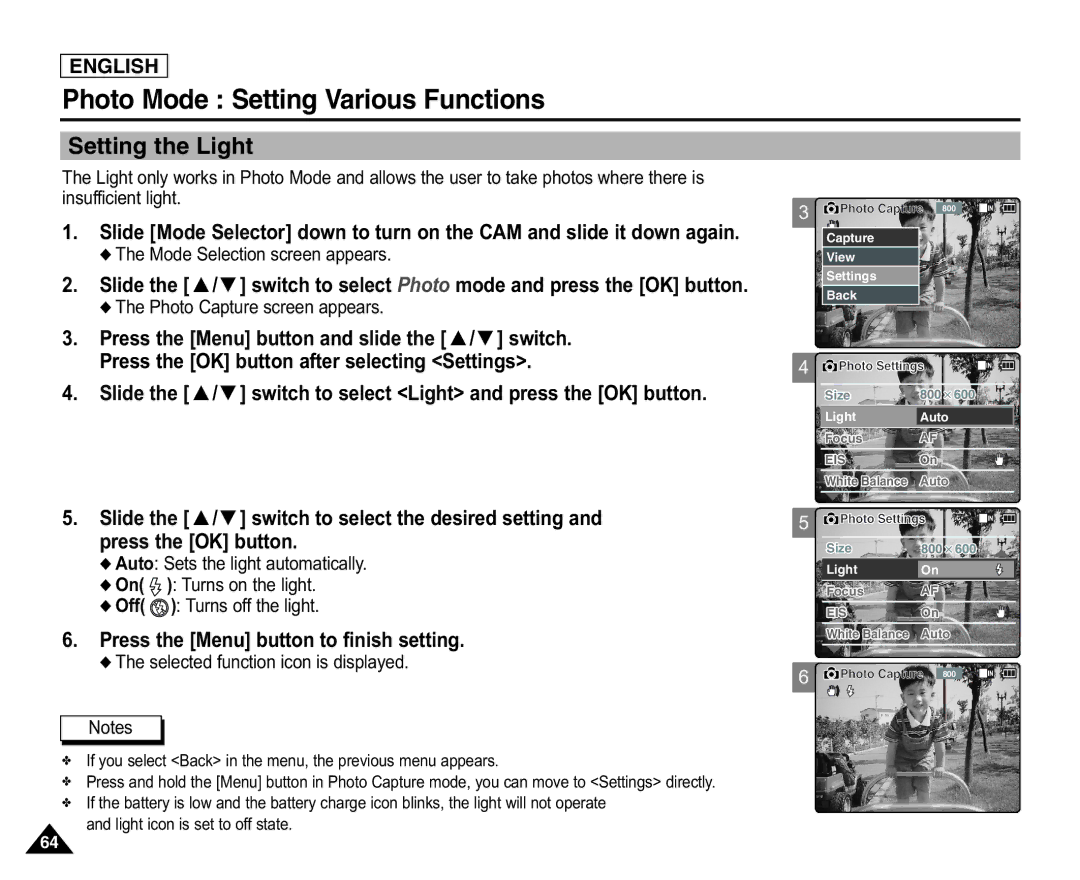
1.Slide [Mode Selector] down to turn on the CAM and slide it down again.
◆The Mode Selection screen appears.
2.Slide the [ ▲ /▼ ] switch to select Photo mode and press the [OK] button.
◆The Photo Capture screen appears.
3.Press the [Menu] button and slide the [ ▲ /▼ ] switch.
Press the [OK] button after selecting <Settings>.
4.Slide the [ ▲ /▼ ] switch to select <Light> and press the [OK] button.
3
4
![]() Photo Capture 800
Photo Capture 800
Capture |
View |
Settings |
Back |
![]() Photo Settings
Photo Settings
Size
LightAuto
Focus AF
EISOn
White Balance Auto
5.Slide the [ ▲ /▼ ] switch to select the desired setting and press the [OK] button.
◆Auto: Sets the light automatically.
◆On( ![]() ): Turns on the light.
): Turns on the light.
◆Off( ![]() ): Turns off the light.
): Turns off the light.
6.Press the [Menu] button to finish setting.
◆The selected function icon is displayed.
Notes
✤If you select <Back> in the menu, the previous menu appears.
✤Press and hold the [Menu] button in Photo Capture mode, you can move to <Settings> directly.
✤If the battery is low and the battery charge icon blinks, the light will not operate
and light icon is set to off state.
5 ![]() Photo Settings
Photo Settings
Size
LightOn
Focus AF
EISOn
White Balance Auto
6 ![]() Photo Capture 800
Photo Capture 800
Capturing...
BLC
64
