ENGLISH
ESPAÑOL
Advanced Recording | Filmación avanzada |
Setting and Recording the DATE/TIME
✤Setting and recording the date/time feature works in the CAMERA mode only.
✤You can record the date/time on your tapes, so you will know when it was made. The date and time are recorded whenever they are displayed on the viewfinder or LCD.
Configurar y grabar una FECHA/HORA
✤Configurar y grabar la función de fecha/hora sólo funciona en el modo CAMERA.
✤Usted puede grabar la fecha/hora en las cintas que realiza, de modo que cuando vea posteriormente la cinta, podrá recordar el momento en que se hizo. La fecha y la hora se graban siem- pre que aparezcan en el visor o en la pantalla LCD.
Setting a DATE/TIME
Configuración de FECHA/HORA
✤Setting the DATE/TIME is possible in STANDBY of CAMERA mode only.
1. Make sure that you have installed the LITHIUM BATTERY. (see page 17) The LITHIUM BATTERY is needed to maintain the clock.
2. Set the power switch to CAMERA mode. (see page 18)
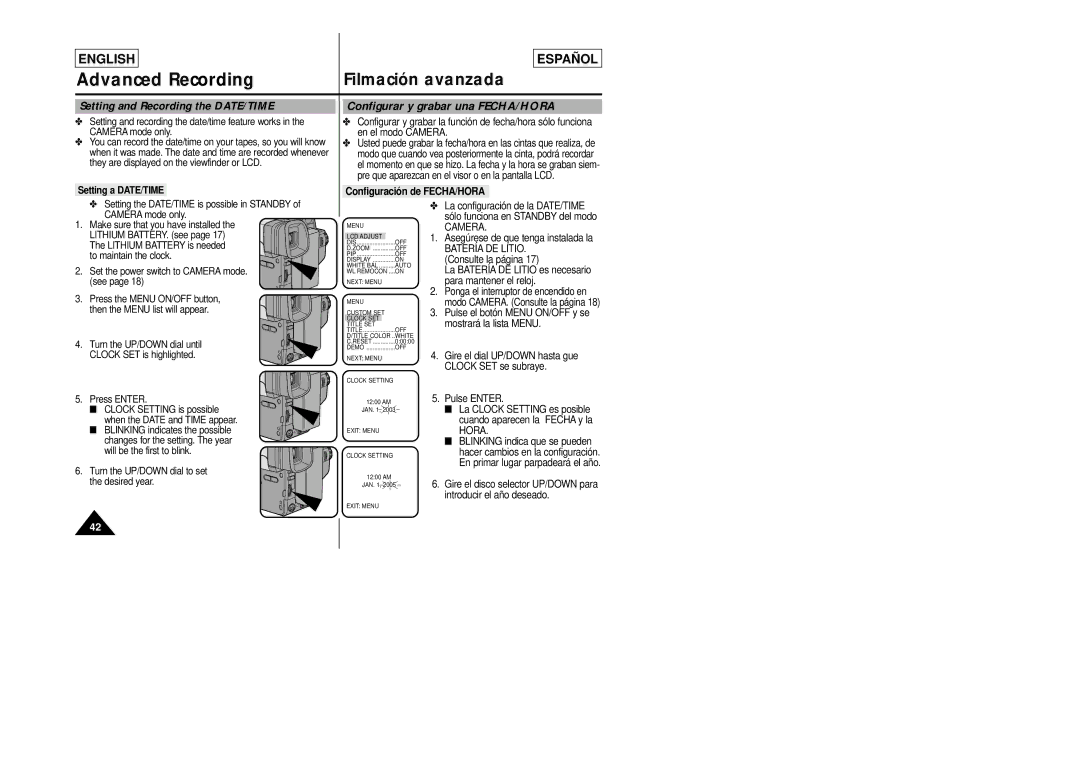
3. Press the MENU ON/OFF button, then the MENU list will appear.
4. Turn the UP/DOWN dial until
MENU |
| ||
|
| ||
LCD ADJUST |
| OFF | |
DIS | |||
D.ZOOM | OFF | ||
PIP | OFF | ||
DISPLAY | ON | ||
WHITE BAL | AUTO | ||
WL REMOCON .... | ON | ||
NEXT: MENU |
| ||
MENU |
| ||
CUSTOM SET |
| ||
CLOCK SET |
|
|
|
TITLE SET | OFF | ||
TITLE | |||
D/TITLE COLOR .. | WHITE | ||
C.RESET | 0:00:00 | ||
DEMO | OFF | ||
✤La configuración de la DATE/TIME sólo funciona en STANDBY del modo
CAMERA.
1.Asegúrese de que tenga instalada la
BATERÍA DE LITIO. (Consulte la página 17)
La BATERÍA DE LITIO es necesario para mantener el reloj.
2.Ponga el interruptor de encendido en modo CAMERA. (Consulte la página 18)
3.Pulse el botón MENU ON/OFF y se mostrará la lista MENU.
CLOCK SET is highlighted.
5. Press ENTER.
■ CLOCK SETTING is possible when the DATE and TIME appear.
■ BLINKING indicates the possible changes for the setting. The year will be the first to blink.
6. Turn the UP/DOWN dial to set the desired year.
NEXT: MENU
CLOCK SETTING
12:00 AM
JAN. 1, 2003
EXIT: MENU
CLOCK SETTING
12:00 AM
JAN. 1, 2005
EXIT: MENU
4.Gire el dial UP/DOWN hasta gue CLOCK SET se subraye.
5.Pulse ENTER.
■La CLOCK SETTING es posible cuando aparecen la FECHA y la HORA.
■BLINKING indica que se pueden hacer cambios en la configuración. En primar lugar parpadeará el año.
6.Gire el disco selector UP/DOWN para introducir el año deseado.
42