Chapter Two: Getting Started | 2. Prepare for installation 18 |
|
|
2. Prepare for installation
To ensure that the installation of your DIVA LAN ISDN Modem is quick and trouble free, take a few moments to prepare for installation.
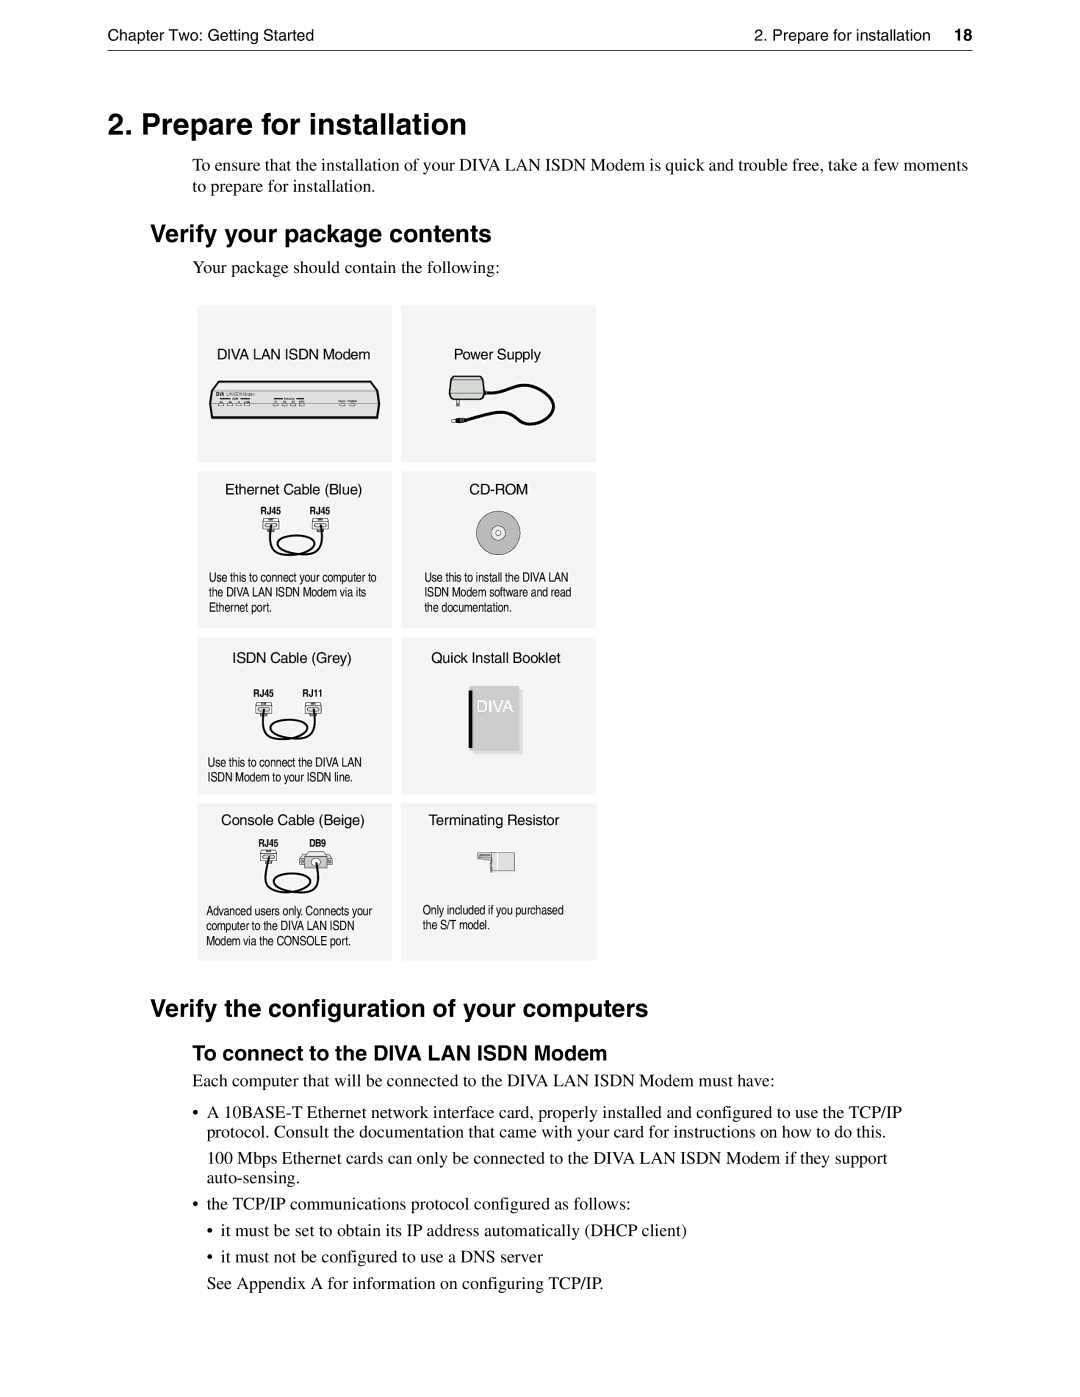
Verify your package contents
Your package should contain the following:
DIVA LAN ISDN Modem | ||||
DIVA LAN ISDN Modem |
|
|
|
|
ISDN |
| Ethernet |
| FAULT POWER |
B1 B2 D LINK | E1 | E2 E3 | E4/C | |
Ethernet Cable (Blue)
RJ45 RJ45
Use this to connect your computer to the DIVA LAN ISDN Modem via its Ethernet port.
Power Supply
Use this to install the DIVA LAN ISDN Modem software and read the documentation.
ISDN Cable (Grey)
RJ45 RJ11
Use this to connect the DIVA LAN ISDN Modem to your ISDN line.
Quick Install Booklet
DIVA
Console Cable (Beige)
RJ45 DB9
Advanced users only. Connects your computer to the DIVA LAN ISDN Modem via the CONSOLE port.
Terminating Resistor
Only included if you purchased the S/T model.
Verify the configuration of your computers
To connect to the DIVA LAN ISDN Modem
Each computer that will be connected to the DIVA LAN ISDN Modem must have:
•A
100 Mbps Ethernet cards can only be connected to the DIVA LAN ISDN Modem if they support
•the TCP/IP communications protocol configured as follows:
•it must be set to obtain its IP address automatically (DHCP client)
•it must not be configured to use a DNS server
See Appendix A for information on configuring TCP/IP.