Chapter Nine: Advanced Installations | SecurID support 138 |
|
|
SecurID support
When establishing a connection to a SecurID server, a special username and password must be supplied to log on. The server will request this information during authentication. In order to reply to the request, the DIVA LAN ISDN Modem must obtain the log on information from the user that initiated the connection. To support the dynamic collection of username and password, the Eicon SecurID Client application must be installed on the user’s computer.
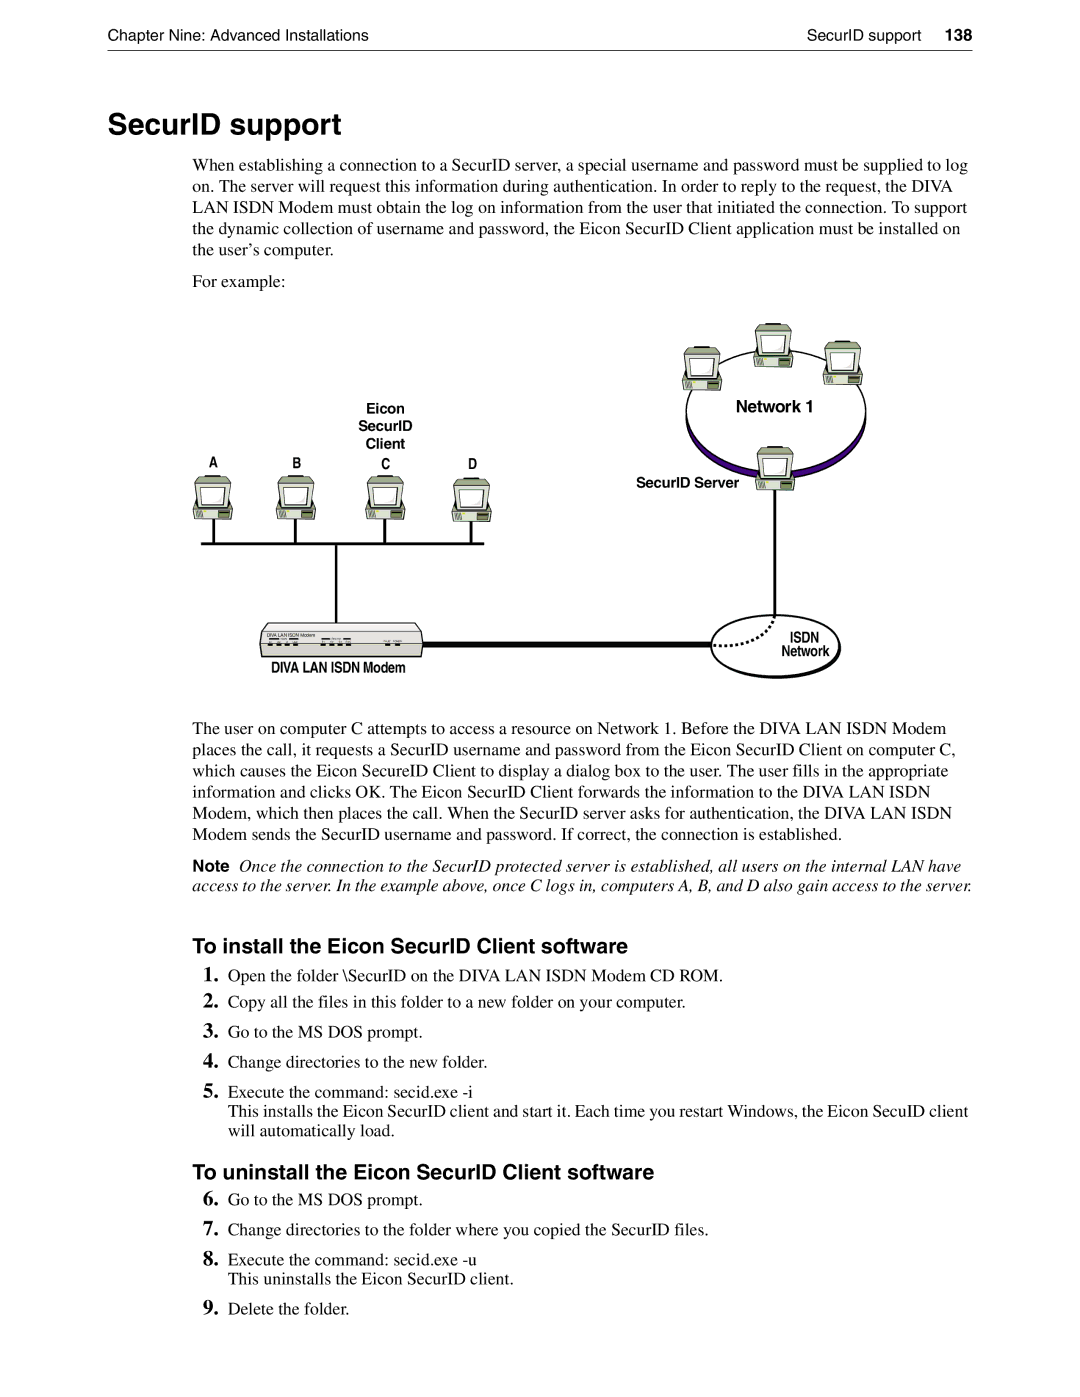
For example:
Eicon | Network 1 |
SecurID |
|
Client |
|
ABCD
SecurID Server
DIVA LAN ISDN Modem
|
| ISDN |
|
|
| Ethernet |
|
| FAULT POWER |
B1 | B2 | D LINK |
| E1 | E2 E3 E4/C | ||||
![]() ISDN Network
ISDN Network
DIVA LAN ISDN Modem
The user on computer C attempts to access a resource on Network 1. Before the DIVA LAN ISDN Modem places the call, it requests a SecurID username and password from the Eicon SecurID Client on computer C, which causes the Eicon SecureID Client to display a dialog box to the user. The user fills in the appropriate information and clicks OK. The Eicon SecurID Client forwards the information to the DIVA LAN ISDN Modem, which then places the call. When the SecurID server asks for authentication, the DIVA LAN ISDN Modem sends the SecurID username and password. If correct, the connection is established.
Note Once the connection to the SecurID protected server is established, all users on the internal LAN have access to the server. In the example above, once C logs in, computers A, B, and D also gain access to the server.
To install the Eicon SecurID Client software
1.Open the folder \SecurID on the DIVA LAN ISDN Modem CD ROM.
2.Copy all the files in this folder to a new folder on your computer.
3.Go to the MS DOS prompt.
4.Change directories to the new folder.
5.Execute the command: secid.exe
This installs the Eicon SecurID client and start it. Each time you restart Windows, the Eicon SecuID client will automatically load.
To uninstall the Eicon SecurID Client software
6.Go to the MS DOS prompt.
7.Change directories to the folder where you copied the SecurID files.
8.Execute the command: secid.exe
9.Delete the folder.