Chapter Eight: Connecting to a Corporate Network | 2. Configure the Corporate profile 105 |
|
|
8.Set the following parameters:
•Select profile mode: Leave this set to NAT unless you have a specific requirement not too. For more information on NAT, see “Network address translation” on page 78.
•Primary/Secondary DNS address: Specify the addresses of the primary/secondary DNS servers on the corporate network. If you leave these addresses set to 0.0.0.0, the DIVA LAN ISDN Modem will attempt to retrieve the DNS addresses for you when it connects to the corporate LAN (if supported by the corporate LAN).
•Domain name: Specify the DNS name of the corporate network. For example: eicon.com.
•IP address: On some corporate networks, the network administrator will assign a static IP address to the DIVA LAN ISDN Modem. If this is your case, enter the static IP address here. Leave this set to 0.0.0.0 if you want the DIVA LAN ISDN Modem to negotiate its own address when it connects to the network.
•Subnet mask: Specify the subnet mask associated with the IP address.
•Remote IP address: In some instances, you need to specify the IP address of the corporate network.
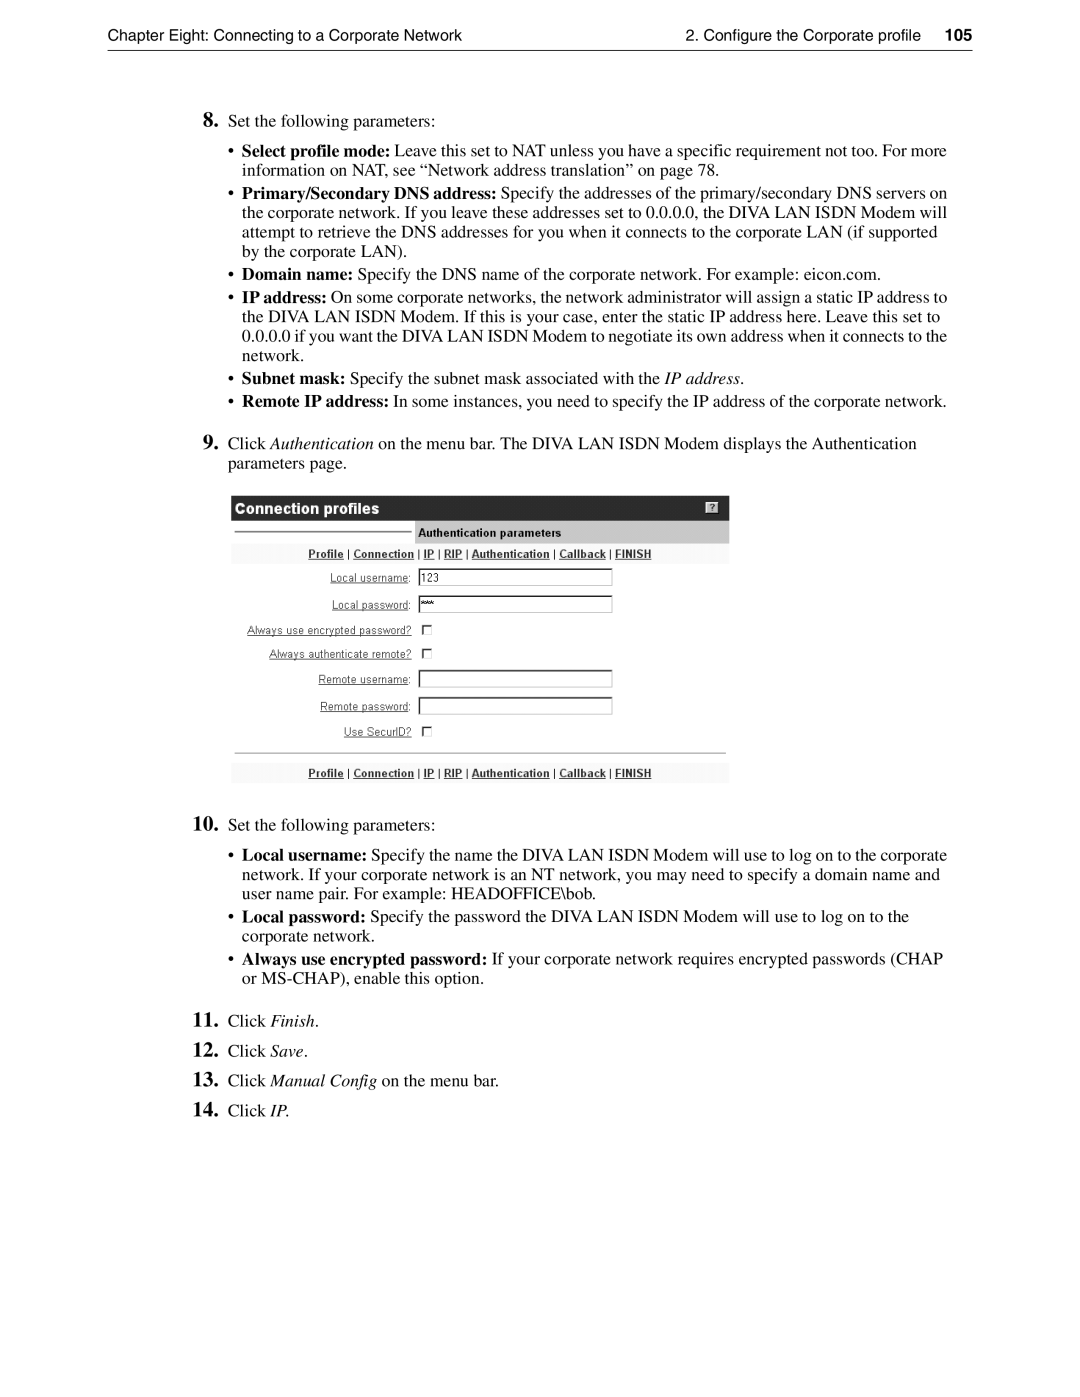
9.Click Authentication on the menu bar. The DIVA LAN ISDN Modem displays the Authentication parameters page.
10.Set the following parameters:
•Local username: Specify the name the DIVA LAN ISDN Modem will use to log on to the corporate network. If your corporate network is an NT network, you may need to specify a domain name and user name pair. For example: HEADOFFICE\bob.
•Local password: Specify the password the DIVA LAN ISDN Modem will use to log on to the corporate network.
•Always use encrypted password: If your corporate network requires encrypted passwords (CHAP or
11.Click Finish.
12.Click Save.
13.Click Manual Config on the menu bar.
14.Click IP.