3-9. Mounting
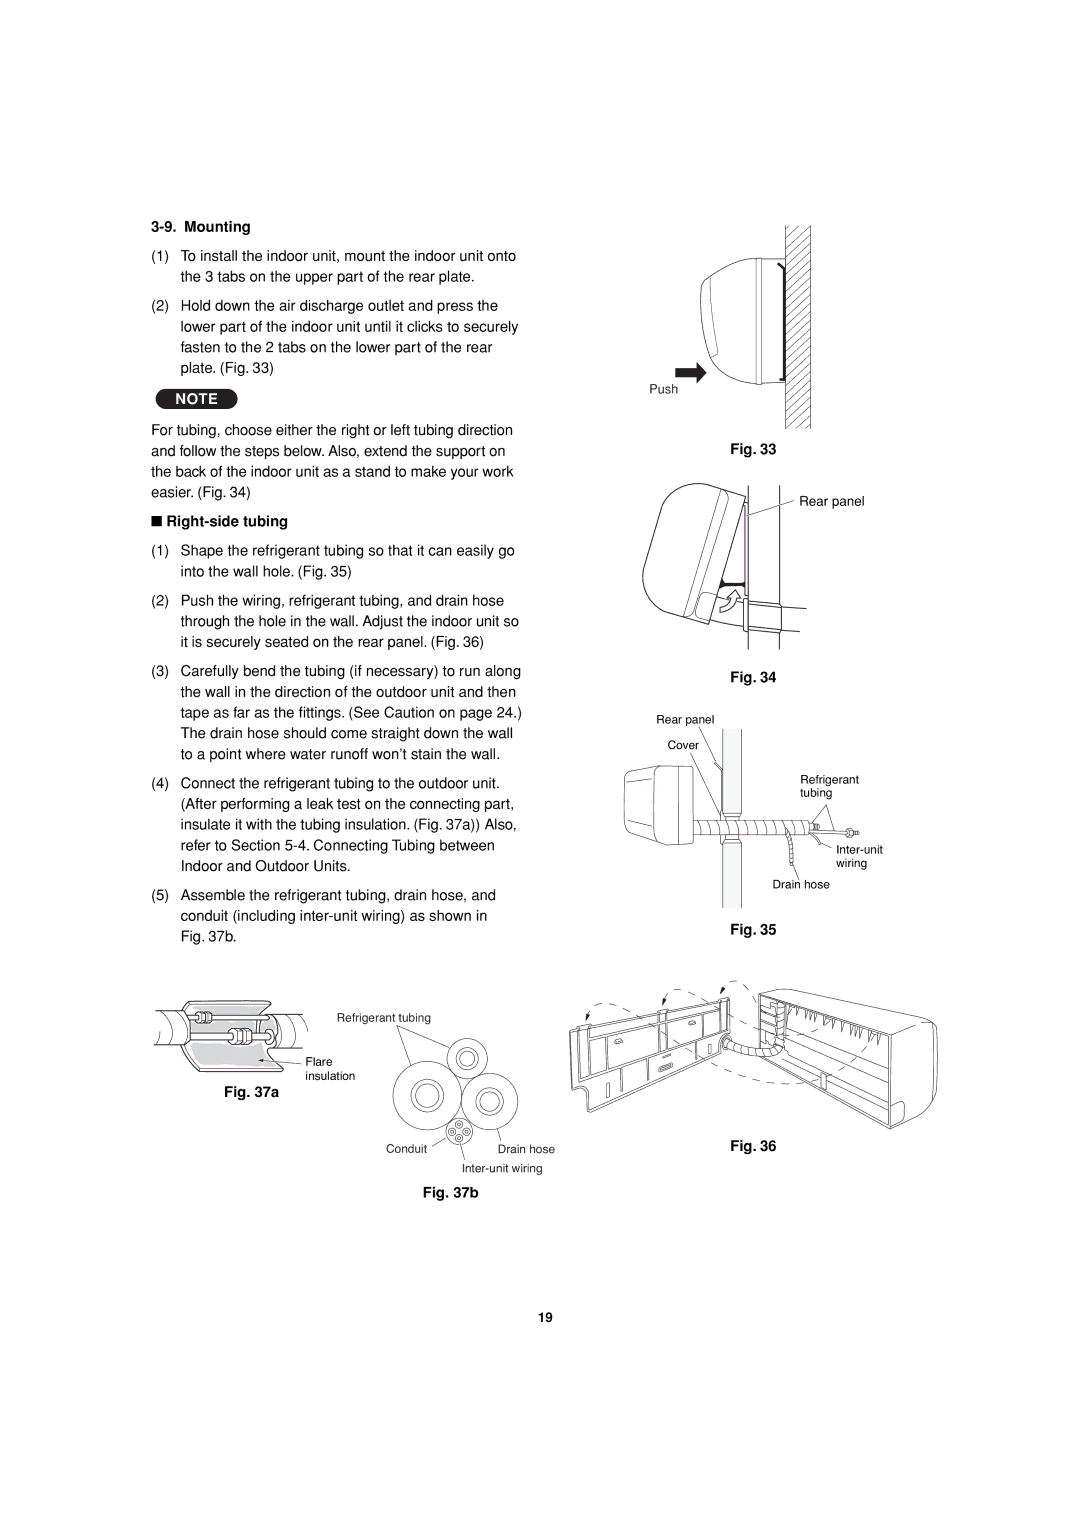
(1)To install the indoor unit, mount the indoor unit onto the 3 tabs on the upper part of the rear plate.
(2)Hold down the air discharge outlet and press the lower part of the indoor unit until it clicks to securely fasten to the 2 tabs on the lower part of the rear plate. (Fig. 33)
NOTE
For tubing, choose either the right or left tubing direction and follow the steps below. Also, extend the support on the back of the indoor unit as a stand to make your work easier. (Fig. 34)
■Right-side tubing
(1)Shape the refrigerant tubing so that it can easily go into the wall hole. (Fig. 35)
(2)Push the wiring, refrigerant tubing, and drain hose through the hole in the wall. Adjust the indoor unit so it is securely seated on the rear panel. (Fig. 36)
(3)Carefully bend the tubing (if necessary) to run along the wall in the direction of the outdoor unit and then tape as far as the fittings. (See Caution on page 24.) The drain hose should come straight down the wall to a point where water runoff won’t stain the wall.
(4)Connect the refrigerant tubing to the outdoor unit. (After performing a leak test on the connecting part, insulate it with the tubing insulation. (Fig. 37a)) Also, refer to Section
(5)Assemble the refrigerant tubing, drain hose, and conduit (including
Refrigerant tubing
Flare insulation
Fig. 37a
Conduit | Drain hose |
Fig. 37b
Push
Fig. 33
![]() Rear panel
Rear panel
Fig. 34
Rear panel
Cover
Refrigerant tubing
Drain hose
Fig. 35
Fig. 36
19
