7. Project the Image via the Networks
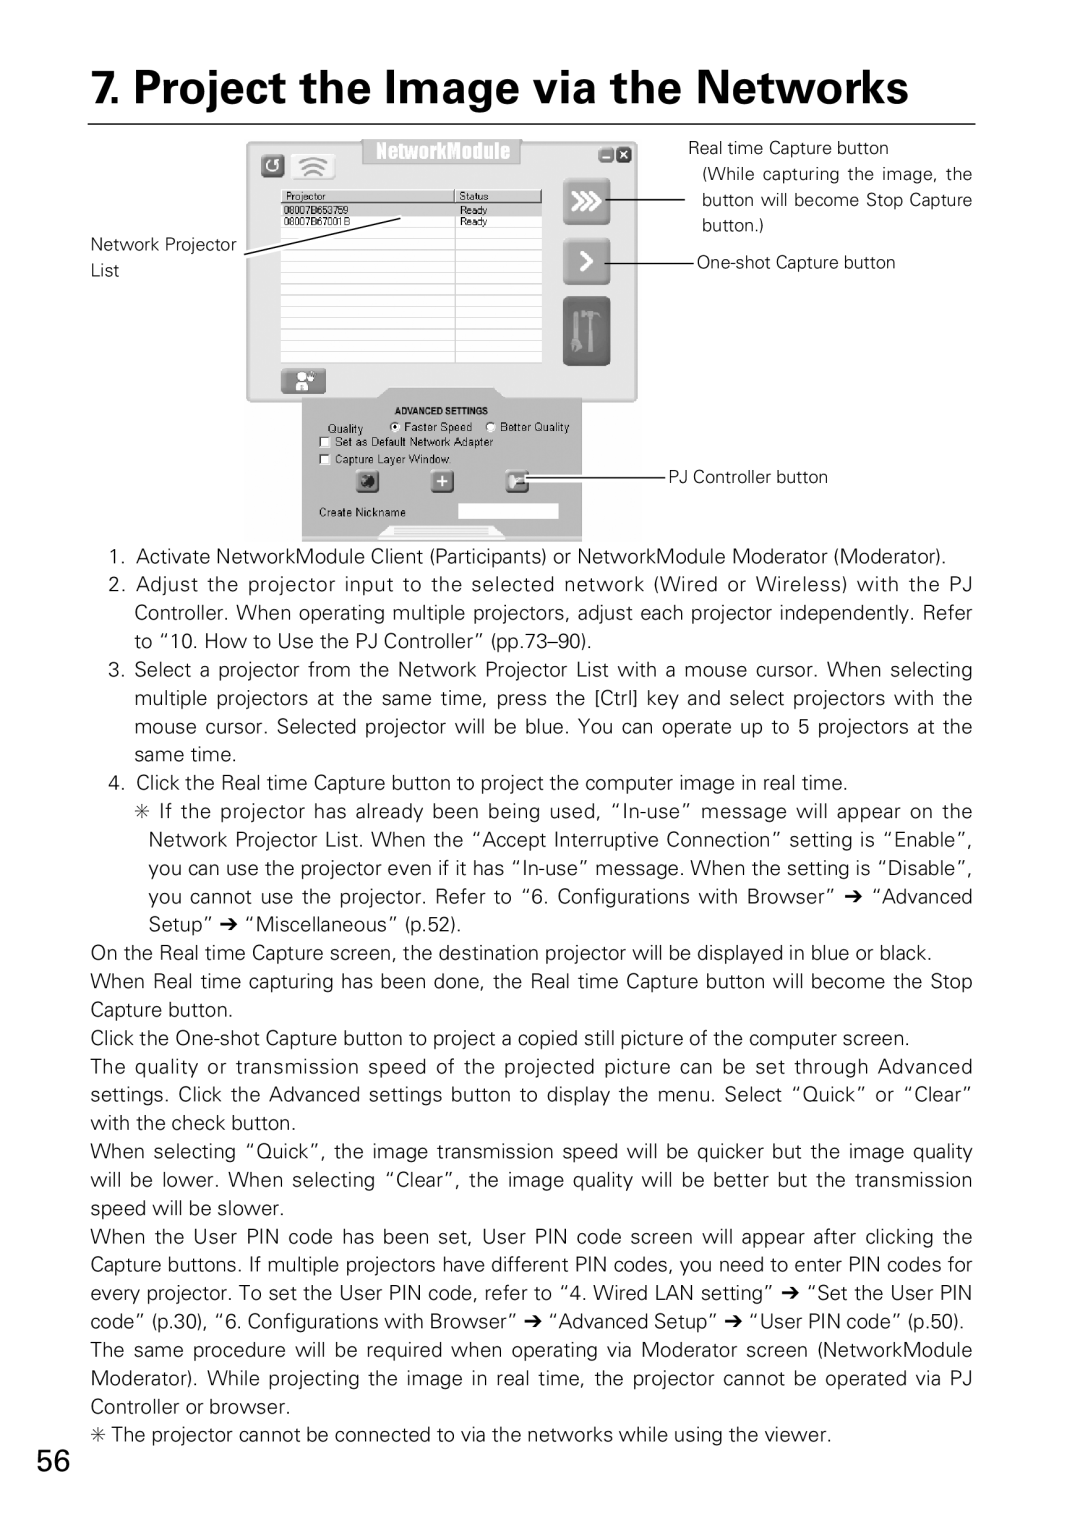
Network Projector ![]() List
List
Real time Capture button
(While capturing the image, the button will become Stop Capture button.)
PJ Controller button
1.Activate NetworkModule Client (Participants) or NetworkModule Moderator (Moderator).
2.Adjust the projector input to the selected network (Wired or Wireless) with the PJ Controller. When operating multiple projectors, adjust each projector independently. Refer to “10. How to Use the PJ Controller”
3.Select a projector from the Network Projector List with a mouse cursor. When selecting multiple projectors at the same time, press the [Ctrl] key and select projectors with the mouse cursor. Selected projector will be blue. You can operate up to 5 projectors at the same time.
4.Click the Real time Capture button to project the computer image in real time.
✳If the projector has already been being used,
On the Real time Capture screen, the destination projector will be displayed in blue or black. When Real time capturing has been done, the Real time Capture button will become the Stop Capture button.
Click the
The quality or transmission speed of the projected picture can be set through Advanced settings. Click the Advanced settings button to display the menu. Select “Quick” or “Clear” with the check button.
When selecting “Quick”, the image transmission speed will be quicker but the image quality will be lower. When selecting “Clear”, the image quality will be better but the transmission speed will be slower.
When the User PIN code has been set, User PIN code screen will appear after clicking the Capture buttons. If multiple projectors have different PIN codes, you need to enter PIN codes for every projector. To set the User PIN code, refer to “4. Wired LAN setting” ➔ “Set the User PIN code” (p.30), “6. Configurations with Browser” ➔ “Advanced Setup” ➔ “User PIN code” (p.50). The same procedure will be required when operating via Moderator screen (NetworkModule Moderator). While projecting the image in real time, the projector cannot be operated via PJ Controller or browser.
✳The projector cannot be connected to via the networks while using the viewer.
56