10. How to Use the PJ Controller
Image Adjustment
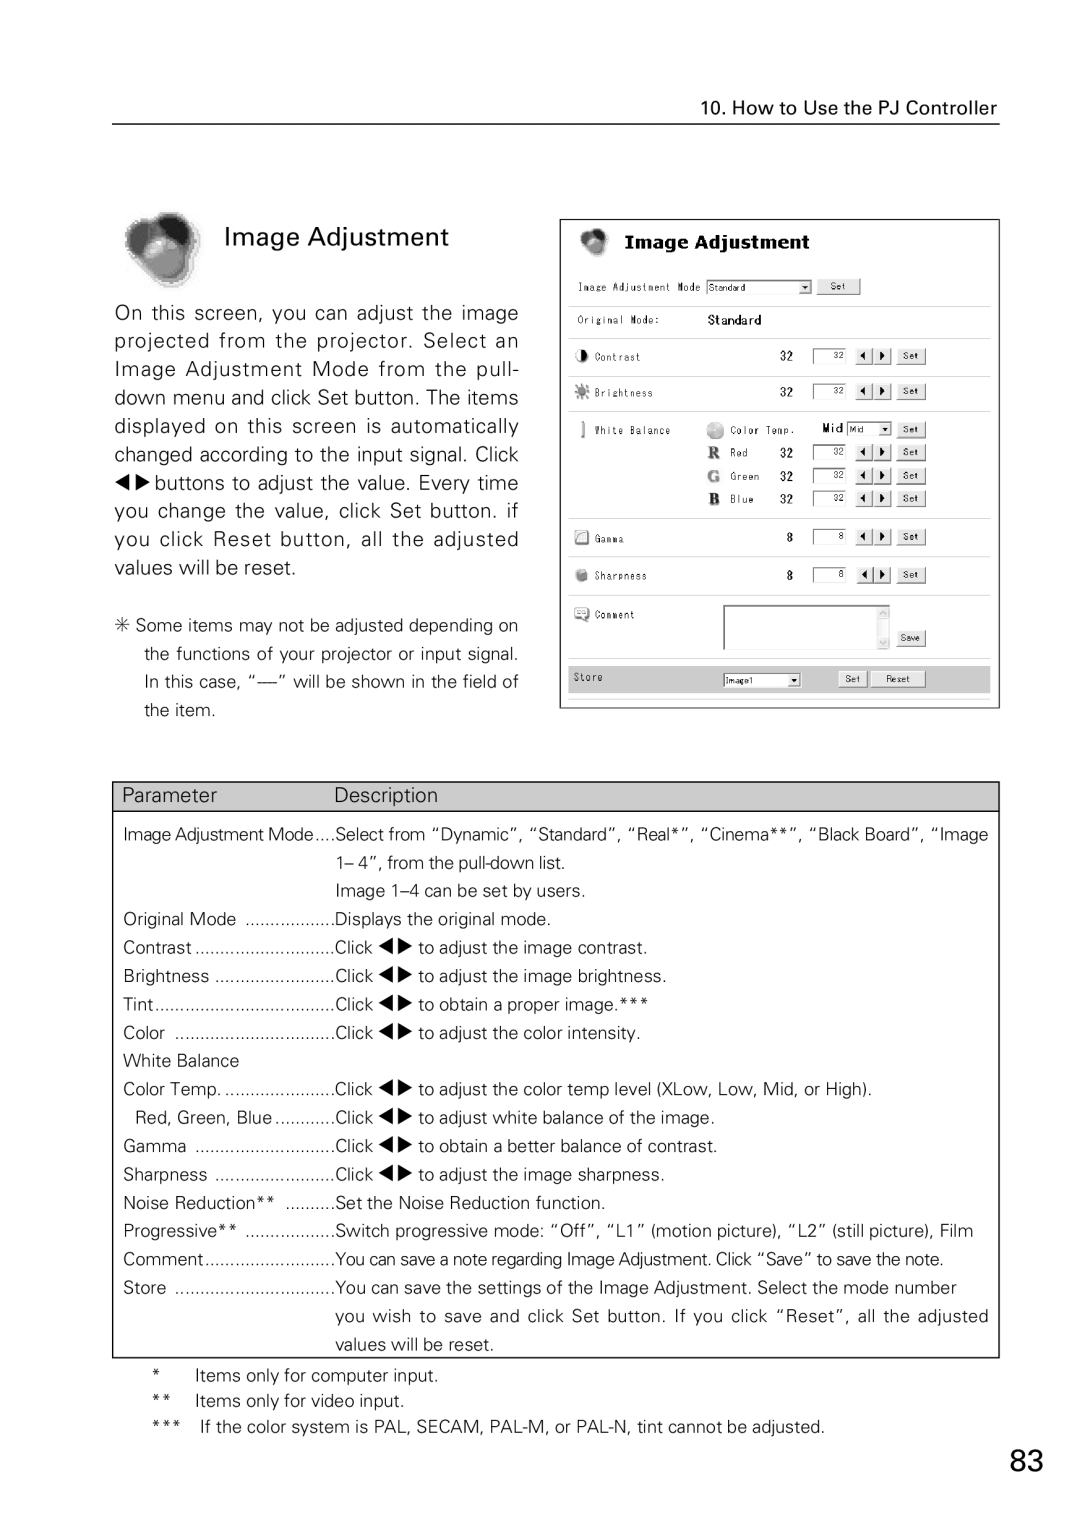
On this screen, you can adjust the image projected from the projector. Select an Image Adjustment Mode from the pull- down menu and click Set button. The items displayed on this screen is automatically changed according to the input signal. Click 7 8 buttons to adjust the value. Every time you change the value, click Set button. if you click Reset button, all the adjusted values will be reset.
✳ Some items may not be adjusted depending on the functions of your projector or input signal. In this case,
the item.
Parameter | Description |
Image Adjustment Mode | ....Select from “Dynamic”, “Standard”, “Real*”, “Cinema**”, “Black Board”, “Image |
| 1– 4”, from the |
| Image |
Original Mode | Displays the original mode. |
Contrast | Click 78 to adjust the image contrast. |
Brightness | Click 78 to adjust the image brightness. |
Tint | Click 78 to obtain a proper image.*** |
Color | Click 78 to adjust the color intensity. |
White Balance |
|
Color Temp | Click 78 to adjust the color temp level (XLow, Low, Mid, or High). |
Red, Green, Blue | Click 78 to adjust white balance of the image. |
Gamma | Click 78 to obtain a better balance of contrast. |
Sharpness | Click 78 to adjust the image sharpness. |
Noise Reduction** | Set the Noise Reduction function. |
Progressive** | Switch progressive mode: “Off”, “L1” (motion picture), “L2” (still picture), Film |
Comment | You can save a note regarding Image Adjustment. Click “Save” to save the note. |
Store | You can save the settings of the Image Adjustment. Select the mode number |
| you wish to save and click Set button. If you click “Reset”, all the adjusted |
| values will be reset. |
*Items only for computer input.
**Items only for video input.
***If the color system is PAL, SECAM,
83