Cleaning and Replacing the Dust Filters
4 Replace the filter cover.
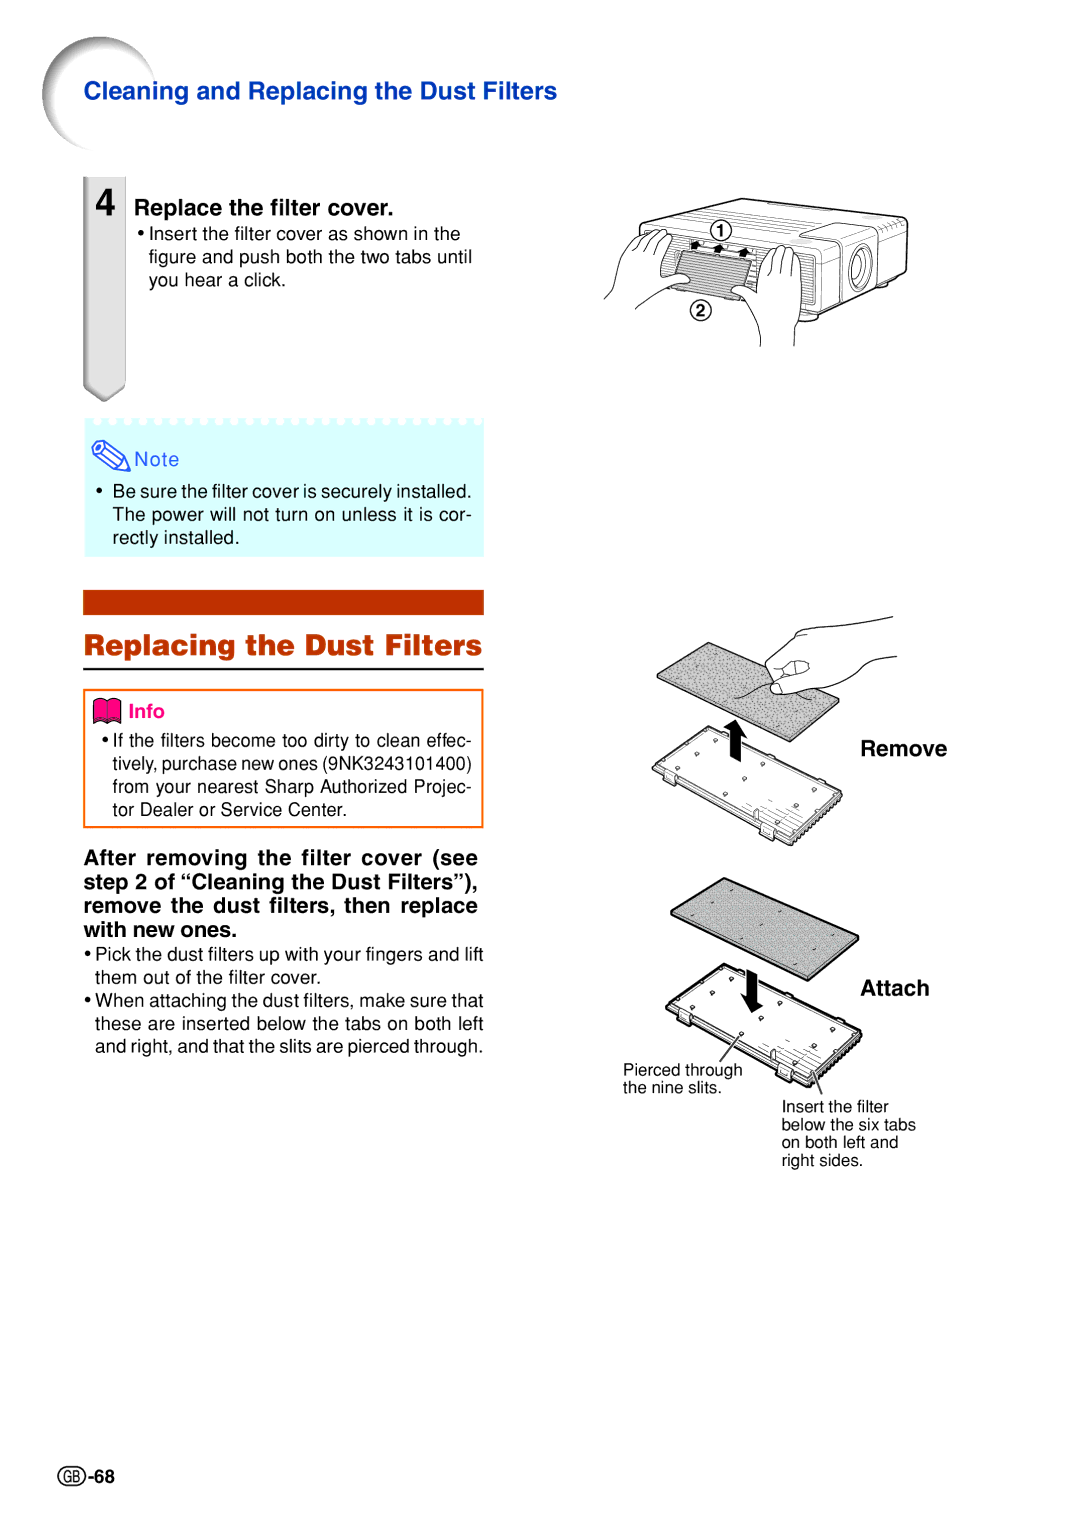
•Insert the filter cover as shown in the figure and push both the two tabs until you hear a click.
![]() Note
Note
•Be sure the filter cover is securely installed. The power will not turn on unless it is cor- rectly installed.
1
2
Replacing the Dust Filters
![]() Info
Info
•If the filters become too dirty to clean effec- tively, purchase new ones (9NK3243101400) from your nearest Sharp Authorized Projec- tor Dealer or Service Center.
After removing the filter cover (see step 2 of “Cleaning the Dust Filters”), remove the dust filters, then replace with new ones.
•Pick the dust filters up with your fingers and lift them out of the filter cover.
•When attaching the dust filters, make sure that these are inserted below the tabs on both left and right, and that the slits are pierced through.
Remove
Attach
Pierced through the nine slits.
Insert the filter below the six tabs on both left and right sides.
![]() -68
-68
