Attaching the Optional Lens
Do not attempt to exchange the lens when the projector is installed hanging from the ceiling. Injury may occur if the lens cover and lens fall.
Before exchanging the lens, reset lens shift to the center position. (The lens shift is located at the center in the factory preset.)
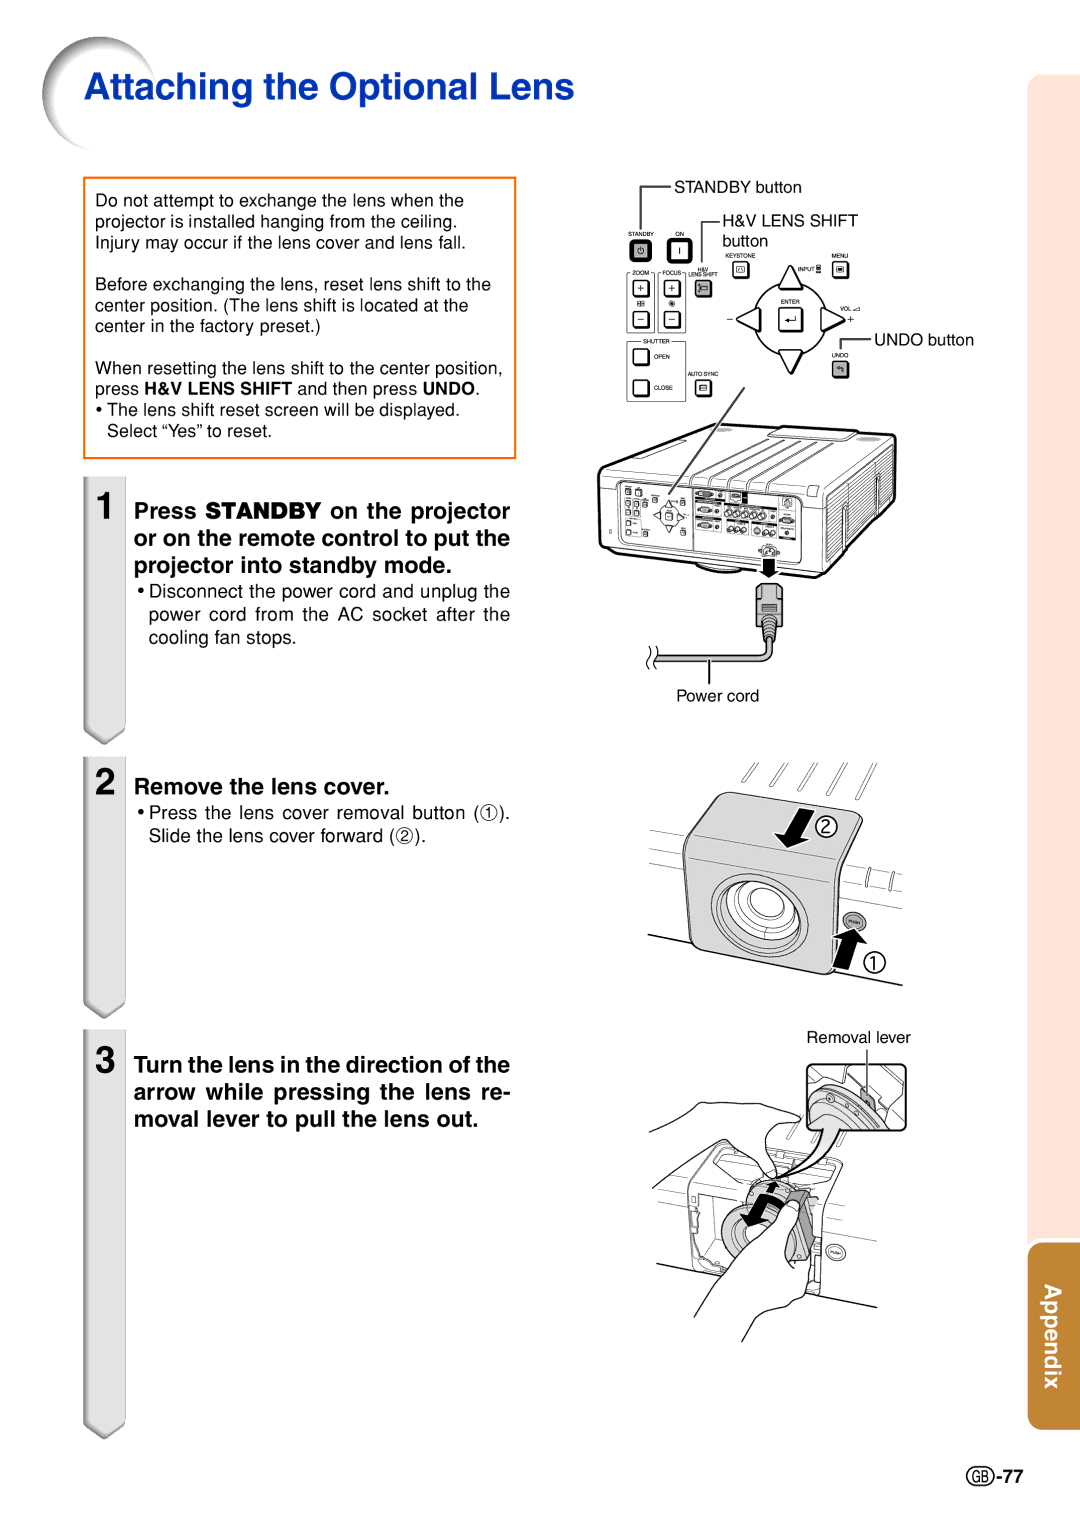
When resetting the lens shift to the center position, press H&V LENS SHIFT and then press UNDO.
•The lens shift reset screen will be displayed. Select “Yes” to reset.
1 Press STANDBY on the projector or on the remote control to put the projector into standby mode.
•Disconnect the power cord and unplug the power cord from the AC socket after the cooling fan stops.
2 Remove the lens cover.
•Press the lens cover removal button (1). Slide the lens cover forward (2).
3 Turn the lens in the direction of the arrow while pressing the lens re- moval lever to pull the lens out.
![]() STANDBY button
STANDBY button
H&V LENS SHIFT
button
![]() UNDO button
UNDO button
Power cord
Removal lever
Appendix
![]() -77
-77
