Attaching the Optional Lens
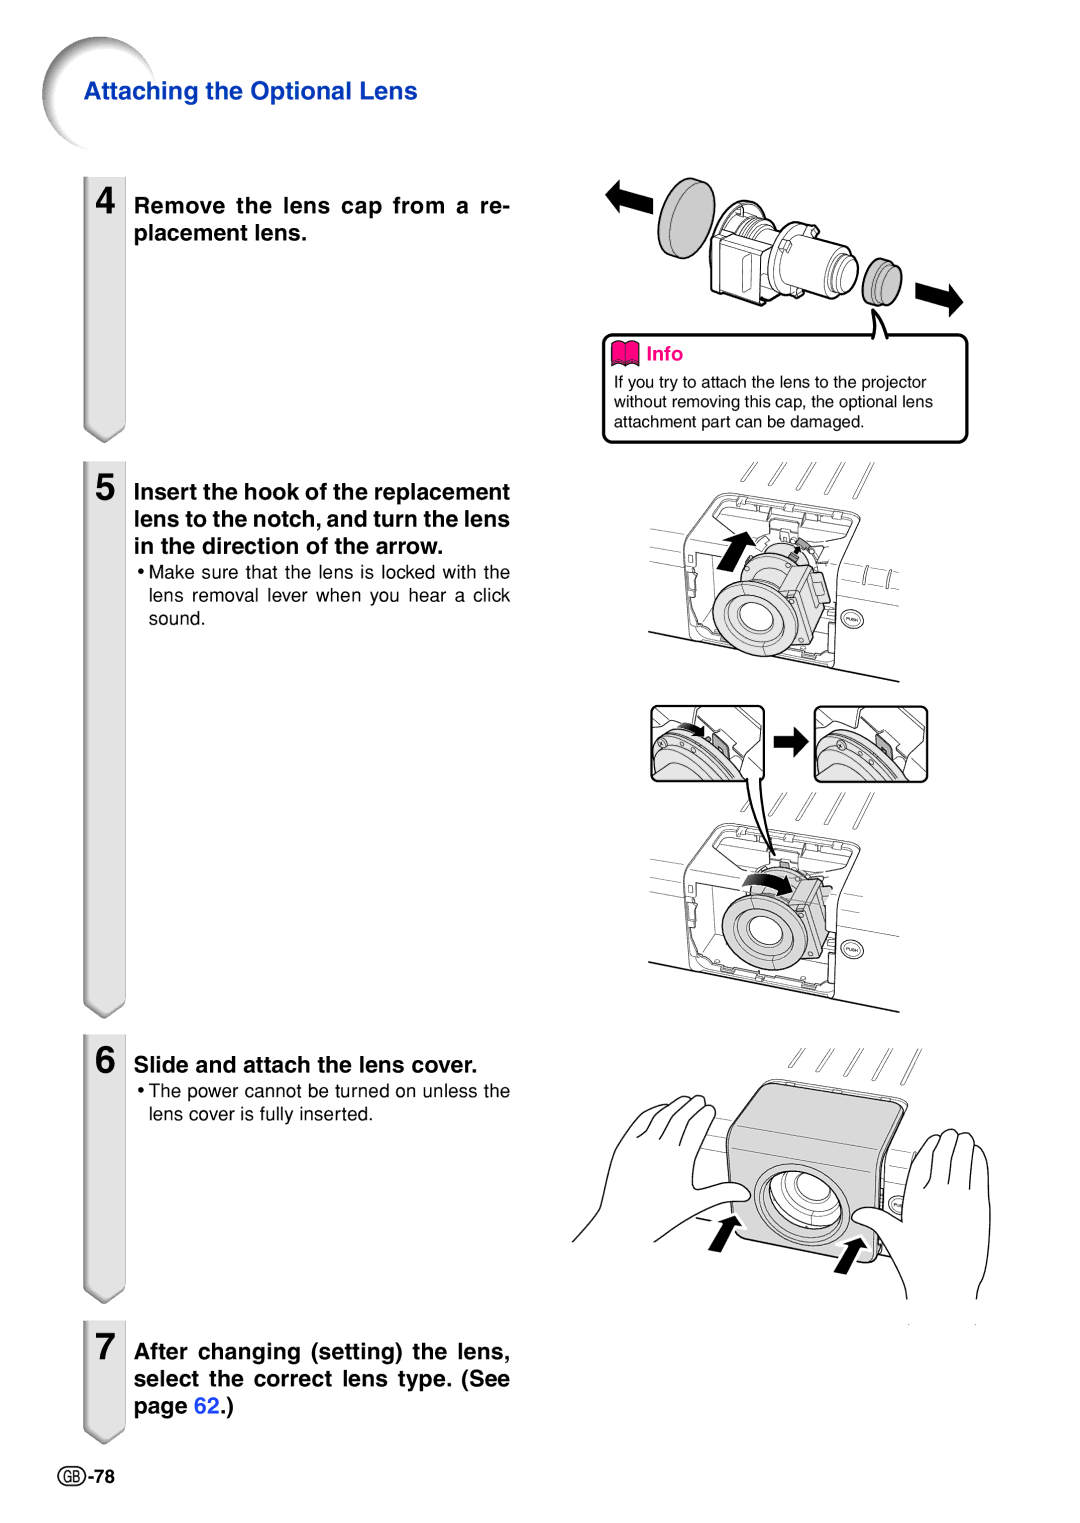
4 Remove the lens cap from a re- placement lens.
5 Insert the hook of the replacement lens to the notch, and turn the lens in the direction of the arrow.
•Make sure that the lens is locked with the lens removal lever when you hear a click sound.
![]() Info
Info
If you try to attach the lens to the projector without removing this cap, the optional lens attachment part can be damaged.
6
7
Slide and attach the lens cover.
•The power cannot be turned on unless the lens cover is fully inserted.
After changing (setting) the lens, select the correct lens type. (See page 62.)
![]() -78
-78
