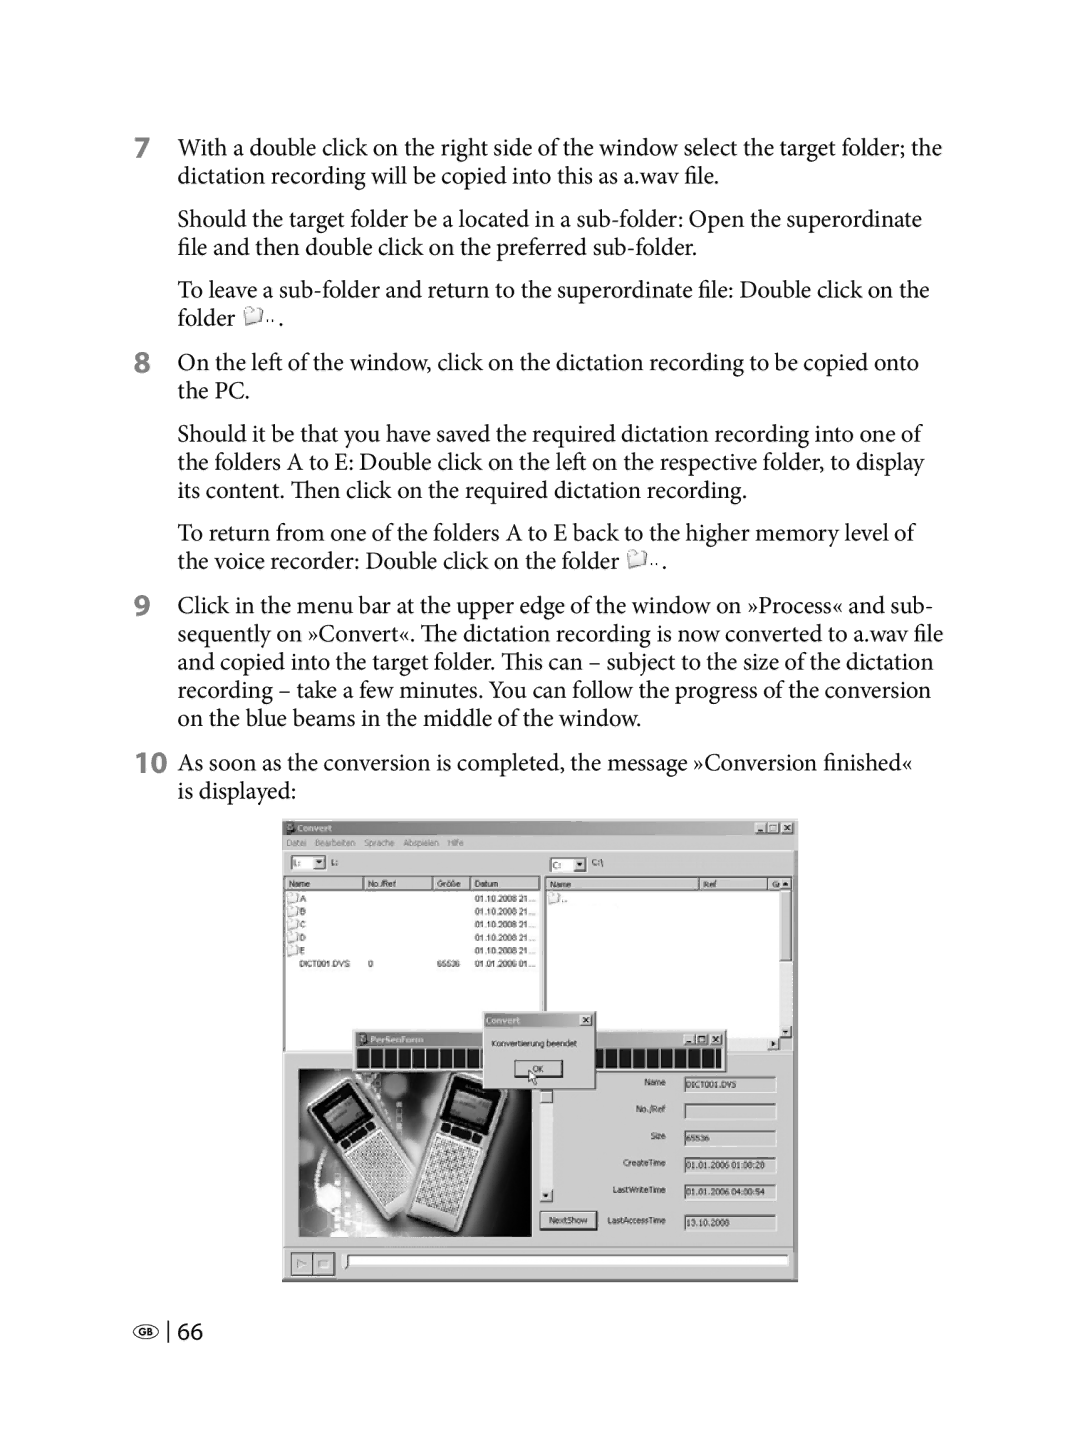
7With a double click on the right side of the window select the target folder; the dictation recording will be copied into this as a.wav file.
Should the target folder be a located in a
To leave a ![]() .
.
8On the left of the window, click on the dictation recording to be copied onto the PC.
Should it be that you have saved the required dictation recording into one of the folders A to E: Double click on the left on the respective folder, to display its content. Then click on the required dictation recording.
To return from one of the folders A to E back to the higher memory level of the voice recorder: Double click on the folder ![]() .
.
9Click in the menu bar at the upper edge of the window on »Process« and sub- sequently on »Convert«. The dictation recording is now converted to a.wav file and copied into the target folder. This can – subject to the size of the dictation recording – take a few minutes. You can follow the progress of the conversion on the blue beams in the middle of the window.
10As soon as the conversion is completed, the message »Conversion finished« is displayed:
![]()
![]() 66
66
