MZ-N10
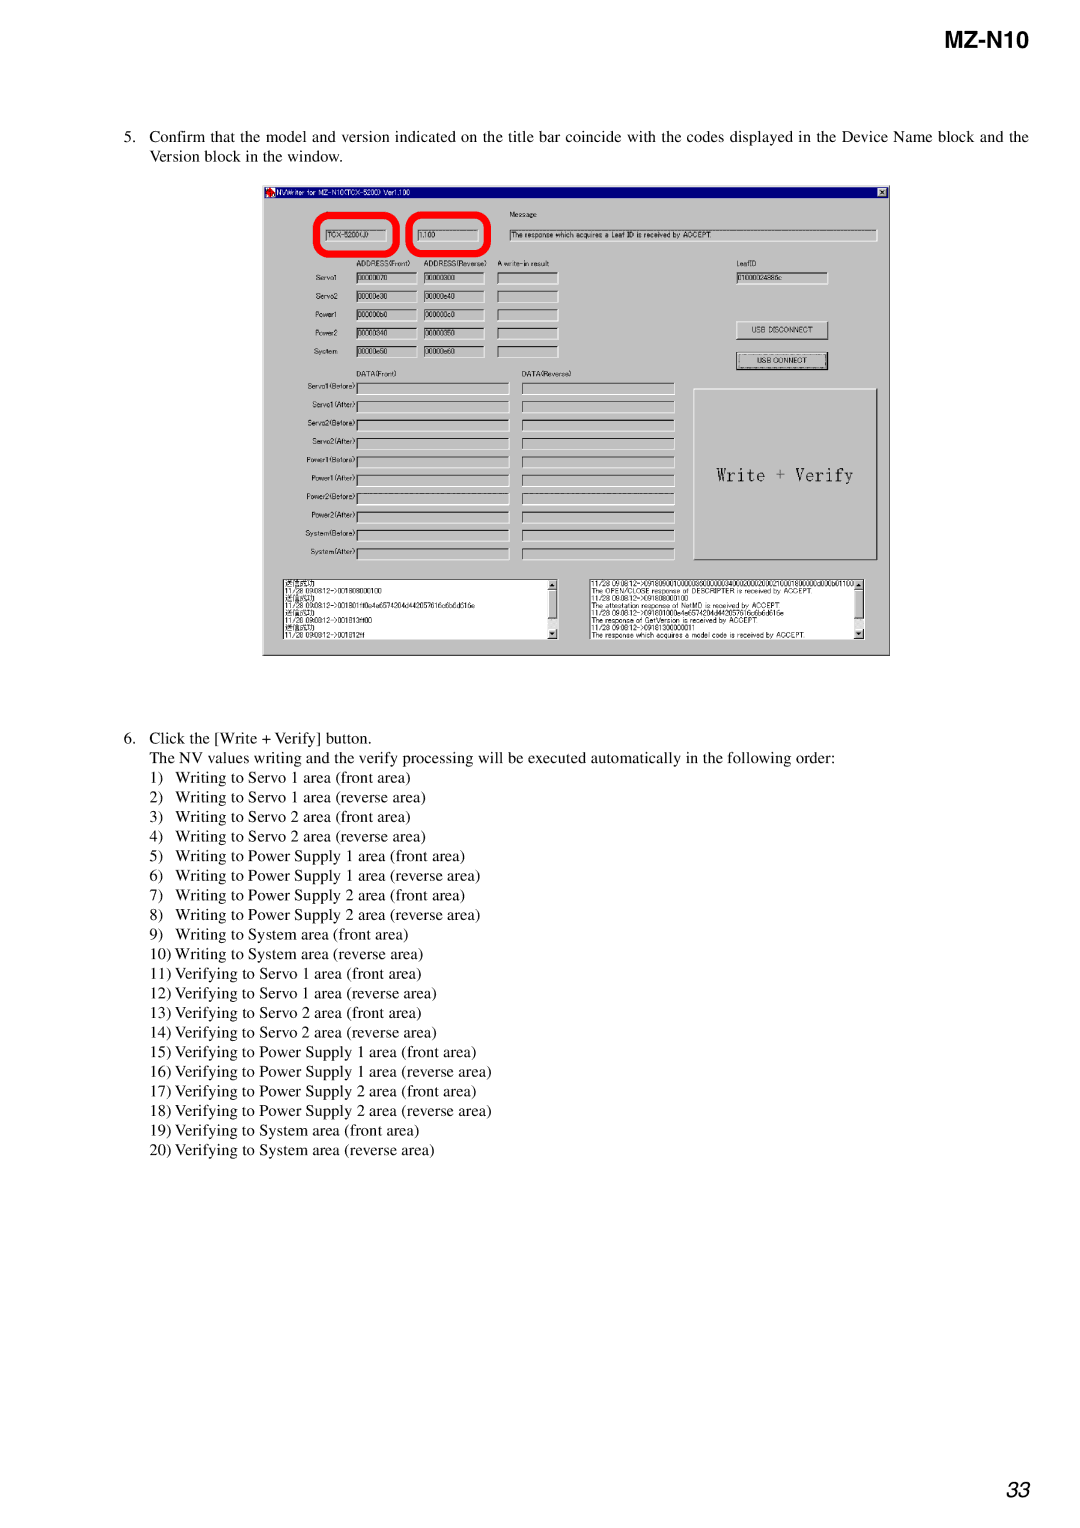
5.Confirm that the model and version indicated on the title bar coincide with the codes displayed in the Device Name block and the Version block in the window.
6.Click the [Write + Verify] button.
The NV values writing and the verify processing will be executed automatically in the following order:
1)Writing to Servo 1 area (front area)
2)Writing to Servo 1 area (reverse area)
3)Writing to Servo 2 area (front area)
4)Writing to Servo 2 area (reverse area)
5)Writing to Power Supply 1 area (front area)
6)Writing to Power Supply 1 area (reverse area)
7)Writing to Power Supply 2 area (front area)
8)Writing to Power Supply 2 area (reverse area)
9)Writing to System area (front area)
10)Writing to System area (reverse area)
11)Verifying to Servo 1 area (front area)
12)Verifying to Servo 1 area (reverse area)
13)Verifying to Servo 2 area (front area)
14)Verifying to Servo 2 area (reverse area)
15)Verifying to Power Supply 1 area (front area)
16)Verifying to Power Supply 1 area (reverse area)
17)Verifying to Power Supply 2 area (front area)
18)Verifying to Power Supply 2 area (reverse area)
19)Verifying to System area (front area)
20)Verifying to System area (reverse area)
33