SUPERSERVER
Memory Support
The
Note: Due to OS limitations, some operating systems may not show more than 4 GB of memory. To optimize memory support, follow the table below for memory installation:
Optimized DIMM Configurations
|
| Branch 0 |
|
|
|
|
|
| Branch 1 |
|
|
|
|
|
| ||||
Number of | Bank 1 |
|
| Bank 2 |
|
| Bank 3 |
|
| Bank 4 |
|
| |||||||
DIMMs | (Channel 0) |
| (Channel 1) |
| (Channel 2) |
| (Channel 3) |
| |||||||||||
2 | DIMMs | 1A |
| 2A |
| ||||||||||||||
4 | DIMMs | 1A |
| 2A | 3A |
| 4A | ||||||||||||
6 | DIMMs | 1A | 1B |
| 2A | 2B | 3A |
| 4A | ||||||||||
8 | DIMMs | 1A | 1B |
| 2A | 2B | 3A | 3B |
| 4A | 4B | ||||||||
10 | DIMMs | 1A | 1B |
| 1C | 2A | 2B | 2C | 3A | 3B |
| 4A | 4B | ||||||
12 | DIMMs | 1A | 1B |
| 1C | 2A | 2B | 2C | 3A | 3B |
| 3C | 4A | 4B | 4C | ||||
14 DIMMs | 1A | 1B |
| 1C | 1D | 2A | 2B | 2C | 2D | 3A | 3B |
| 3C | 4A | 4B | 4C | |||
16 DIMMs | 1A | 1B |
| 1C | 1D | 2A | 2B | 2C | 2D | 3A | 3B |
| 3C | 3D | 4A | 4B | 4C | 4D | |
Notes: i. a DIMM slot# specified means that slot should be populated, whereas
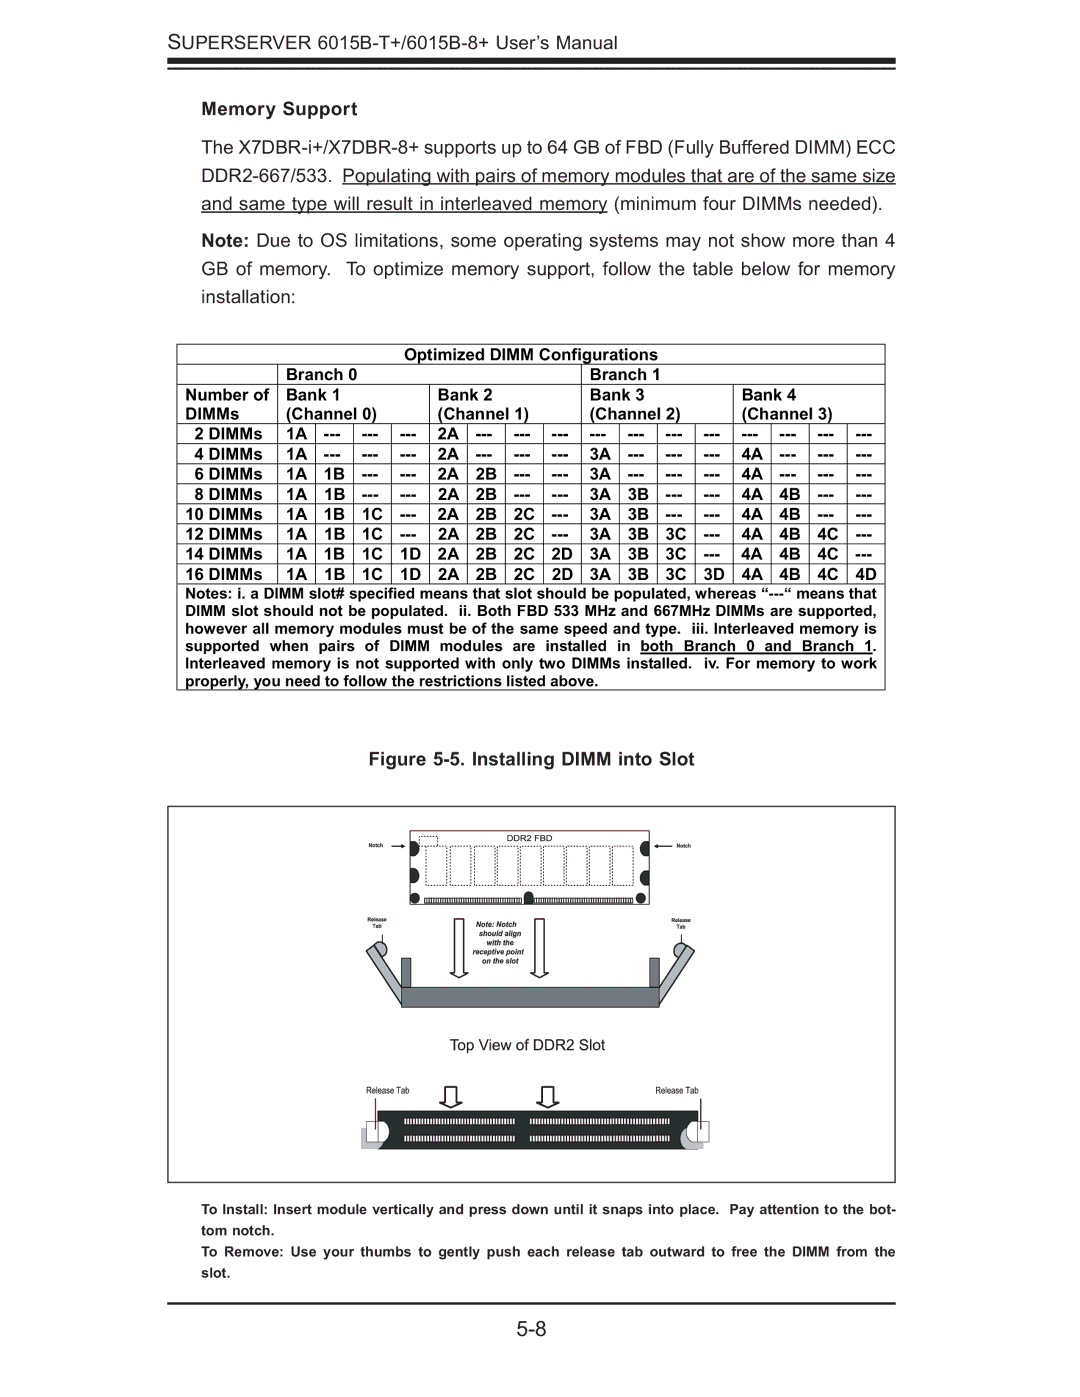
Figure 5-5. Installing DIMM into Slot
To Install: Insert module vertically and press down until it snaps into place. Pay attention to the bot-
tom notch.
To Remove: Use your thumbs to gently push each release tab outward to free the DIMM from the
slot.
